Setting sequence markers – Grass Valley EDIUS Pro v.7.4 Reference Manual User Manual
Page 267
Chapter 6 Editing Timelines — Markers
267
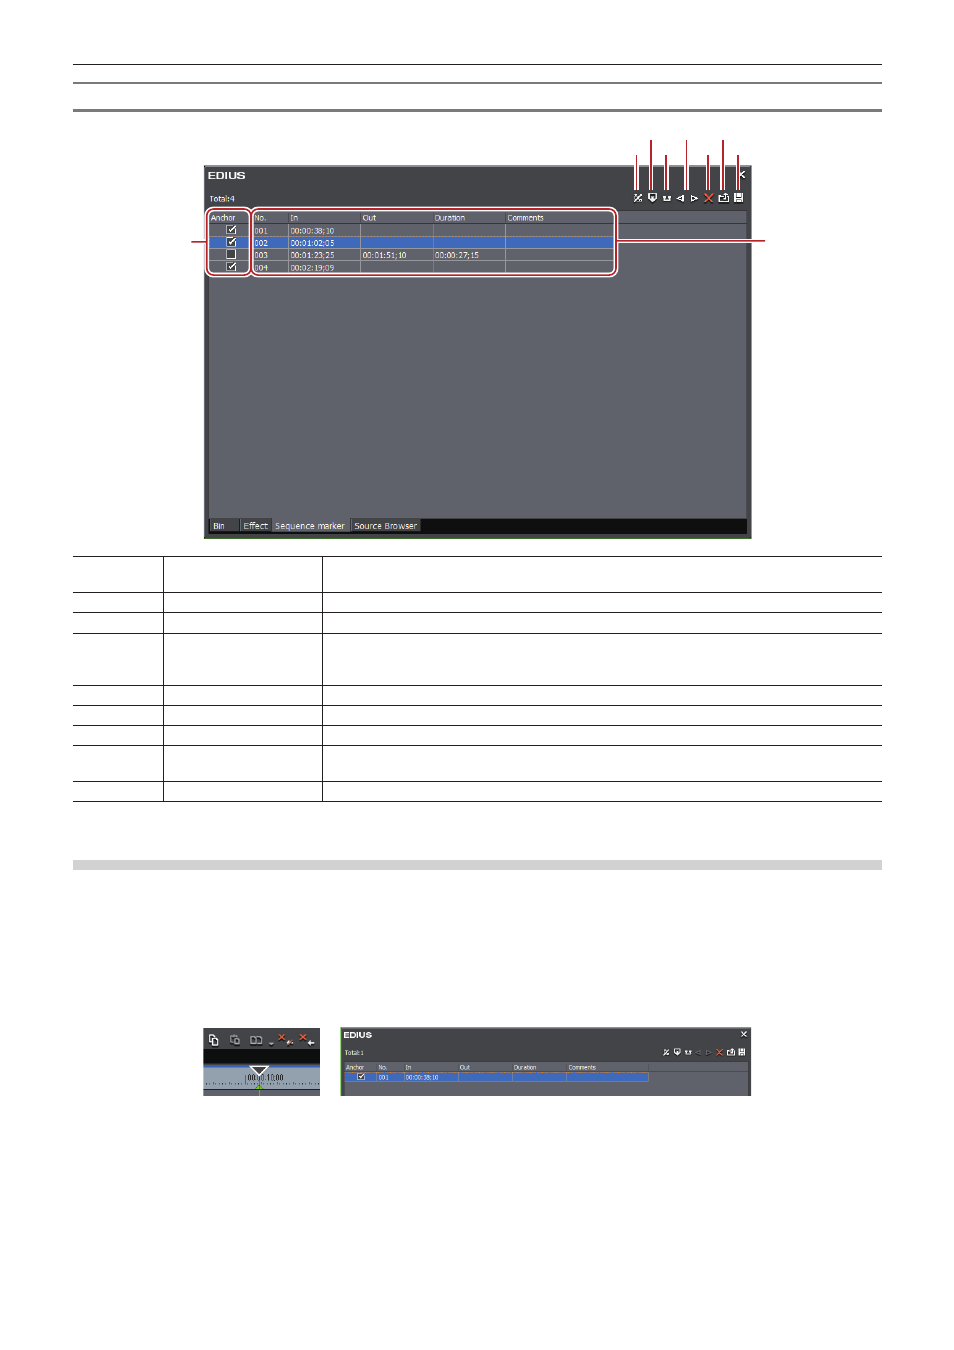
[Sequence Marker] List
(1)
(2) (4) (6)
(9)
(8)
(3)
(5) (7)
(1)
[Toggle Sequence
Marker/Clip Marker]
Switch between the [Clip Marker] list and the [Sequence Marker] list.
(2)
[Set Marker]
Add a sequence marker at the timeline cursor position.
(3)
[Set Mark In/Out]
Add a sequence marker with range to between In and Out points on the timeline.
(4)
[Go to Previous
Marker]/[Go to Next
marker]
Move to the previous/next sequence marker.
(5)
[Clear Marker]
Select and delete a sequence marker from the sequence marker list.
(6)
[Import Marker List]
Import a sequence marker list.
(7)
[Export Marker List]
Export the sequence marker list as a CSV file.
(8)
[Anchor]
Check this to cancel linking the sequence marker to the timeline editing even in the sync-lock
mode.
(9)
Sequence marker list
Display the timecode or comment of the set sequence marker.
Setting Sequence Markers
You can set a sequence marker on the timeline, and jump to the marker position or add a comment.
1)
Move the timeline cursor to the position to set a sequence marker.
2)
Click [Set Marker] in the [Sequence Marker] list.
f
“[Sequence Marker] List” (w page 267)
f
The sequence marker is set to the time scale, and the timecode of the sequence marker is displayed in the [Sequence Marker] list.
1
Alternative
f
Right-click the time scale, and click [Set Sequence marker/Clear Sequence marker (Toggle)].
f
Click [Marker] on the menu bar, and click [Add Mark].
f
Right-click the sequence marker list, and click [Set Mark].
f
Setting sequence markers:
[V]
2
f
You can move marker positions by the following operation.
g
Click the timecode at [In] in the [Sequence Marker] list, and enter the desired numerical value.