Grass Valley EDIUS Pro v.7.4 Reference Manual User Manual
Page 317
Chapter 7 Applying Effects — Setting Effects
317
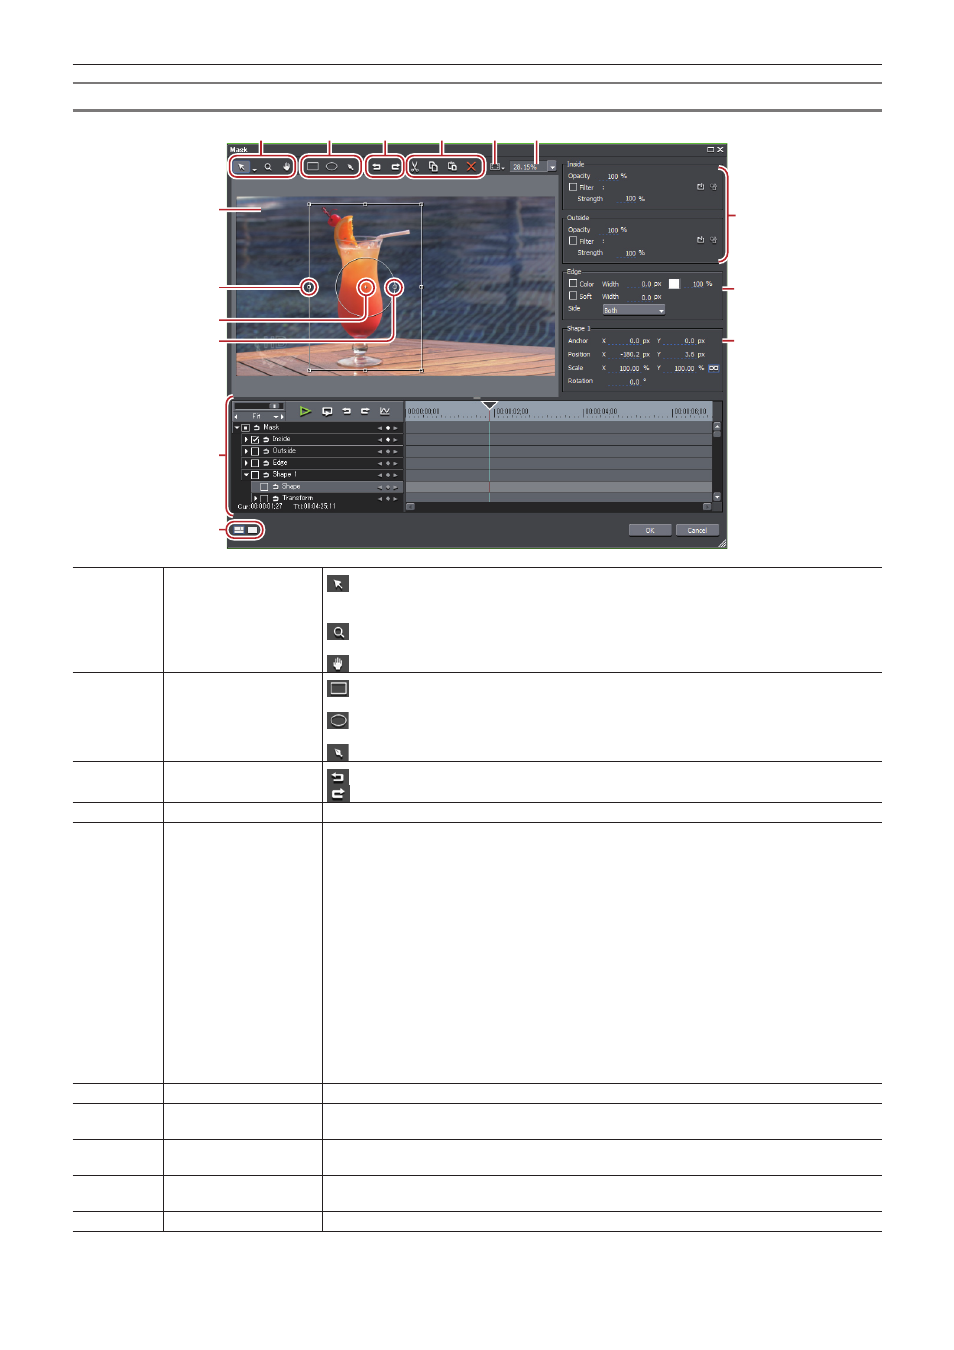
[Mask] Dialog Box
(1)
(2)
(3)
(4)
(5)
(6)
(7)
(9)
(8)
(15)
(14)
(10)
(11)
(12)
(13)
(1)
Tool buttons
: Click this button and select the selection tool to select and move the path, or drag the
handle to enlarge/reduce or rotate the path. Click the list button and select the shape edit tool
to edit the path by dragging the path vertex or the handle.
: Drag the mouse to expand or contract screens. From the drag start point, drag to the right
to expand screens, and drag to the left to contract.
: Drag the mouse to move the display area.
(2)
Drawing buttons
: Drag the mouse to draw a rectangle. Drag the mouse with [Shift] on the keyboard held
down to draw a square.
: Drag the mouse to draw an ellipse. Drag the mouse with [Shift] on the key board held
down to draw a circle.
: Draw a free shape using Bezier curve.
(3)
[Undo]/[Redo]
: Undo an operation.
: Redo the undone operation.
(4)
Edit buttons
Cut, copy, paste, and delete a selected path.
(5)
Function menu
[Apply Mask]
Switch the enable/disable setting for mask temporarily.
[Background]
Switch the show/hide setting for the transparent grid if the transparency is set for outside and
inside of the mask.
[Motion Path]
Switch the show/hide setting for the path if the position is changed by key frame and the setting
is enabled.
[Grid]
Switch the show/hide setting for the grid.
[Guide]
Switch the show/hide setting for the underscan, overscan, title safe, horizontal/vertical center
line.
[Stereoscopic]
Displayed only in the stereoscopic edit mode. The display can be switched to L side only, R
side only or to the L and R sides blended.
(6)
Zoom factor
Change the zoom factor by entering a value or selecting a value from the list.
(7)
Preview
Display a preview of the image being edited.
Select a path to display a handle or anchor to modify the path.
(8)
Stretch handles
Move the cursor to the operation handles at the corners and at the middle of the lines to resize
the area.
(9)
Anchor
Indicate the reference point of the path. This point is a reference point for the rotation center
and for stretching. Drag with [Ctrl] on the keyboard held down to change the position.
(10)
Rotation handle
Move the cursor and drag the rotation handle to rotate the image.