Grass Valley EDIUS Pro v.7.4 Reference Manual User Manual
Page 310

Chapter 7 Applying Effects — Setting Effects
310
[YUV Curve] Dialog Box
(1)
(4)
(6)
(3)
(2)
(3)
(5)
(1)
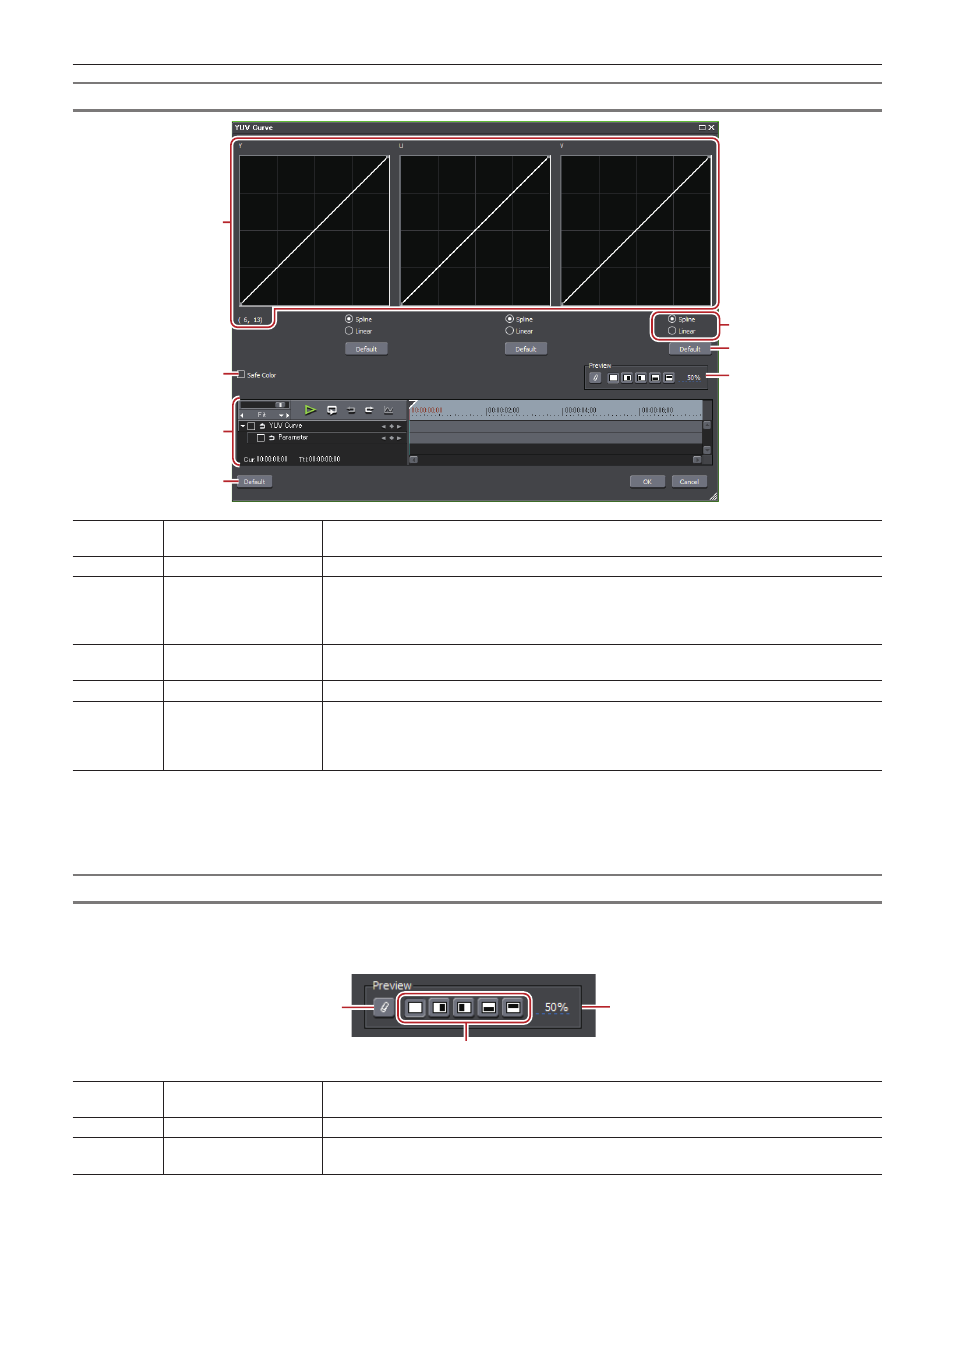
YUV curve
Drag the line on each chart to adjust Y, U, and V. The value on the bottom left of the Y curve
indicates the input value and output value.
(2)
[Spline]/[Linear]
Select the line of the chart (curve or straight).
(3)
[Default]
Click [Default] of each chart to restore the defaults for each Y, U, and V value and add them as
the keys.
Click [Default] at the bottom of the window to delete all the keys and reset the chart to its initial
values.
(4)
[Safe Color]
Check this item to make an automatic adjustment to keep the video signal within the YUV color
space.
(5)
Preview setting
“Preview setting” (w page 310)
(6)
Key frame setting
Adjust the YUV curve chart for each key frame. The field option for the key will be [Hold], and
no change along the time axis is allowed.
For how to set a key frame, see “Key frame setting”.
“Key frame setting” (w page 311)
2
f
Although Safe Color clips a range of luminance 16-235 and chroma 16-240, and the chroma is not automatically included in the safe area,
it is calculated to include luminance/chroma within IRE0-100.
Common Settings in Color Correction
r
Preview setting
You can lay and compare the image applied color correction and the original image.
(1)
(3)
(2)
(1)
[Use current screen to
show filter effect]
Fix the screen with the timeline cursor position when comparing filter effects.
(2)
Check the filter effects Set the segmentation of the screen when checking the result of the filter.
(3)
Filter apply screen ratio Set the screen ratio to display the video with the filter applied when comparing the result of the
filter.
