Grass Valley EDIUS Pro v.7.4 Reference Manual User Manual
Page 219
Chapter 6 Editing Timelines — Placing Clips
219
1
Alternative
f
Drag and drop a clip in the bin onto the timeline. Channels can be mapped to any desired track and clips can be placed according to the
drop point regardless of the track patch setting.
f
Right-click a clip in the bin, and click [Add to Timeline].
f
Play back a clip on the Player, and drag and drop the clip onto the timeline from the Player. Channels can be mapped to any desired track
according to the drop point regardless of source channel mapping.
f
Play back a clip on the Player, and click [Insert to Timeline] or [Overwrite to Timeline].
f
Placing a clip displayed on the Player on the timeline:
[E]
f
Set the source channel mapping, move the timeline cursor to the clip place point, and drag and drop the clip onto the Recorder.
f
Placing clips:
[Shift] + [Enter]
2
f
You can place sources on the timeline without registering them to the bin.
Move the timeline cursor to the clip place point, right-click a track, and click [Add Clip]. Select the source from the [Open] dialog box, and
click [Open].
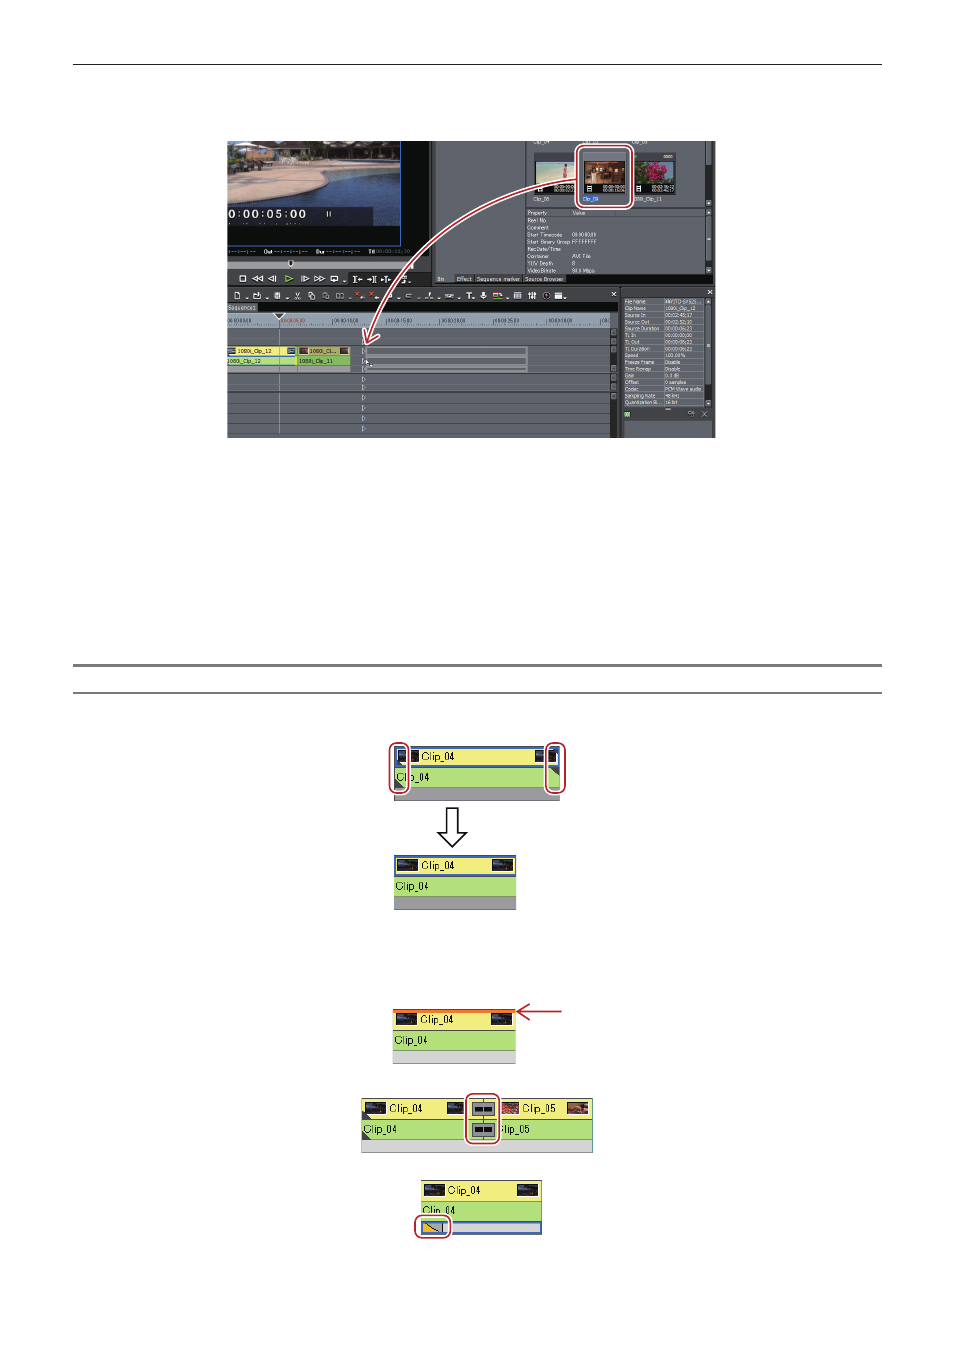
Placed Clips
You can confirm that a filter or transition is set from the display of the clip placed on the track.
Triangular marks at both ends of the clip mean the start and end of the clip. Triangular marks are displayed when the clip has no margin.
A green line is displayed at the top of the clip when rendering has been performed. An orange line is displayed when filter, time effect,
layouter, normalize, etc. has been set.
Example:
When effect has been set
A frame is displayed as follows when a transition or audio cross fades is set between clips.
A triangle is displayed as shown below in the mixer area when a track transition is set at the start point of a clip.