Trimming by entering the timecode – Grass Valley EDIUS Pro v.7.4 Reference Manual User Manual
Page 257
Chapter 6 Editing Timelines — Trimming Clips
257
Slide trim:
Slip trim:
Rolling trim:
Trimming by Entering the Timecode
In the trim mode, the sequence timecode and the source timecode are displayed in the preview window, and you can execute trimming by
entering numerical values.
1)
Click [Mode] on the menu bar, and click [Trimming Mode].
f
The preview window switches from the standard mode to the trim mode.
2)
Select the trimming clip.
3)
Click the respective button at [Trimming Mode] in the trim window, and select the cut point.
f
The cut point changes color to green or yellow, and trimming is enabled.
“In point trim/Out point trim” (w page 251)
“Ripple Trim” (w page 252)
“Split Trim” (w page 252)
“Slide Trim” (w page 253)
“Slip Trim” (w page 253)
“Rolling Trim” (w page 254)
4)
Enter the timecode.
f
Move the mouse cursor to the timecode at the bottom of the trim window, and the mouse cursor changes shape. If you click in this state, a
blue line is displayed under the timecode and numerical values can be entered.
“Entry of Values” (w page 41)
f
“Timecode of Trim Window” (w page 257)
5)
Press [Enter] on the keyboard.
f
Adjust the range to be used while checking the video displayed on the preview window.
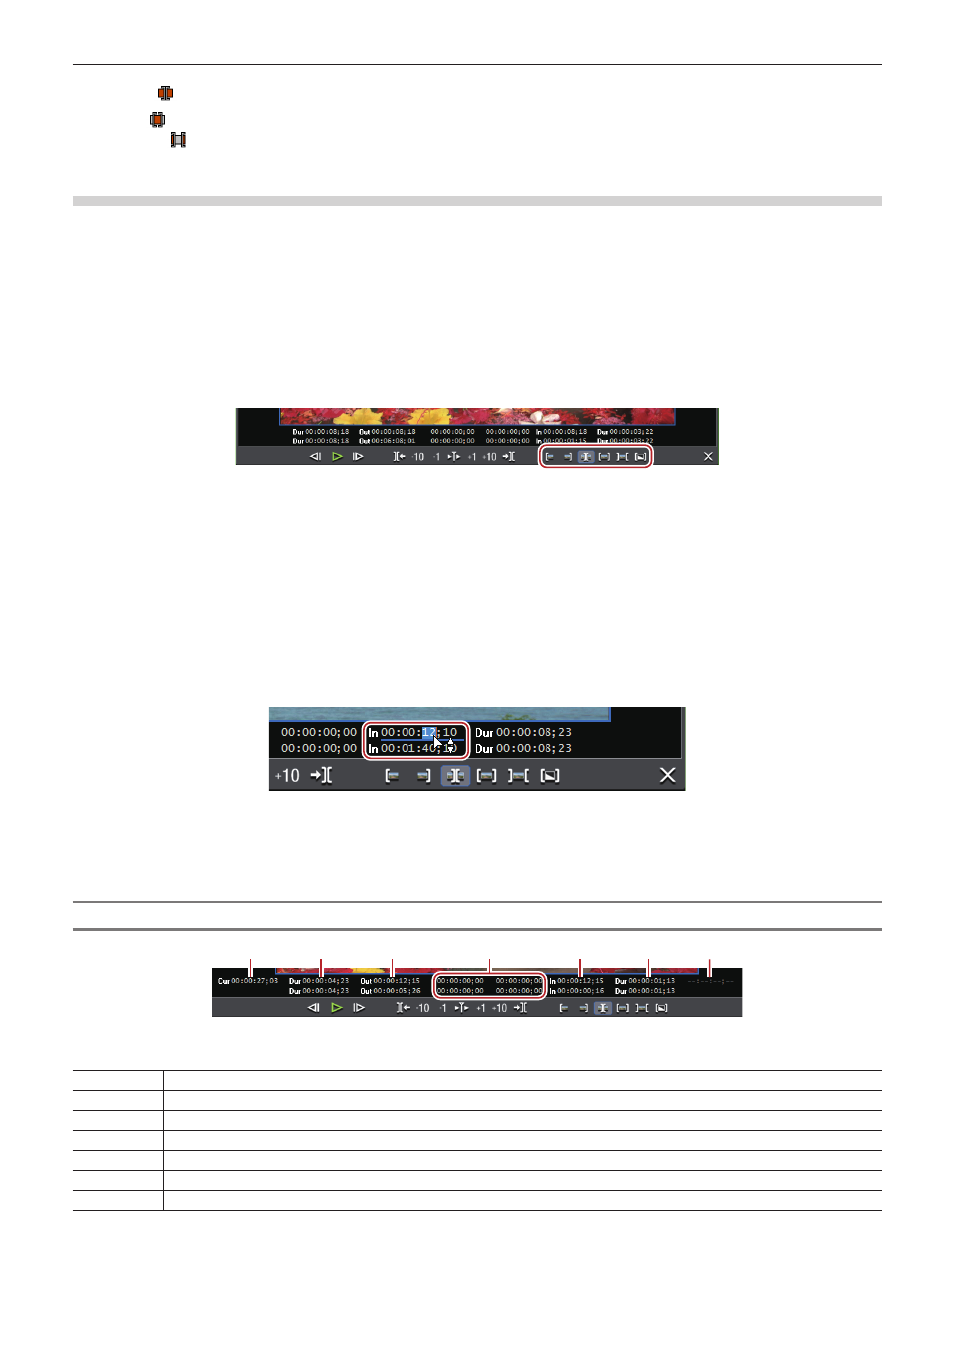
Timecode of Trim Window
(4)
(6)
(2)
(1)
(3)
(7)
(5)
The upper level is the timecode of the sequence, and the lower level is the timecode of the source. Numerical values can be entered in
either level for trimming.
(1)
Number of frames moved from focused cut point
(2)
Timecode of the focused cut point (Out point of clip)
(3)
Timecode of the focused cut point (In point of clip)
(4)
Length of clip to be trimmed (clip on Out point side)
(5)
Length of clip to be trimmed (clip on In point side)
(6)
Timecode at timeline cursor
(7)
Length of transition/audio cross fades to be trimmed
* The items displayed may differ depending on the size of the preview window.