Rendering around the timeline cursor position, Rendering clips/transitions – Grass Valley EDIUS Pro v.7.4 Reference Manual User Manual
Page 280
Chapter 6 Editing Timelines — Playing Back Timelines
280
1)
Setting the In and Out Points to the Timeline
f
“Setting In/Out Points and Placing Clips” (w page 220)
2)
Click [Render In/Out (Render Overload Area)] on the timeline.
f
To cancel rendering, click [Cancel] in the [Render] dialog box.
f
Lines in the rendered areas on the time scale change color to green.
1
Alternative
f
Click [Render] on the menu bar, and click [Render In/Out] → [Render Red Area].
f
Click the [Render In/Out (Render Overload Area)] list button, and click [Render In/Out] → [Render Overload Area].
f
Right-click the time scale, and click [Render In/Out] → [Render Overload Area].
f
Rendering overload areas between In and Out points:
[Ctrl] + [Q]
2
f
You can render all areas judged to be red, yellow and light blue between In and Out points by the following operation.
g
Click [Render] on the menu bar, and click [Render In/Out] → [All].
g
Click the [Render In/Out] list button, and click [Render In/Out] → [All].
g
Right-click the time scale, and click [Render In/Out] → [All].
g
Rendering between In and Out points (all):
[Shift] + [Alt] + [Q]
f
Overload areas (red) and load areas (yellow) between In and Out points can be rendered in a single operation by the following operation.
g
Click [Render] on the menu bar, and click [Render In/Out] → [Render Orange Area].
g
Click the [Render In/Out (Render Overload Area)] list button, and click [Render In/Out] → [Render Loaded Area].
g
Right-click the time scale, and click [Render In/Out] → [Render Loaded Area].
g
Rendering between In and Out points (load area):
[Ctrl] + [Alt] + [Q]
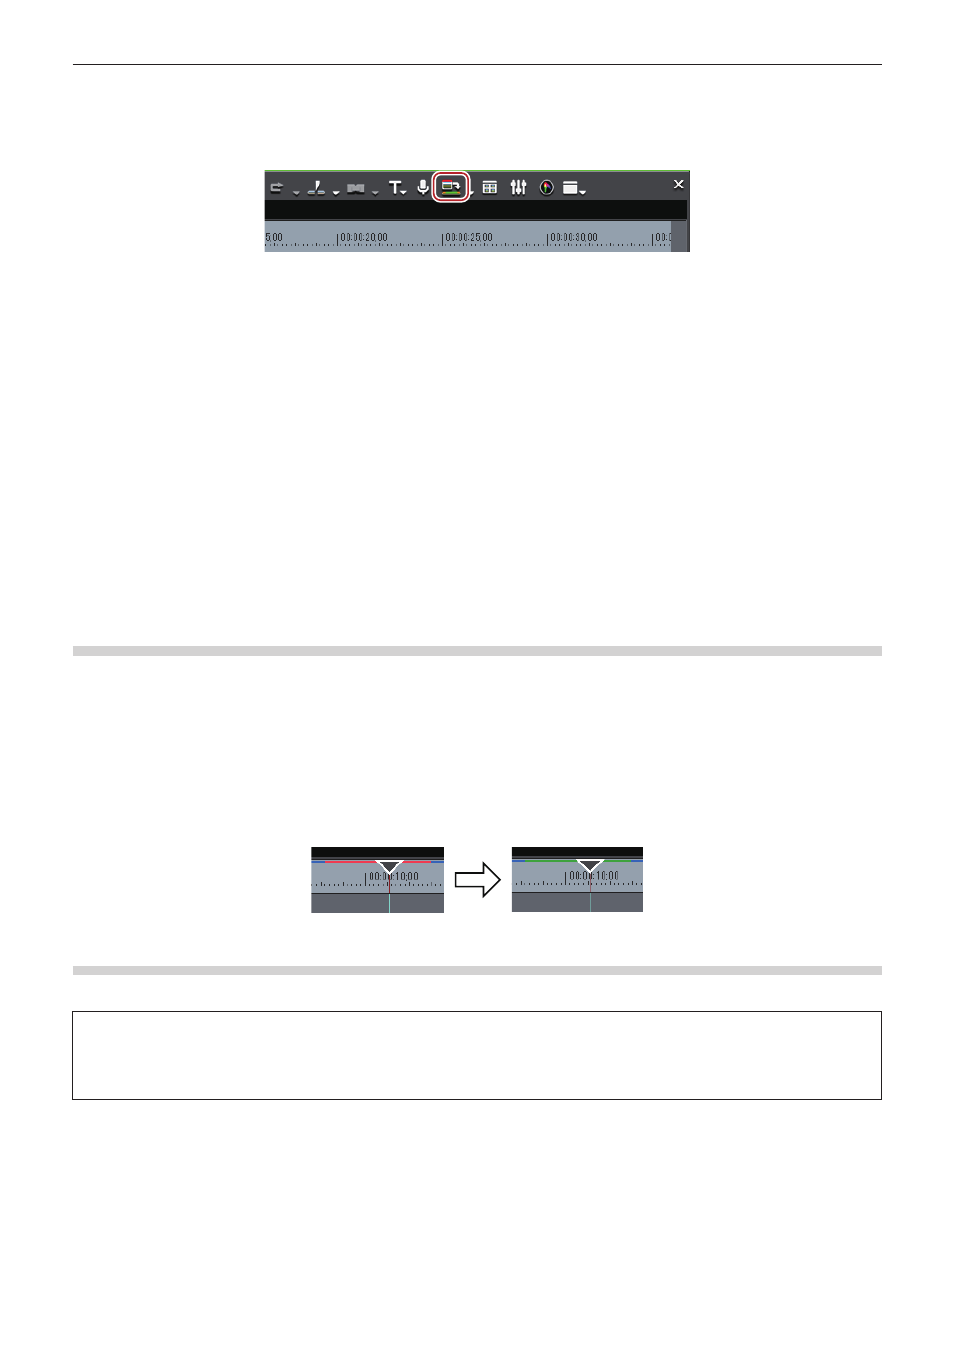
Rendering Around the Timeline Cursor Position
Render only overload areas (red) or load areas (yellow) around the timeline cursor position.
1)
Move the timeline cursor to the area to be rendered.
2)
Click [Render] on the menu bar, and click [Render Cursor Area].
f
To cancel rendering, click [Cancel] in the [Render] dialog box.
f
Areas of the same line color on the time scale are rendered around the timeline cursor position. When there is a transition in same-color
lines, the rendered area becomes the area up to the In or Out point of the transition.
f
Lines in the rendered areas on the time scale change color to green.
Rendering Clips/Transitions
Perform rendering in individual clip or transition units.
3
Note
f
If you perform clip rendering on a clip with alpha effect, alpha information will no longer be applied.
f
Keys, transparencies or transitions between tracks (effects set in the mixer area) cannot be rendered. In this case, take the alternate
method to render a part of the timeline.
1)
Right-click the clip to be rendered, and click [Render].
f
To render a transition, right-click the transition and click [Render].
f
To cancel rendering, click [Cancel] in the [Render] dialog box.
f
When rendering is completed, a green line is displayed on the clip.