Changing layouts along the time axis, Setting key frames, 247 changing layouts along the time axis – Grass Valley EDIUS Pro v.7.4 Reference Manual User Manual
Page 247

Chapter 6 Editing Timelines — Video Layout
247
Changing Layouts along the Time Axis
Setting Key Frames
When a key frame is set, you can change the layout along the timeline.
1)
Select a clip, and start up layouter.
f
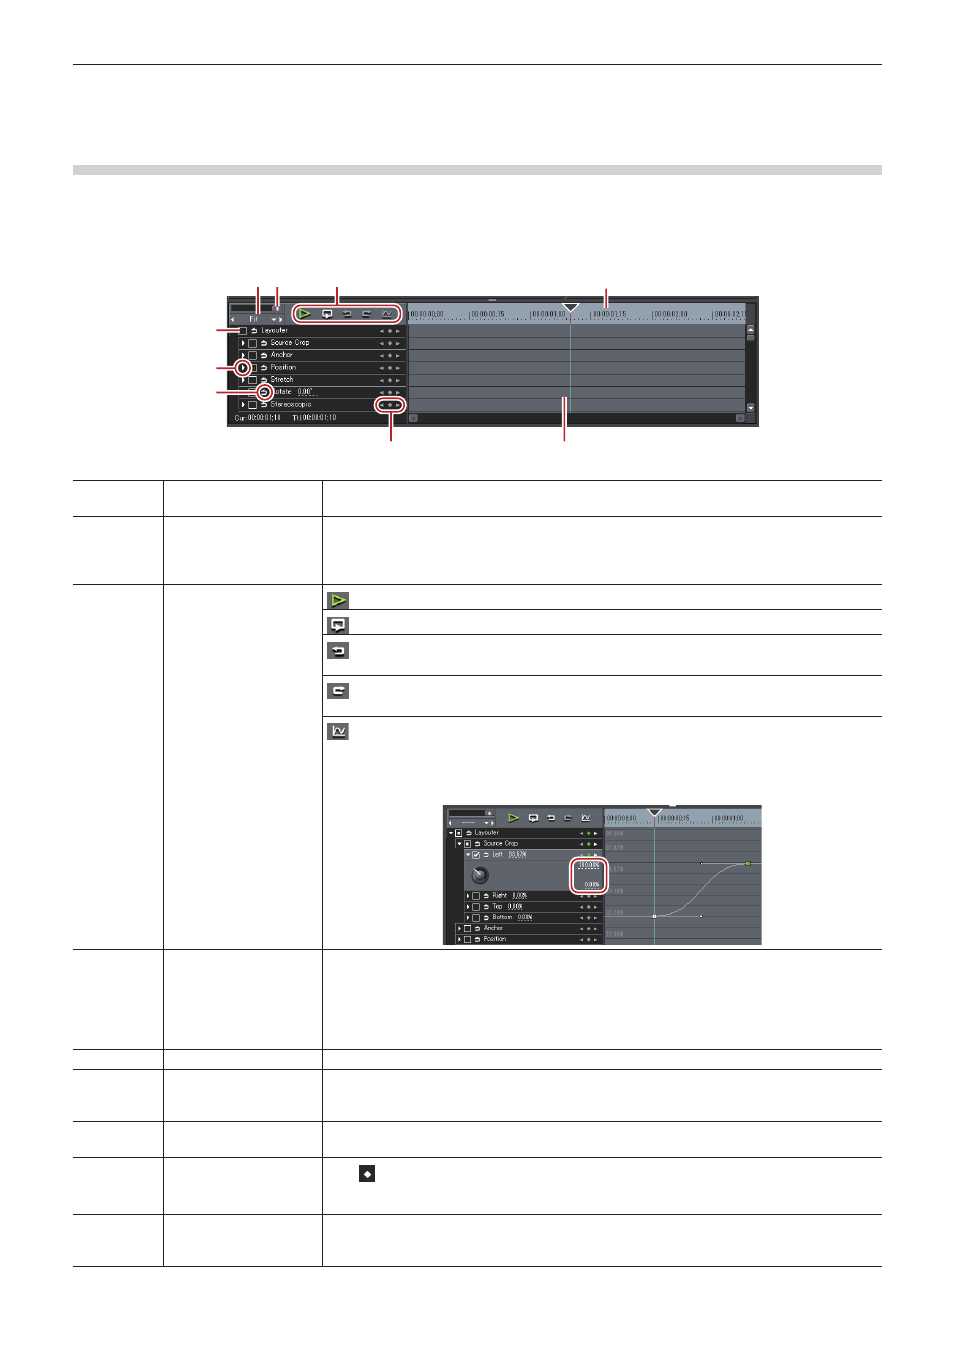
Set the key frame on the timeline in layouter.
(1)(2)
(3)
(4)
(5)
(6)
(8)
(9)
(7)
(1)
Timeline controller
Drag the slider to the left and right to adjust the time scale display unit. Move the slider to the
left to reduce the display unit, or to the right to increase it. The right end is [Fit].
(2)
Time scale settings
Click this to toggle the specified display unit and [Fit].
Click the left arrow to reduce the display unit, or click the right arrow to increase the display
unit.
(3)
Playback/Tool buttons
: Play back the timeline on the Recorder.
: Repeatedly play back the clip currently being edited.
: Undo an operation.
[Ctrl] + [Z]
: Redo the undone operation.
[Ctrl] + [Y]
: Switch the changes of each parameter to the chart view. In the chart view, the timeline is
represented by a chart display of the selected key. The parameters can be edited by moving
the keys up and down.
The numerical values and gradations of the Y axis can be changed by entering numerical
values.
(4)
Time scale for key
frame
Display a scale with the unit selected in the time scale setting on the timeline.
Right-click the time scale and click [Timeline Timecode] to display the timecode of the timeline
or click [Zero base Timecode] to display the timecode with the beginning of the clip as 0.
If a sequence marker is set for the position where the clip is placed, right-click the time scale
and click [Go to Previous Sequence Marker] or [Go To Next Sequence marker] to move the
timeline cursor to the previous or next sequence marker.
(5)
Enable/Disable
Unchecking the item disables the parameter settings. To set a key frame, check [Layouter].
(6)
Expand button
Click this button to configure detailed settings for each item.
The layout can be edited by entering a numerical value or moving the mouse to a control and
dragging when the mouse cursor changes shape.
(7)
[Add default key]
Click this item to set the key frame of the items for each parameter in the layout (in an
unchanged state) set as the [Default] in the preset at the timeline cursor position.
(8)
Key frame setting
Click in the center to set a key frame on the position of the timeline cursor. When the
timeline cursor is located over the key frame, the key frame will be deleted.
Click the left and right arrow to move to the previous and next key frame.
(9)
Key frame timeline
When a layout is edited at the timeline cursor position, a key frame is automatically added.
Also, when parameter items are expanded, parameters can be edited by dragging the key
frame up or down.
