Timeline settings, Track display, Track header – Grass Valley EDIUS Pro v.7.4 Reference Manual User Manual
Page 202
Chapter 6 Editing Timelines — Timeline Settings
202
Timeline Settings
Track Display
The following explains the descriptions of the track header and the types of tracks.
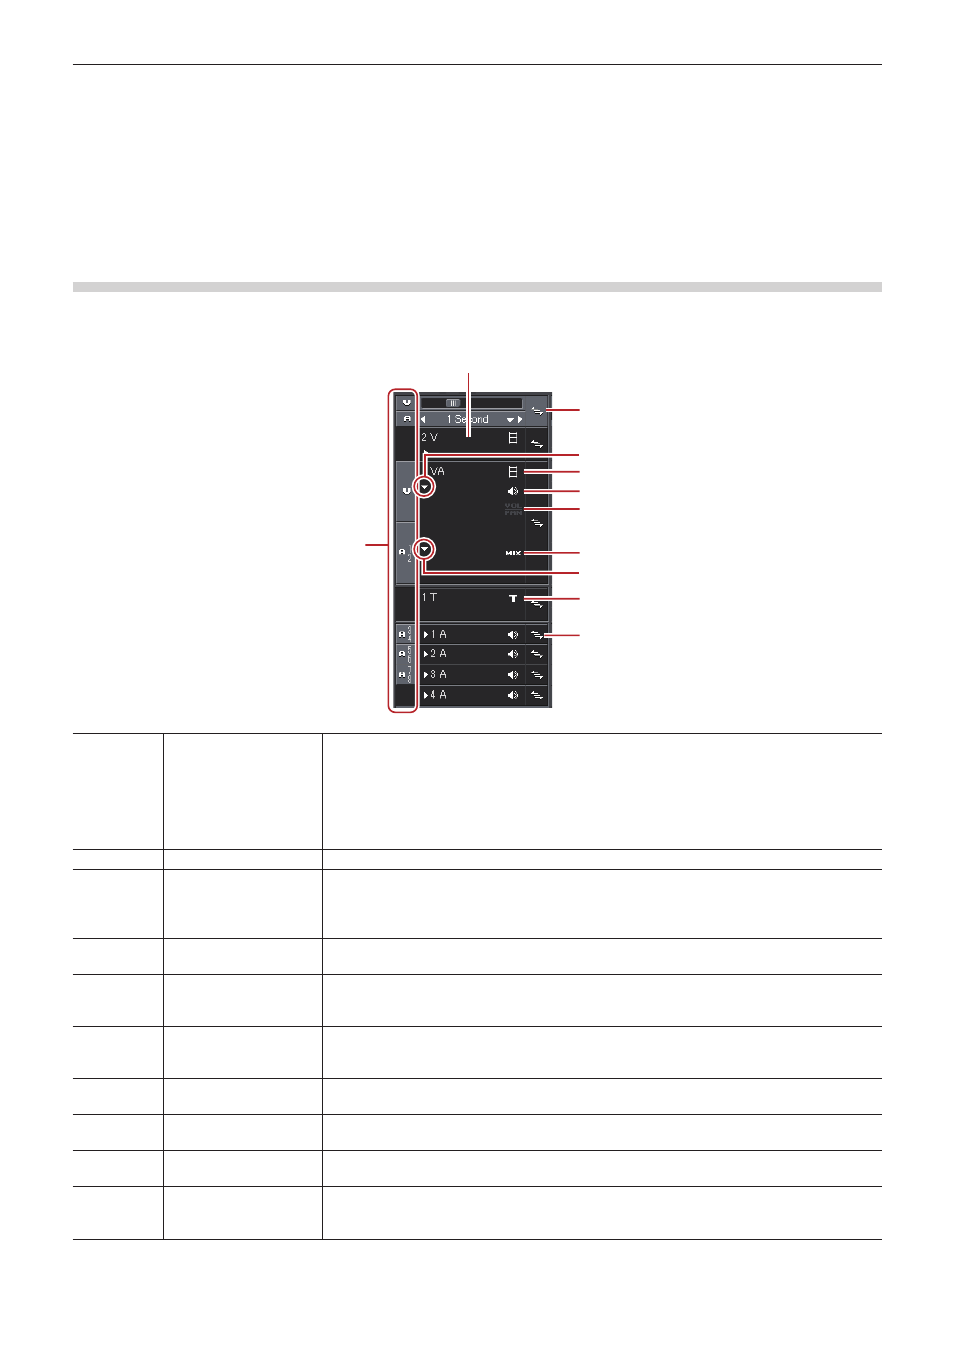
Track Header
You can make settings for each track simply on the track header, for example, to lock the track for preventing placed clips from moving or to
set the track to exclusively play back audio.
You can set the following items in the track header.
(1)
(2)
(3)
(4)
(5)
(6)
(7)
(8)
(9)
(10)
(11)
(1)
Track patch
When a clip is displayed on the Player or a clip is selected in the bin, the channel held by that
clip (source channel) is displayed on the track patch. When a clip in the source browser is
selected, the source channel is displayed on the track patch according to the channel map
in the project settings. Also, the track patch position displays which track the source channel
is mapped to when a clip is placed on the timeline by a shortcut key or button. The source
channel mapping to each track can be changed.
“Setting Channel Mapping” (w page 215)
(2)
Track panel
Click this to switch the select/deselect setting for the track.
(3)
Batch lock panel
Click this to set sync-lock for all tracks on and off.
“Sync-lock (Synchronization)” (w page 210)
Right-click to lock the selected track.
(4)
Audio expand button
Click this button to display the rubber band for the audio.
[Alt] + [S]
(5)
[Video Mute]
When mute is set, the video part of the track is not played back. The video part and mixer area
of the clip on a muted track is displayed in gray.
[Shift] + [W]
(6)
[Audio Mute]
When mute is set, the audio part of that track is muted. The audio part and volume/pan part of
the clip on a muted track is displayed in gray.
[Shift] + [S]
(7)
[Volume/Pan]
Switch between the volume adjustment mode and the pan adjustment mode.
“Adjusting the Volume and Pan of a Clip” (w page 373)
(8)
[Mixer]
Switch the transparency adjustment mode on/off.
(9)
Mixer expand button
Click this button to display the rubber band for the transparency.
[Alt] + [W]
(10)
[Title]
Displayed only on T track. Switch the show/hide setting for the title. The title is not played back
when it is set as hidden.
[Shift] + [W]