Grass Valley EDIUS Pro v.7.4 Reference Manual User Manual
Page 243
Chapter 6 Editing Timelines — Video Layout
243
r
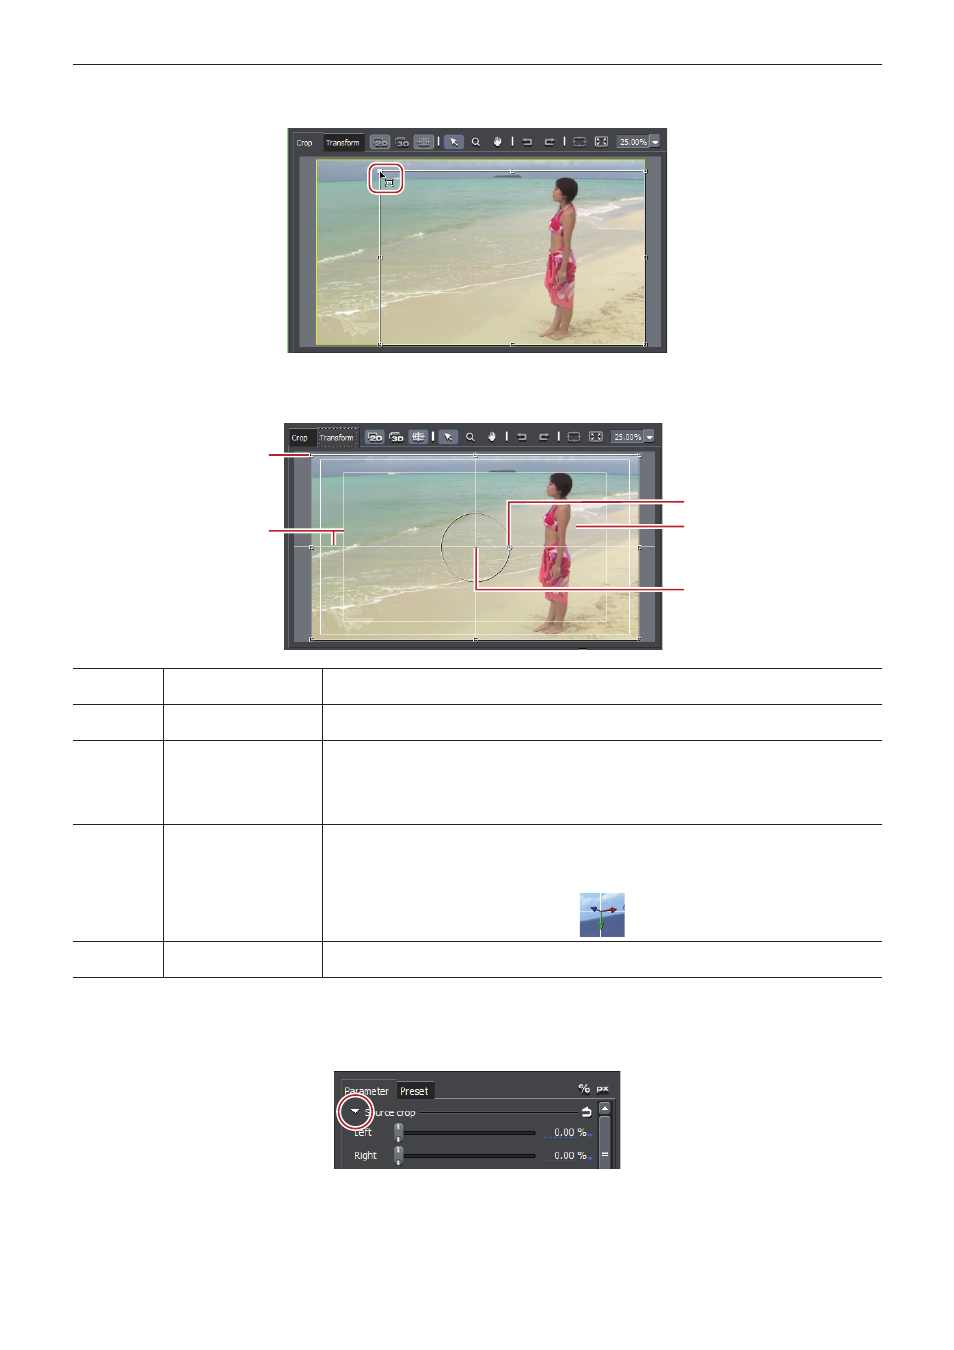
[Crop] tab
Specify the display range by moving the cursor to an operation handle at the four corners or the center of a side and dragging.
r
[Transform] tab
Reflect edited parameter details in the preview. You can also edit parameters by dragging handles inside the preview.
(1)
(2)
(3)
(4)
(5)
(1)
Stretch handles
Move the cursor to the operation handles at the corners and at the middle of the lines to resize
the area.
(2)
Guide
Display the underscan, overscan, title safe, and horizontal/vertical centerlines. You can switch
the show/hide setting by clicking [Guide].
(3)
Rotation handle
Move the cursor and drag the rotation handle to rotate the image.
In the 3D mode, green part rotates around the Y axis, red part rotates around the X axis, and
blue part rotates around the Z axis. With rotation on the preview screen, the X/Y/Z axes are the
values for video, and with rotation by direct entry of numerical values to parameters, the X/Y/Z
axes are the values for the display.
(4)
Preview
Display the results of editing parameters.
The display position can be changed by dragging the preview.
In the 3D mode, the display position can be moved in three dimensions in each of the X, Y and
Z axis directions by dragging the arrow.
(5)
Anchor
Display the reference point of video. This point is a reference point for the rotation center and
for stretching. Drag with [Ctrl] on the keyboard held down to change the position.
r
[Parameter] tab
Enter numerical values or edit using the sliders or controls.
You can switch the show/hide setting for the sliders and controls by clicking the expand button on each editing menu.