Toa N-8000 Series User Manual
Page 344
3-40
Chapter 3
INSTALLATION & WIRING
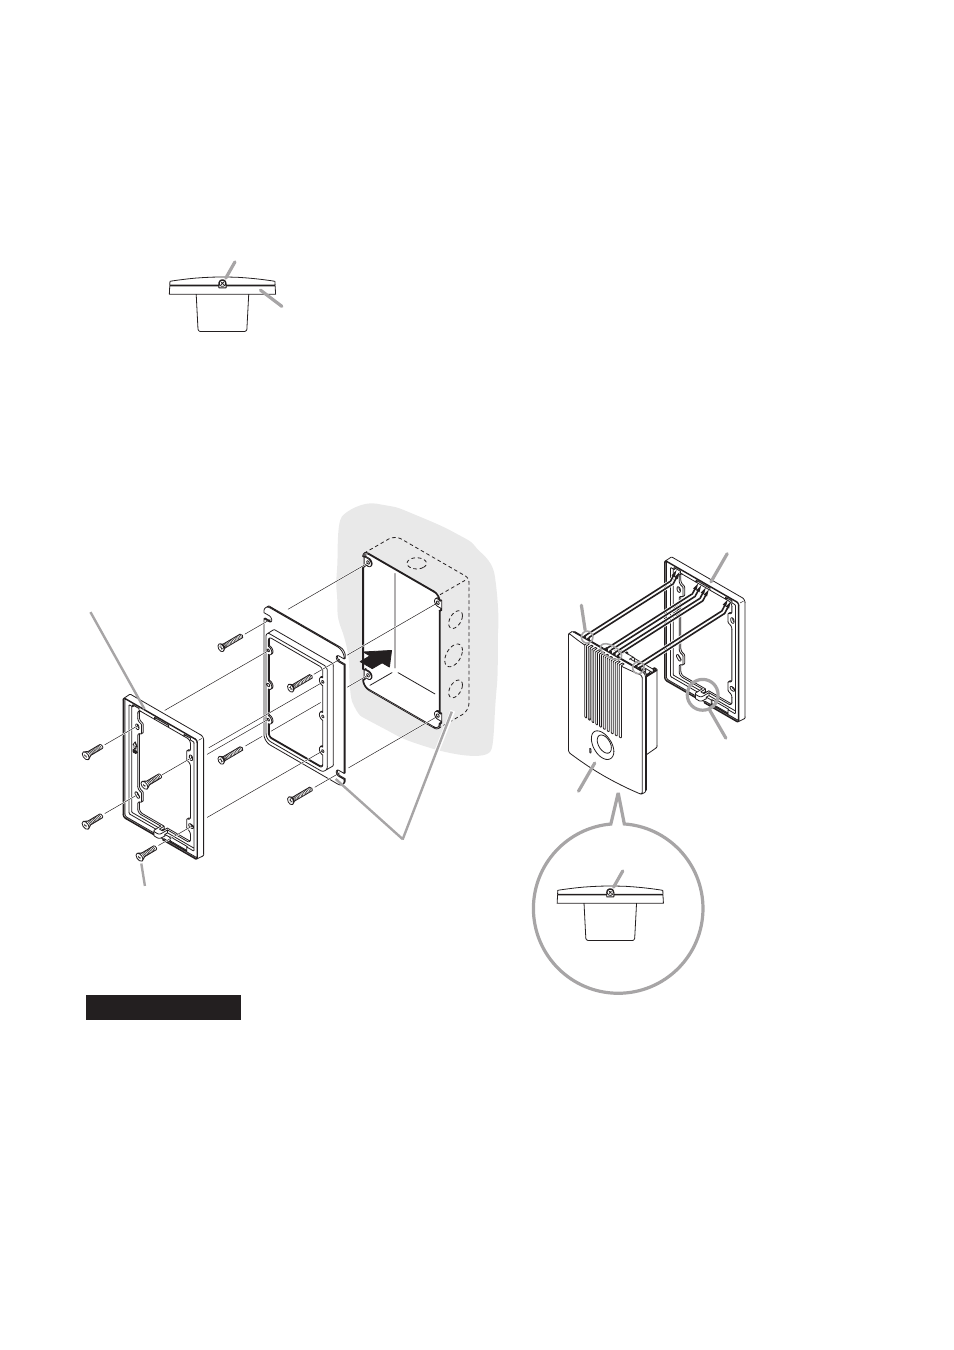
N-8650DS
Panel mount frame
Screw
Screw hole
Bottom view
Tab
[N-8650DS]
Mount the panel mount frame to the YC-150 Back box or 3-gang electrical box installed in a wall, then attach
the N-8650DS to the panel mount frame.
Wall surface
Machine screw M4 x 20 (supplied with the N-8650DS)
YC-150 Back box or 3-gang
electrical box
Panel mount frame
Note
Treat unused cables so as not to short-circuit.
Tip
Refer to
for YC-150 dimensional drawing.
Step 2. Mount the panel mount frame to the YC-150
or electrical box.
Step 3. Attach the N-8650DS to the panel mount
frame.
Hook the tabs on the N-8650DS's upper side
into the panel mount frame's slots, fit them
into place, then secure the both bottom sides
with a screw.
• The N-8650DS comes with 2 type of screws: M4 x 20 and UNC
N0. 6-32 x 20.
• For the electrical box provided with unified threads, use the UNC
N0. 6-32 x 20.
Accessory screws
Step 1. Loosen the screw on the N-8650DS's bottom, then detach the panel mount frame.
N-8650DS's bottom
Screw
Panel mount frame