Toa N-8000 Series User Manual
Page 334
3-30
Chapter 3
INSTALLATION & WIRING
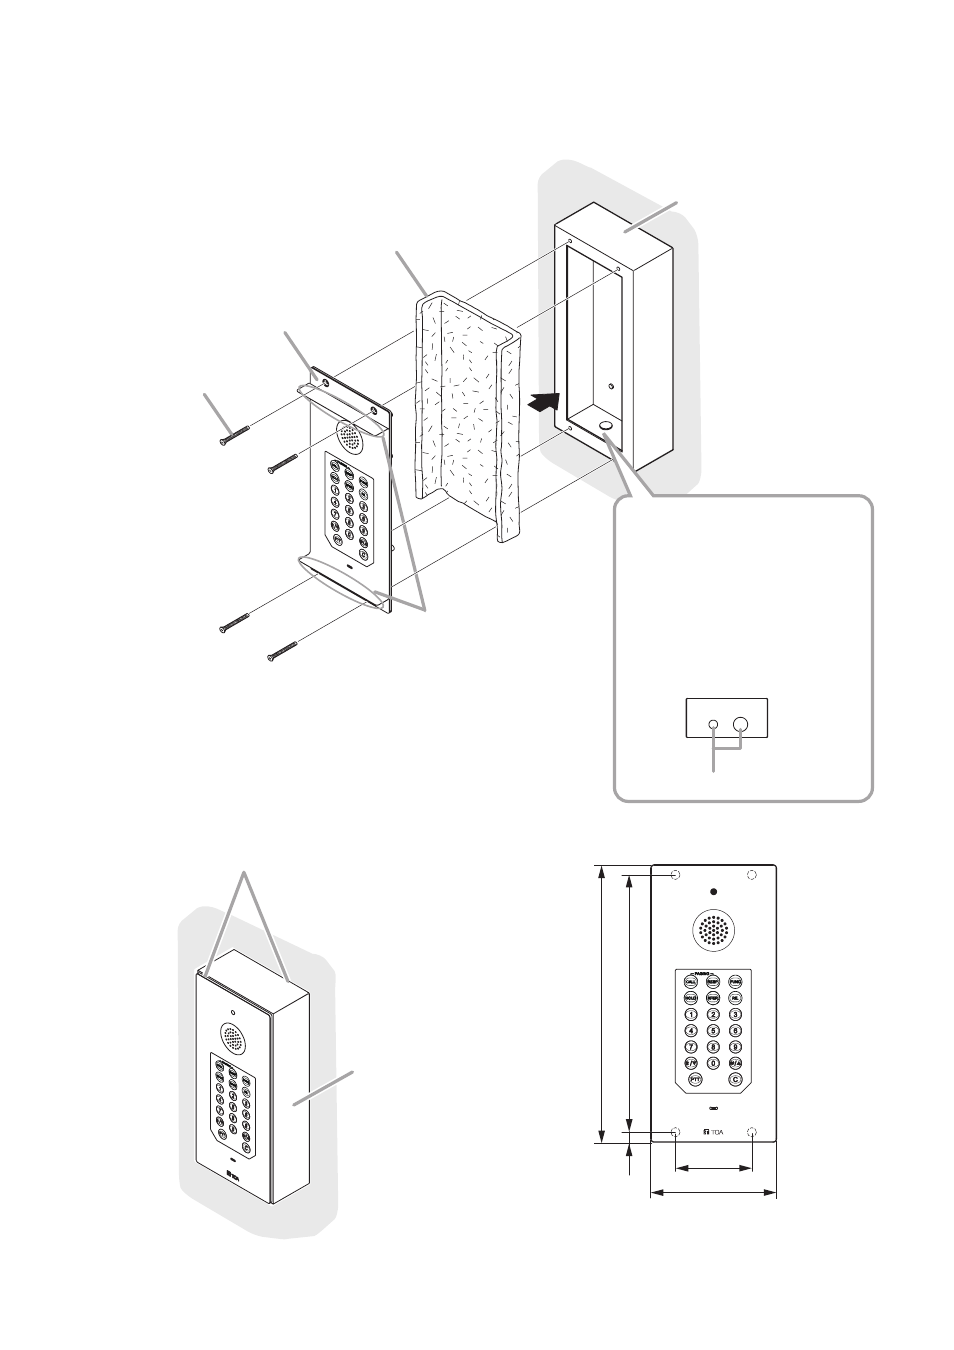
[N-8033MS]
Attach the N-8033MS to the YC-841 Wall-mount box installed on a wall.
N-8033MS
YC-841
YC-841 bottom
Acoustic material (
supplied with the N-8033MS
)
Note
Lay it down along the inside of the box.
Machine screw M4 x 35
(supplied with the N-8033MS)
Wall surface
Knockout holes
Note
When running the cable through
the knockout hole in the YC-841's
bottom surface, be sure to attach
a cord bush (waterproof type).
For the cord bush, contact the
TOA dealer where the unit was
purchased.
After installing the N-8033MS,
check first if the conversations
can be made, then attach the
both ends of the adhesive sheet
to the N-8033MS’s front surface
by removing exfoliate paper
provided at these ends.
YC-841
Wall surface
Seal all the panel and rear edges.
Tip
Refer to
for
YC-841 dimensional
drawing.
254
236
9
70
115
Unit: mm
[Installation completion drawing]
Note
Seal the edges of the panel and those of the box's rear surface in
contact with the wall surface when installing the unit outdoors or at
locations where it gets wet with water. For sealing method, contact
your nearest TOA dealer.