Echelon SmartServer 2.2 User Manual
Page 70
SmartServer
2.2 User’s Guide
71
devices in OpenLNS managed networks to the SmartServer’s built-in applications and to your custom
SmartServer 2.2 Web pages, and use OpenLNS network management services to manage the network
attached to your local SmartServer.
You can also create Web connections between your local SmartServer and an OpenLNS Server on the
LAN (called LNS uplink connections). When the value of a data point on your local SmartServer
changes, an uplink connection to the destination OpenLNS Server is initiated and the data point value
is transmitted to that OpenLNS Server. For more information on creating and using Web connections,
see Creating Web Connections in Chapter 4, Using the SmartServer Web Interface.
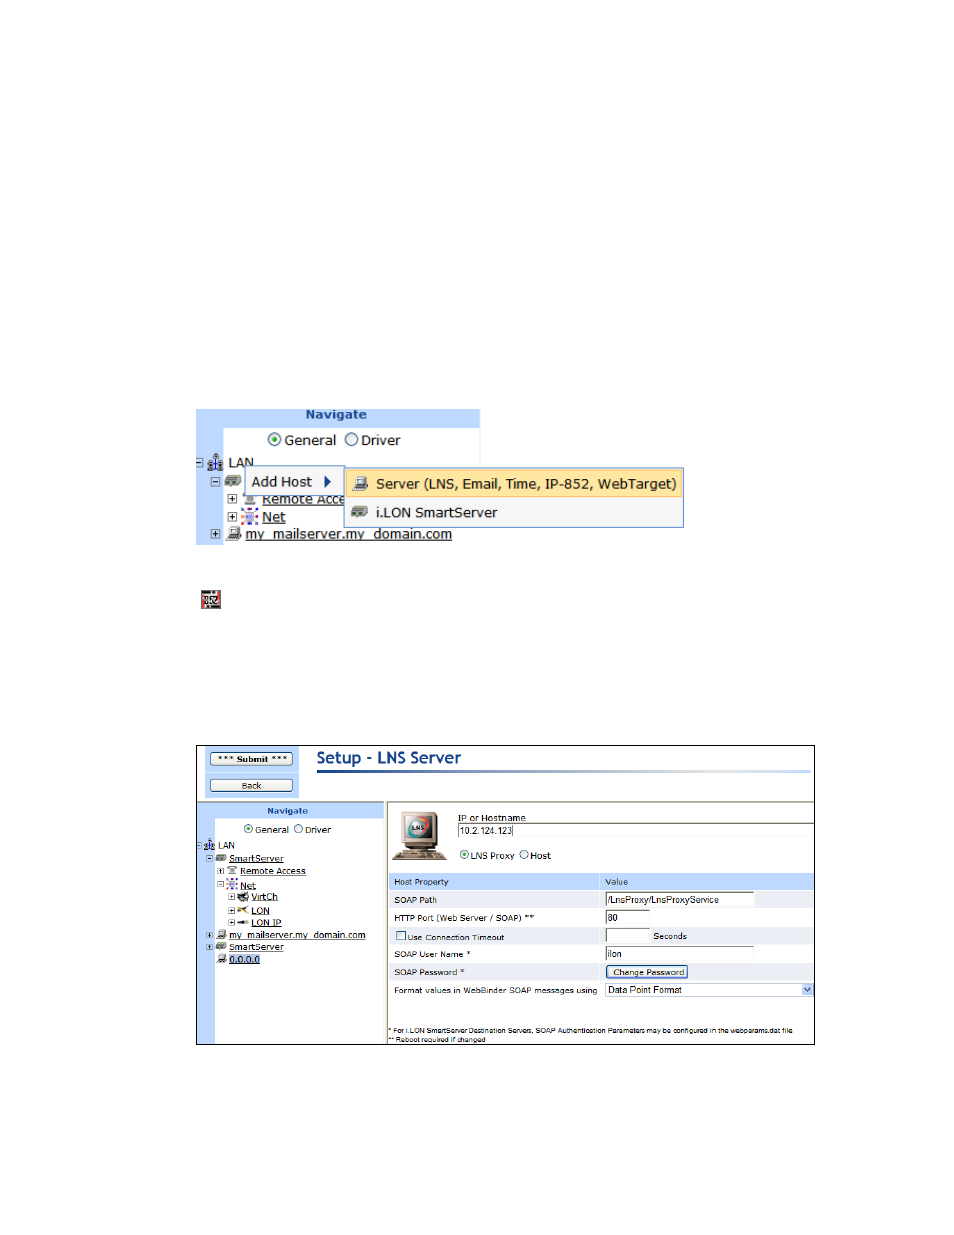
To add an OpenLNS Server or LNS Server to the LAN, follow these steps:
1. Verify that EES 2.2 and an OpenLNS Server or LNS Server have been installed on your computer.
See Chapter 1 of the Echelon Enterprise Services 2.2 User’s Guide for how to perform these
installations.
2. Right-click the LAN icon or a dial-out connection icon, point to Add Host, and then click Server
(LNS, Email, Time, IP-852, WebTarget) on the shortcut menu.
Note: If IP-852 routing is activated and enabled on the SmartServer and the IP-852 Configuration
Server is installed on the OpenLNS Server computer, click the IP-852 Configuration Server icon
(
), click LNS Proxy, and then skip to step 5 in order to configure the properties of the
OpenLNS Server.
3. The Setup – Host Web page opens, and a server icon is added one level below the LAN icon at
the bottom of the navigation pane or one level below the dial-out connection icon.
4. Enter the IP address or hostname of the OpenLNS Server or LNS Server and then click LNS
Proxy. The server icon on the tree becomes an LNS Server icon and the Setup – OpenLNS
Server Web page opens.
5. Configure the following OpenLNS Server properties:
Host Property