Echelon SmartServer 2.2 User Manual
Page 301
302
Using the SmartServer as Network Management Tool
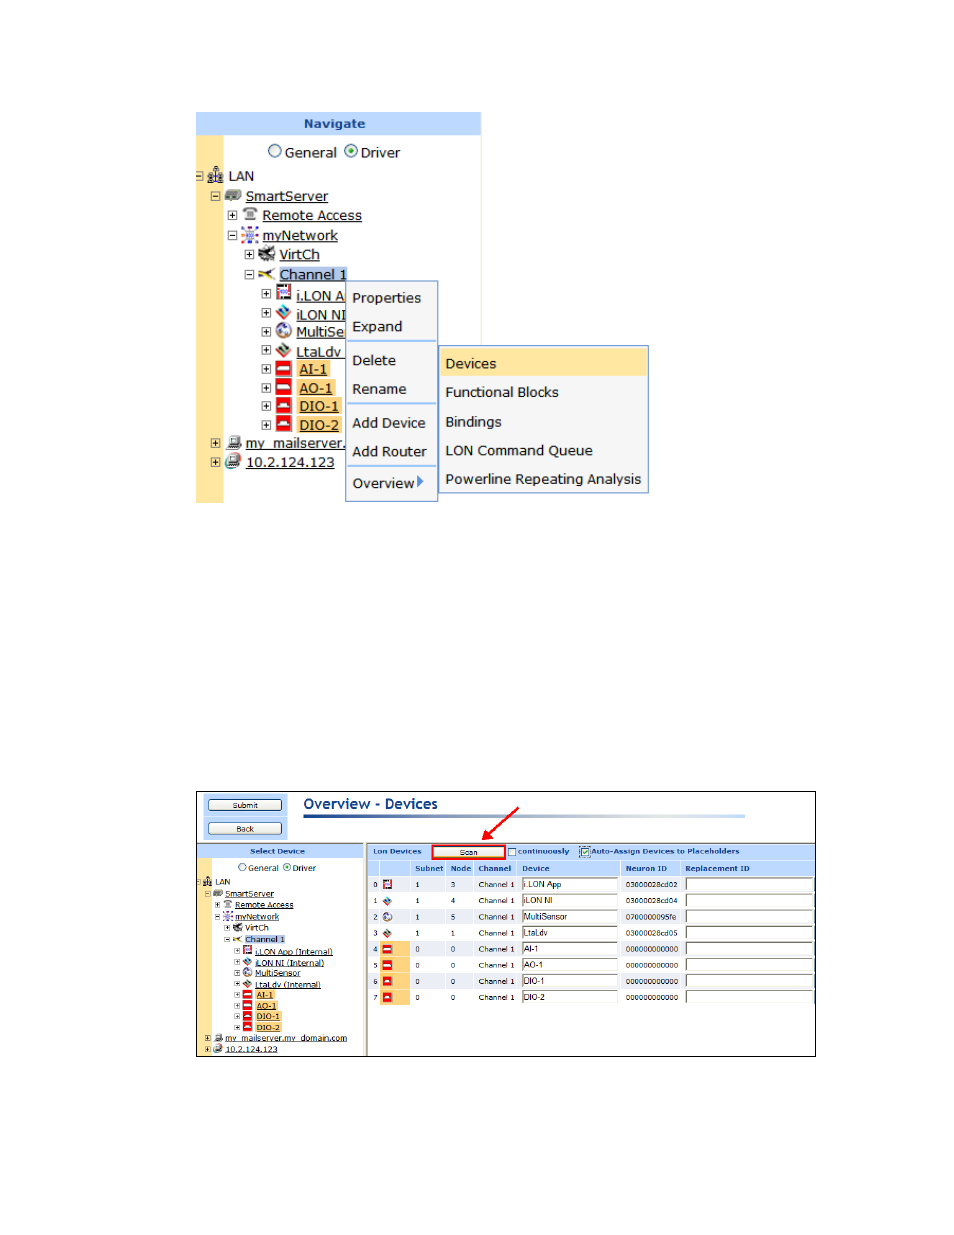
4. The Overview – Devices Web page opens.
5. If you are installing an engineered system, observe that the device icons are shaded based on their
current commission status (orange for uncommissioned; clear for commissioned). If you are
installing an engineered system (you logically created the devices or “placeholders”), select the
Auto-Assign Devices to Placeholders check box. This enables the SmartServer to match the
discovered devices to the devices you have already logically created.
6. To discover ISI devices, click the button to the right of the Scan button to open the LON Scan
Settings dialog, select the Include ISI Drum Messages check box, and then click OK.
7. Click Scan to discover all uncommissioned devices on the network if they are already attached to
the network, or click the Continuously check box if you are incrementally attaching the devices to
the network. A message is broadcast to the devices on the network that triggers the devices to
identify themselves by their Neuron IDs. Click Cancel Scan to stop device discovery.
Note: If you are using Standalone mode, the device discovery process may take a few minutes.
8. If you are discovering an engineered system, the Neuron IDs of the discovered devices appear in
the Replacement ID property, and the under construction triangle appears to the right of the
device icon. If you are discovering an ad-hoc system, the Neuron IDs of the discovered devices