Rebooting the smartserver, Reboot the smartserver – Echelon SmartServer 2.2 User Manual
Page 55
56
Configuring and Managing the SmartServer
locations. After you create a realm, you use the tool to create or update a webParams.dat file, and you
then transfer the file via FTP to the SmartServer’s root directory.
After transferring the webParams.dat file to the SmartServer’s root directory, users must enter the
user name and password that you defined to access the Web page. You can secure all the Web pages
on your SmartServer by creating a realm for the main.htm file in the root/web/user/echelon folder.
For more detailed information on securing Web pages using the i.LON Web Server Security and
Parameters program, see Appendix C, Securing the SmartServer.
Rebooting the SmartServer
You must reboot your SmartServer if you change TCP/IP properties in the Setup – Local
SmartServer Web page that are marked with an asterisk (*), change the security properties in the
Setup – Security Web page that are marked with a double asterisk (**), change the country/region of
the SmartServer’s internal analog modem, or add an IP-852 routing or programming license to your
SmartServer.
Rebooting executes the SmartServer’s shutdown and startup scripts, stopping and re-loading the
SmartServer’s modules in an orderly fashion. The reboot process takes approximately 5 to 10 minutes
depending on the complexity of your network configuration. While the SmartServer is rebooting, the
LEDs on the hardware will flash. Once the reboot is complete, the green Power/Wink LED will stay
on solidly.
If your SmartServer is not behind a firewall, the SmartServer - Welcome Web page will open
automatically once the reboot is complete. If your SmartServer is behind a firewall, you may need to
close and then re-open your Web browser.
If DHCP is enabled, this page may not redirect the Web browser to the SmartServer - Welcome Web
page properly. This because the new address from the DHCP server is unknown. If this is the case,
issue the show all command from the console application, or ask your network administrator to
determine the new IP address of the SmartServer. See Appendix B, Using the SmartServer Console
Application, for more information on the console application.
If your DHCP server has the capability to dynamically propagate newly assigned device IP address and
target name to the DNS server (as is the case with the WIN2K DHCP server), you should be able to
connect to the SmartServer after reset using its fully qualified hostname.
To reboot the SmartServer, follow these steps:
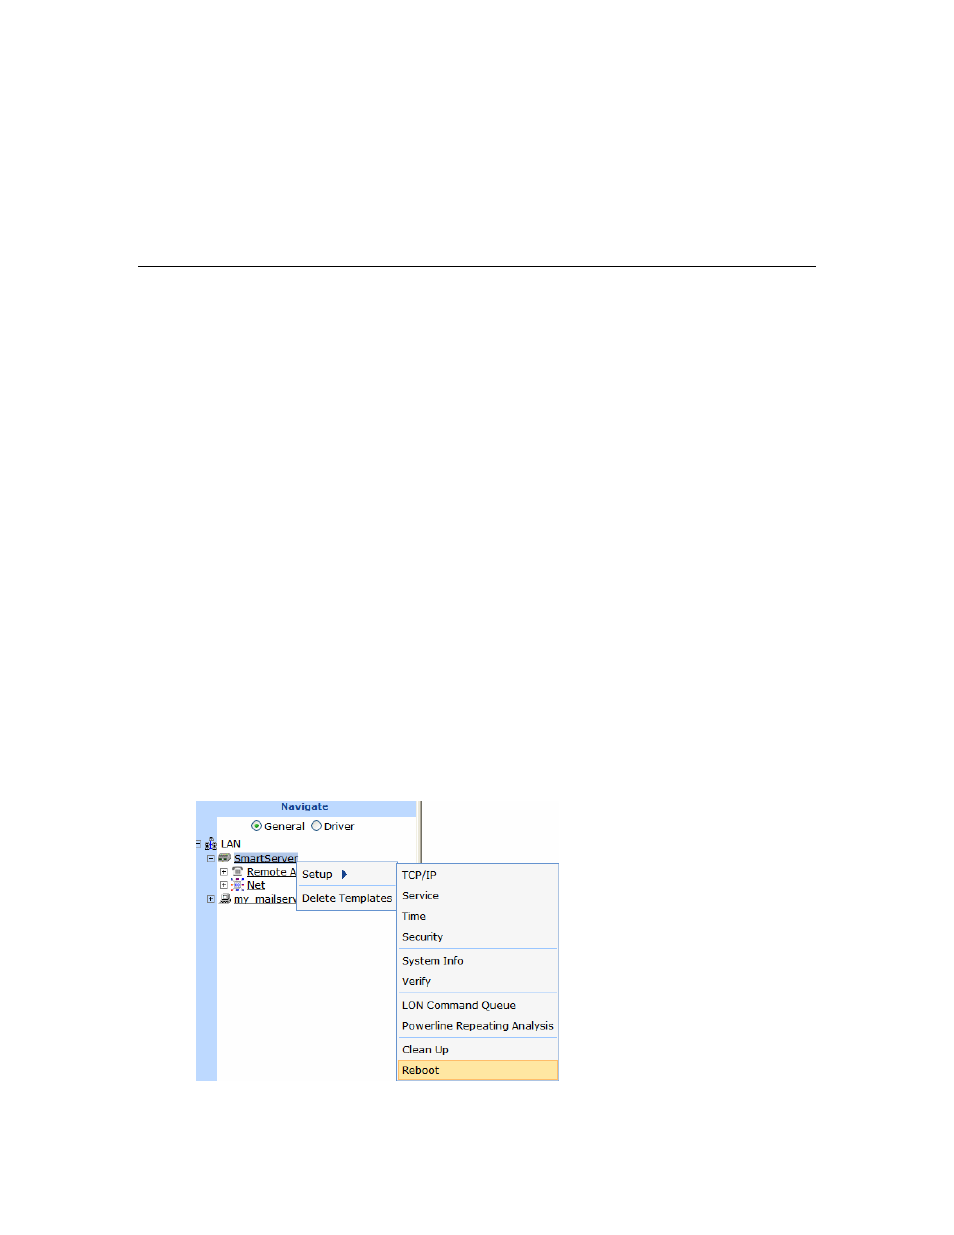
1. Right-click the SmartServer to be rebooted, point to Setup, and then select Reboot from the
shortcut menu.
2. The Reboot dialog opens.