Configuring alarm conditions, Configure alarm conditions – Echelon SmartServer 2.2 User Manual
Page 346
SmartServer
2.2 User’s Guide
347
Alarm Summary
Writes the alarms received on the input point to the Alarm Summary log file
and lists the alarms in the Alarm Notifier: Summary Web page. This
option is selected by default.
Alarm History
Writes the alarms received on the input point to the Alarm History log file
and lists the alarms in the Alarm Notifier: History Web page. This option
is selected by default.
5. Click Submit.
Configuring Alarm Conditions
You can select which alarm conditions received by the selected input points cause the Alarm Notifier
to send an alarm notification. To configure the alarm conditions of the selected input points, follow
these steps:
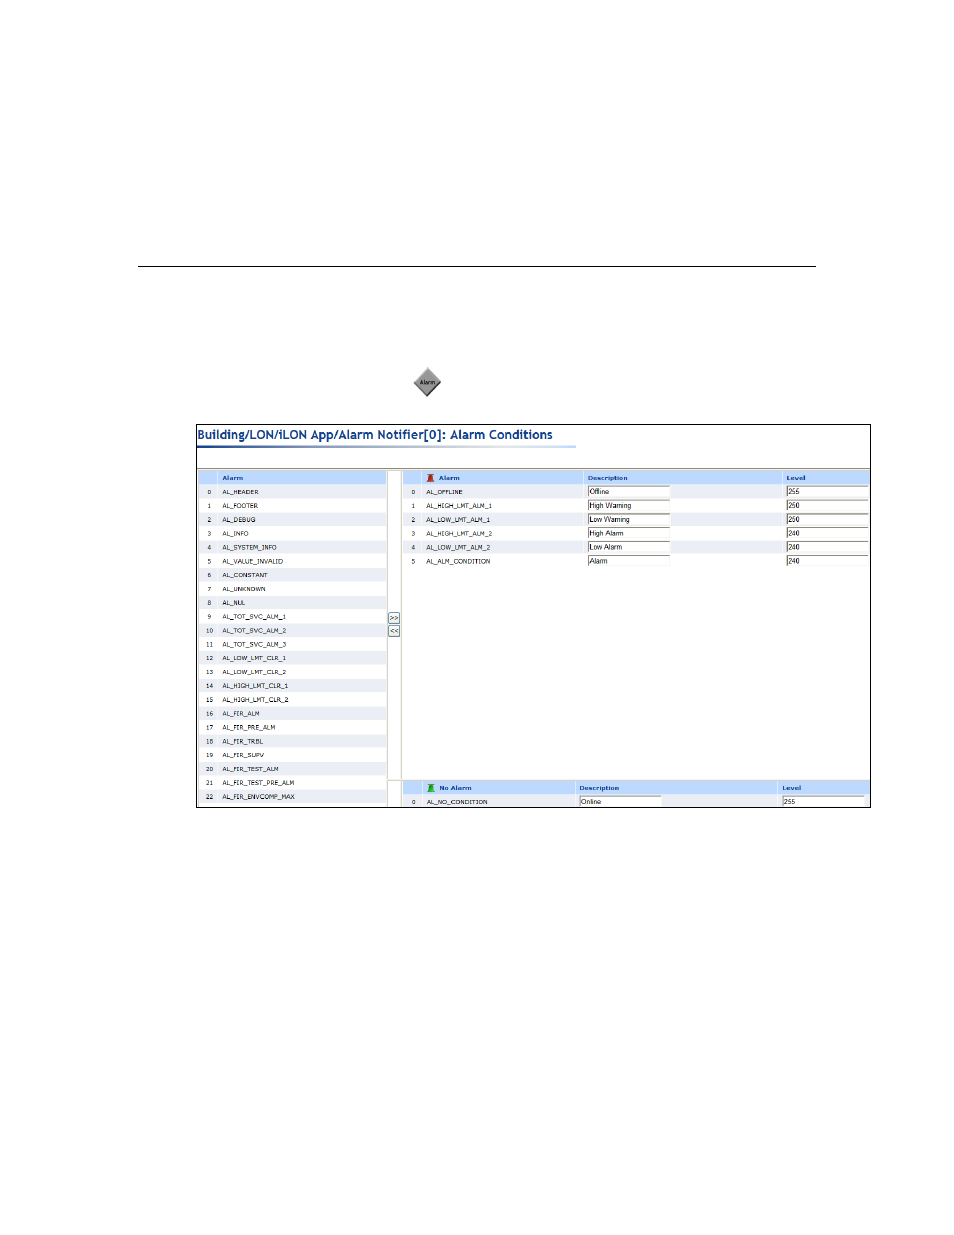
1. Click anywhere in the Alarm box (
). The Alarm Notifier: Alarm Conditions Web page
opens.
The left pane lists all of the alarm conditions that an input point can receive. The right pane
contains separate lists for the alarm conditions defined as active (top) and passive (bottom). You
can click a column heading to sort a list by that heading.
An active alarm indicates a data point that is in an alarm condition. An active alarm is
represented by a red alarm bell. By default, the following five alarms are registered as active
alarm conditions: AL OFFINE, AL_HIGH_LMT_ALM_1, AL_LOW_LMT_ALM_1,
AL_HIGH_LMT_ALM_2, AL_LOW_LMT_ALM_2, and AL_ ALM_CONDITION.
A passive alarm indicates a data point that is in its normal condition or has returned to its
normal condition after being in an alarm condition. A passive alarm is represented by a green
alarm bell. By default, there is one alarm condition registered as a passive alarm condition:
AL_ NO_CONDITION.
The following table lists and describes the alarm conditions that you can set as active and
passive. These alarm conditions are defined in the SNVT_AL.H header file in the
LonWorks\NeuronC\Include folder on your computer.