Echelon SmartServer 2.2 User Manual
Page 492
SmartServer
2.2 User’s Guide
493
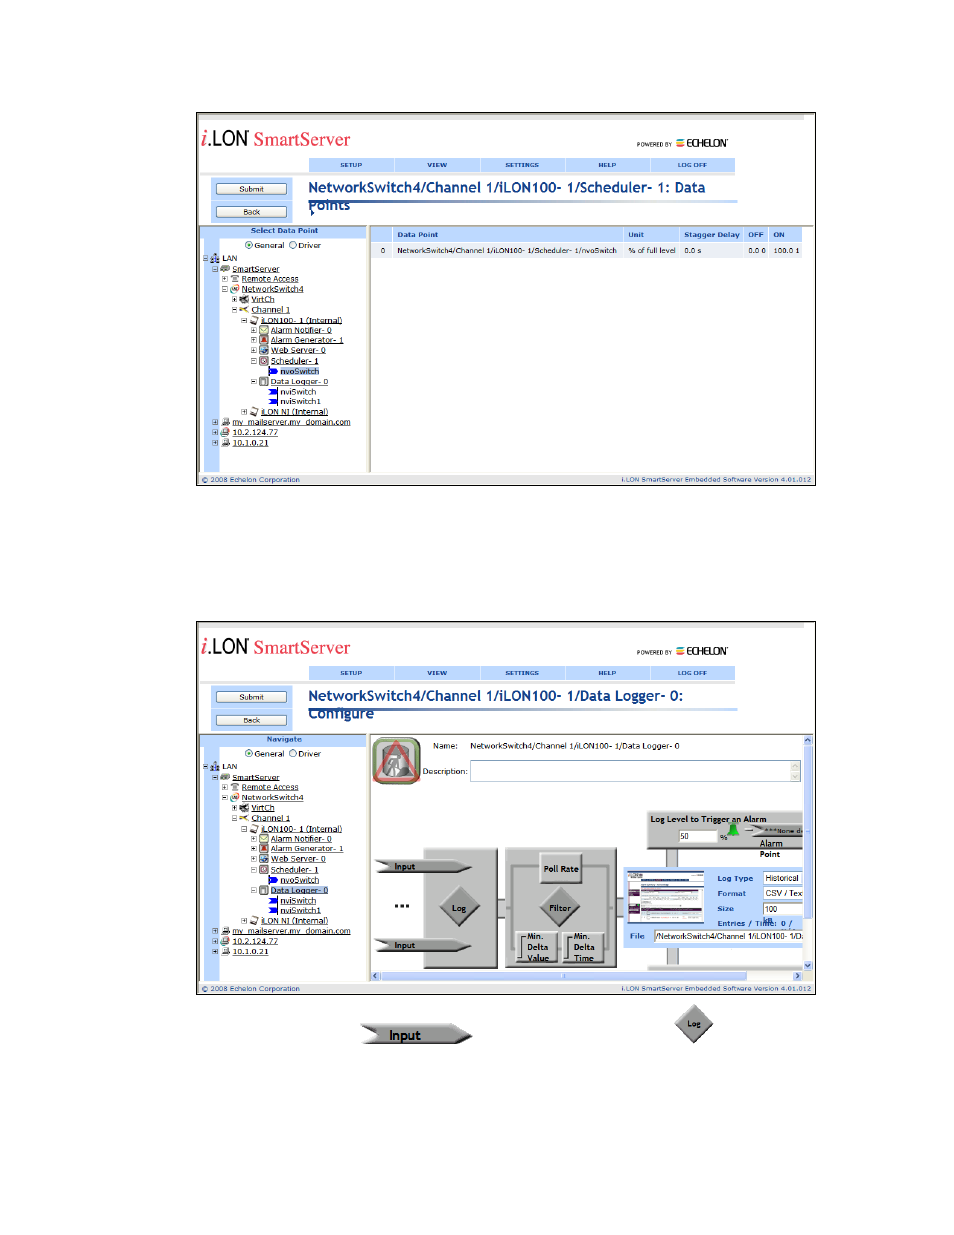
11. Click Submit, and then click Back to return to the Scheduler: Configure Web page. Finish
configuring the Scheduler application following Chapter 7, Scheduling.
12. In the navigation pane, click the Data Logger functional block. The Data Logger: Configure
Web page opens. Expand the Data Logger functional block to show the dynamic network
variables (nviSwitch and nviSwitch1) that you added to the Data Logger functional block with
OpenLNS CT in step 4.
13. Click one of the Input icons (
), or click anywhere in the Log box (
). The Data
Logger: Data Points Web page opens in the application frame to the right.
14. Click the nviSwitch and nviSwitch1 data points in the navigation pane to add them to the Data
Logger application.