Managing the smartserver – Echelon SmartServer 2.2 User Manual
Page 101
102
Configuring and Managing the SmartServer
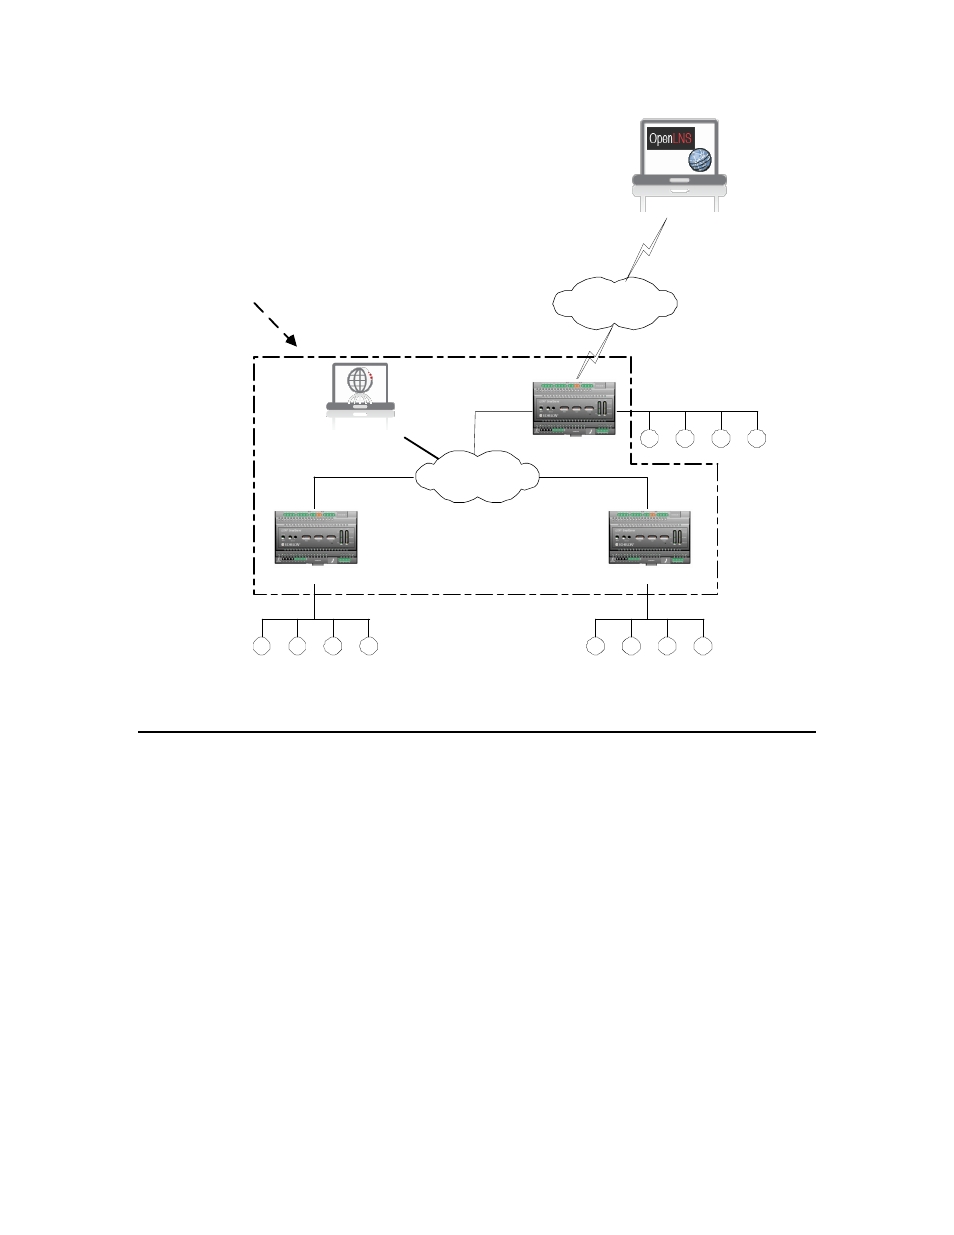
SmartServer
TCP/IP
Network
IP-852
Configuration Server
Floor 2
FT-10 Channel
Floor 3
FT-10 Channel
TCP/IP
Network
OpenLNS or OpenLDV Application
for Floor 3
Floor 1
FT-10 Channel
SmartServer
RNI
IP-852
Channel
SmartServer
Note: The SmartServer’s capabilities are not restricted when using either the RNI or IP-852 routing
function. All the other application features of the SmartServer are available when it is operating as an
RNI or as an IP-852 router.
Managing the SmartServer
You can manage the connections, performance, and configuration of your SmartServer. This section
describes how to perform the following management tasks with your SmartServer:
1. View system information and performance with the Setup – System Info Web page.
2. View system health monitoring with the systemhealth.conf file on the SmartServer flash disk.
3. Test connections with the Setup – Verify Web page.
4. Upgrade an i.LON 100 e3 plus Server to the SmartServer.
5. Downgrade the SmartServer 2.2 firmware to the SmartServer 1.0 version.
6. Downgrade the SmartServer 2.2 firmware to the i.LON 100 e3 version.
7. Migrate an i.LON 100 e3 Server network configuration to the SmartServer.
8. Restore the SmartServer to its factory default settings.
9. Replace the SmartServer.
10. Activate the V40 interface on the SmartServer (in Standalone mode only).
Note: You can manually upgrade, backup/restore, and deploy SmartServers via FTP instead of using
the i.LON AdminServer. For more information on manually managing and deploying SmartServers,
see Appendix D, Manually Managing and Deploying SmartServers.
To upgrade i.LON e3 plus Servers or SmartServers that have previously been downgraded to the
i.LON 100 e3 version firmware to the SmartServer 2.2 (Release 4.06) firmware, you must first