Echelon SmartServer 2.2 User Manual
Page 49
50
Configuring and Managing the SmartServer
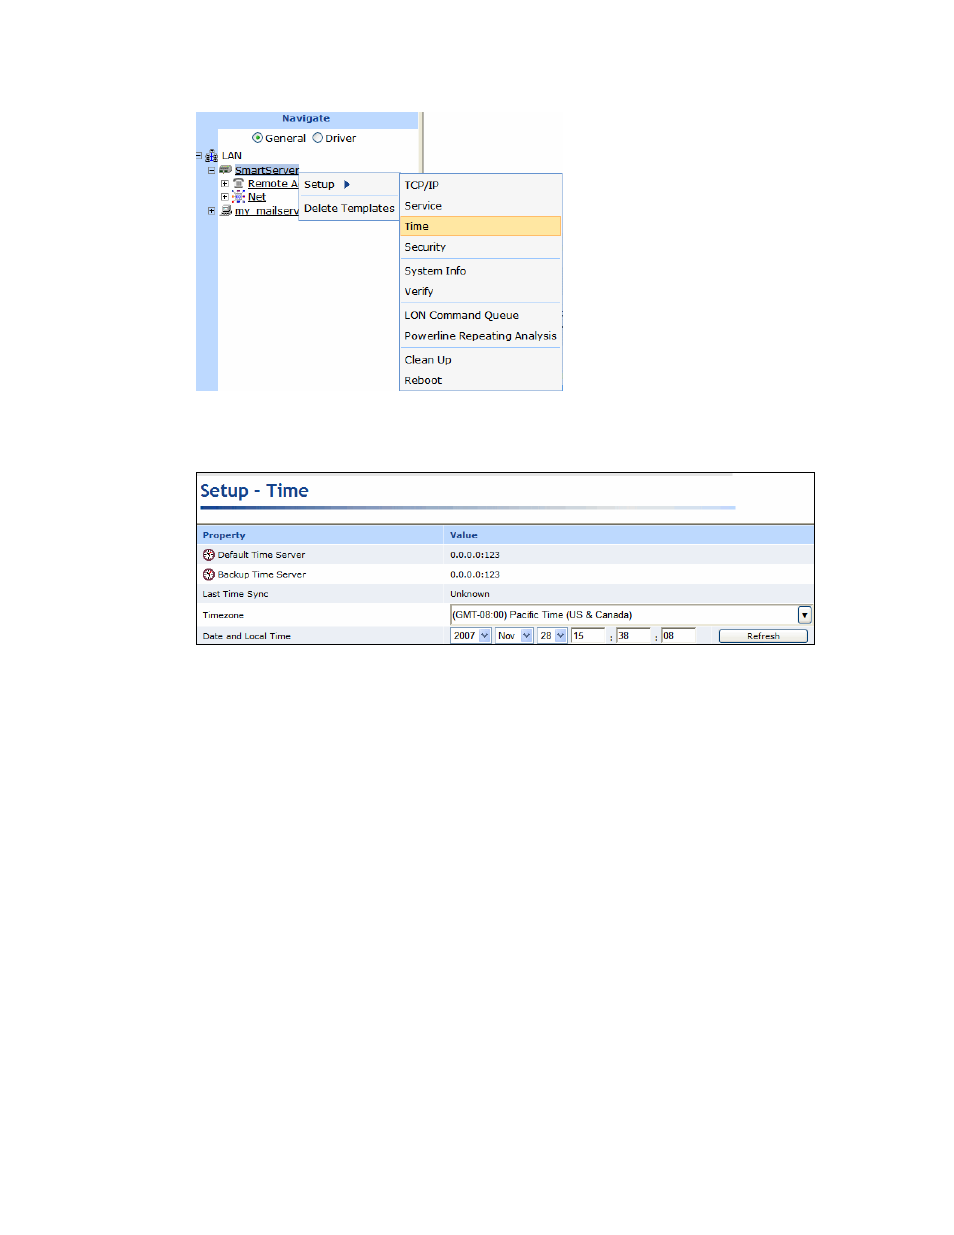
Alternatively, you can click Setup and then click Time to configure the time settings on your local
SmartServer.
2. The Setup – Time Web page opens.
3. Configure the following time settings:
Default Time Server
Displays the IP address of the designated default SNTP time server. See
Adding a Time (SNTP) Server for how to add a time server to the LAN
and select it as the default.
Backup Time Server
Displays the IP address of the designated backup SNTP time server. See
Adding a Time (SNTP) Server for how to add a backup time server to the
LAN.
Last Time Sync
Displays the last time in which the SmartServer synchronized its clock
with the default SNTP time server. The amount of time varies between 1
to 15 minutes, depending on the difference in time between the
SmartServer’s clock and the SNTP time server. As the difference
approaches 75 ms or less, the interval will keep increasing until it reaches
the maximum of 15 minutes.
Time Zone
Select the time zone in which the SmartServer is located.
Date and Local
Time
Displays the time and date currently stored in the SmartServer’s real time
clock. You may need to refresh the Web page to view the current time.
You can manually enter a different time and/or date.
Note: If you have configured an SNTP time server, changes to the time
and date will be overwritten the next time the SmartServer is synchronized
with the SNTP time server.
4. Click Submit to save the changes. Click Back to leave all fields unchanged.