Adding a remote smartserver to the lan – Echelon SmartServer 2.2 User Manual
Page 68
SmartServer
2.2 User’s Guide
69
Adding a Remote SmartServer to the LAN
You can add another SmartServer to the LAN, and then manage the remote SmartServer and manage,
monitor, and control the network attached to it from the Web interface of your local SmartServer. In
addition, you can create Web connections between the data points on your local SmartServer to those
on the remote SmartServer. The Web connections will keep the values of the data points
synchronized. For more information on creating and using Web connections, see Creating Web
Connections in Chapter 4, Using the SmartServer Web Interface.
To add a remote SmartServer to the LAN, follow these steps:
1. Verify that the remote SmartSever has a unique hostname relative to the LAN—the remote
SmartServer cannot have the same hostname as the local SmartSever. To change the hostname of
a SmartServer, do the following:
For a SmartServer in an LNS managed network, change the SmartServer’s hostname with
OpenLNS CT or another OpenLNS tool.
For a SmartServer in a standalone managed network, change the hostname in its Setup –
Local SmartServer TCP/IP Web page or the console application.
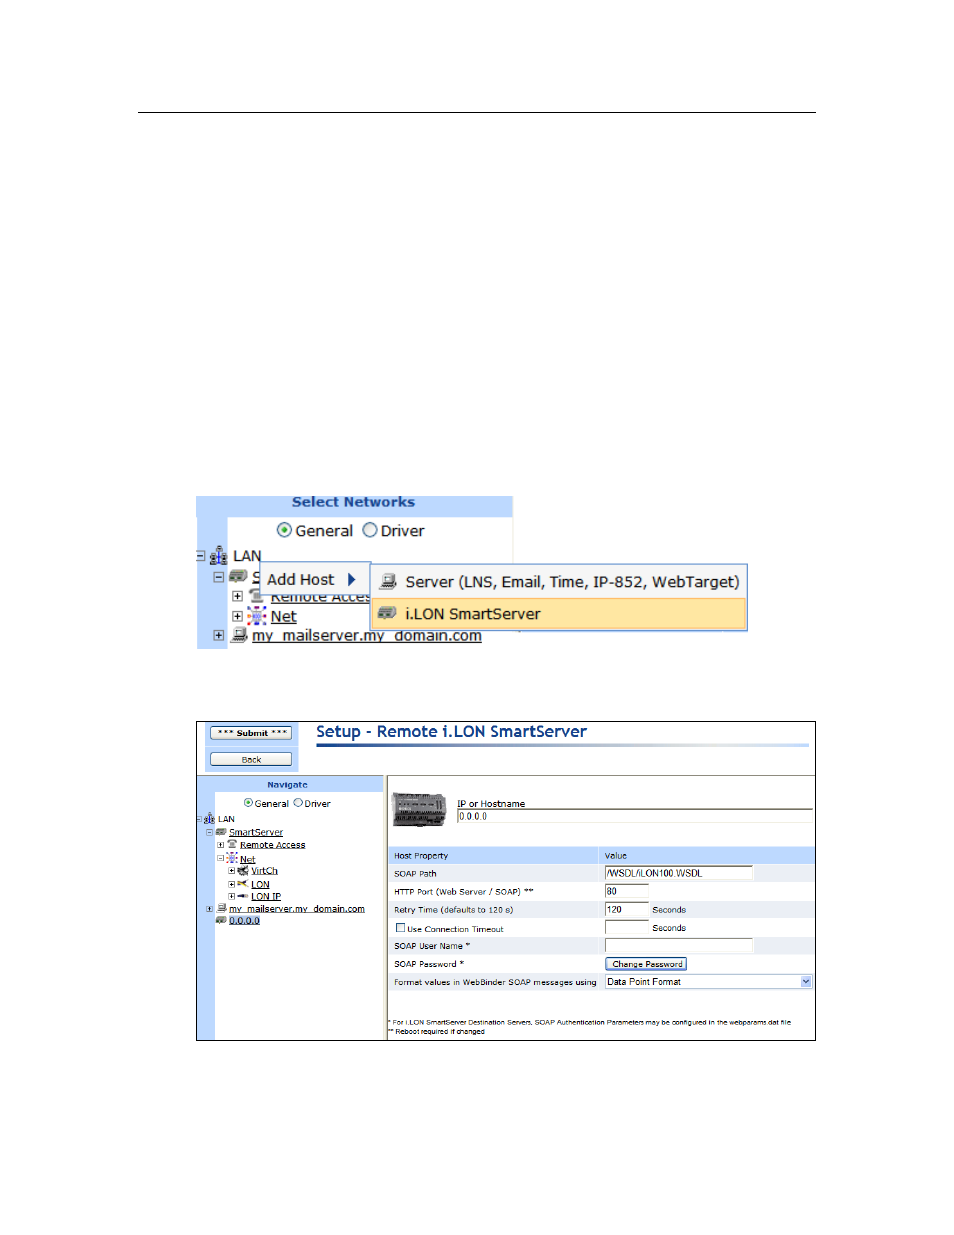
2. Right-click the LAN icon or a dial-out connection icon, point to Add Host, and then click
SmartServer on the shortcut menu.
3. The Setup – Remote SmartServer Web page opens, and a SmartServer icon is added one level
below the LAN icon at the bottom of the navigation pane or one level below the dial-out
connection icon.
4. Configure the following properties for the remote SmartServer:
IP or Hostname
Enter the IP address or hostname of the remote SmartServer. The default