Echelon SmartServer 2.2 User Manual
Page 432
SmartServer
2.2 User’s Guide
433
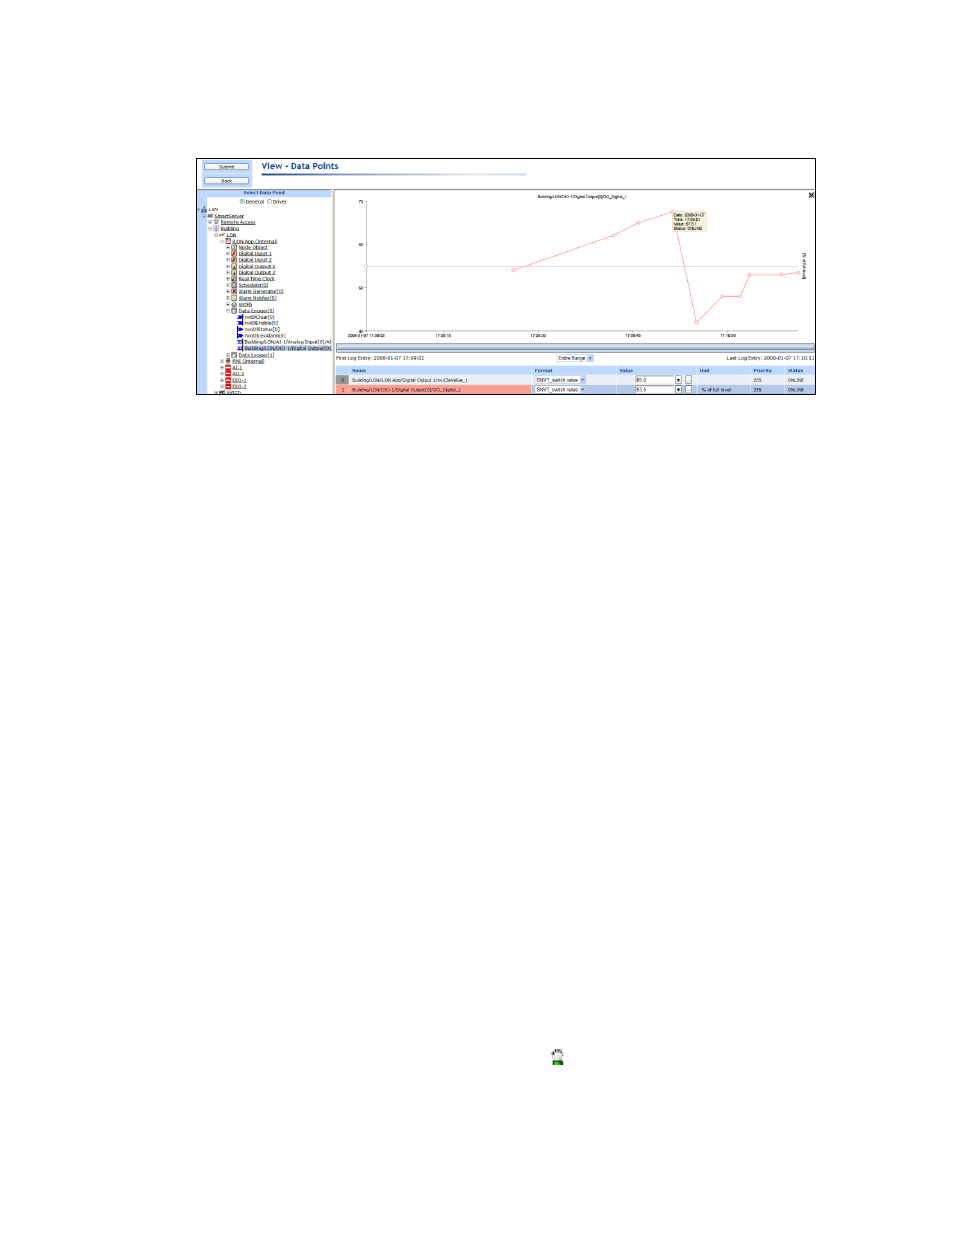
Note: Alternatively, you can reverse steps 1 and 2 to view a data point in the View - Data Points
Web page. This means that you can click the data point, click View, and then click Data Points.
3. The trend graph charts all the selected data points. For multiple data points to be scaled accurately
on the trend graph at the same time, they must have the same Unit String property. You can add
a unit string to a data point or edit the one defined for it in the Configure - Data Points Web page
on the SmartServer. In addition, if the selected points have structured data types, the same fields
must be selected.
You can move the mouse pointer over one of the plotted data point updates to show a ToolTip.
The ToolTip lists the date and time of the update and the value and state of the data point at the
time the update was recorded.
4. By default, the log lists the data points in the order they were selected. You can sort the data
points by clicking a property header. This Web page displays the following properties for the
selected data points:
Name
Displays the name of the data point using the following format:
<network>/<channel>/<device>/<functional block>/<data point>. This is
also the location of the data point in the SmartServer tree.
IP Address
Displays the IP address of the SmartServer or OpenLNS Server on which the
data point resides. This property appears if you select a data point from a
remote SmartServer or an OpenLNS Server.
Format
Displays the SNVT, UNVT, or built-in data type used by the data point, and
it specifies the format (for example, SI metric or US customary) used if the
type has multiple formats such as SNVT_temp_p.
If the data point has structured type (i.e. a structure or union with multiple
fields), you can select which field to monitor and control from the list. For
example, if you select a SNVT_switch data point, you can select the value
or the state of the data point.
Value
Displays the current value of the data point. To update the data point, enter
a valid value in this box and then click Submit, press ENTER, or press
TAB.
If presets are defined for the data point, you can select a preset from the list
and the data point will be updated with the value defined by the preset. You
can edit the values defined by the selected preset by clicking the button to
the right and opening the Edit Value dialog.
If a Manual Override icon (
) appears to the left of the data point, the
data point is in manual override mode (another application has been
assigned a priority for updating this data point). You can enter a value