Echelon SmartServer 2.2 User Manual
Page 349
350
Alarming
To add a destination, right-click anywhere in an existing destination and click Add Destination in
the shortcut menu. To delete a destination, right-click anywhere in the destination to be deleted
and click Delete Destination in the shortcut menu. To make a destination the default, right-click
anywhere in the destination to be used as the default and click Set to Default in the shortcut menu
4. For each destination, configure the e-mail message to be sent when active and passive alarm
conditions occur. To do this, follow these steps:
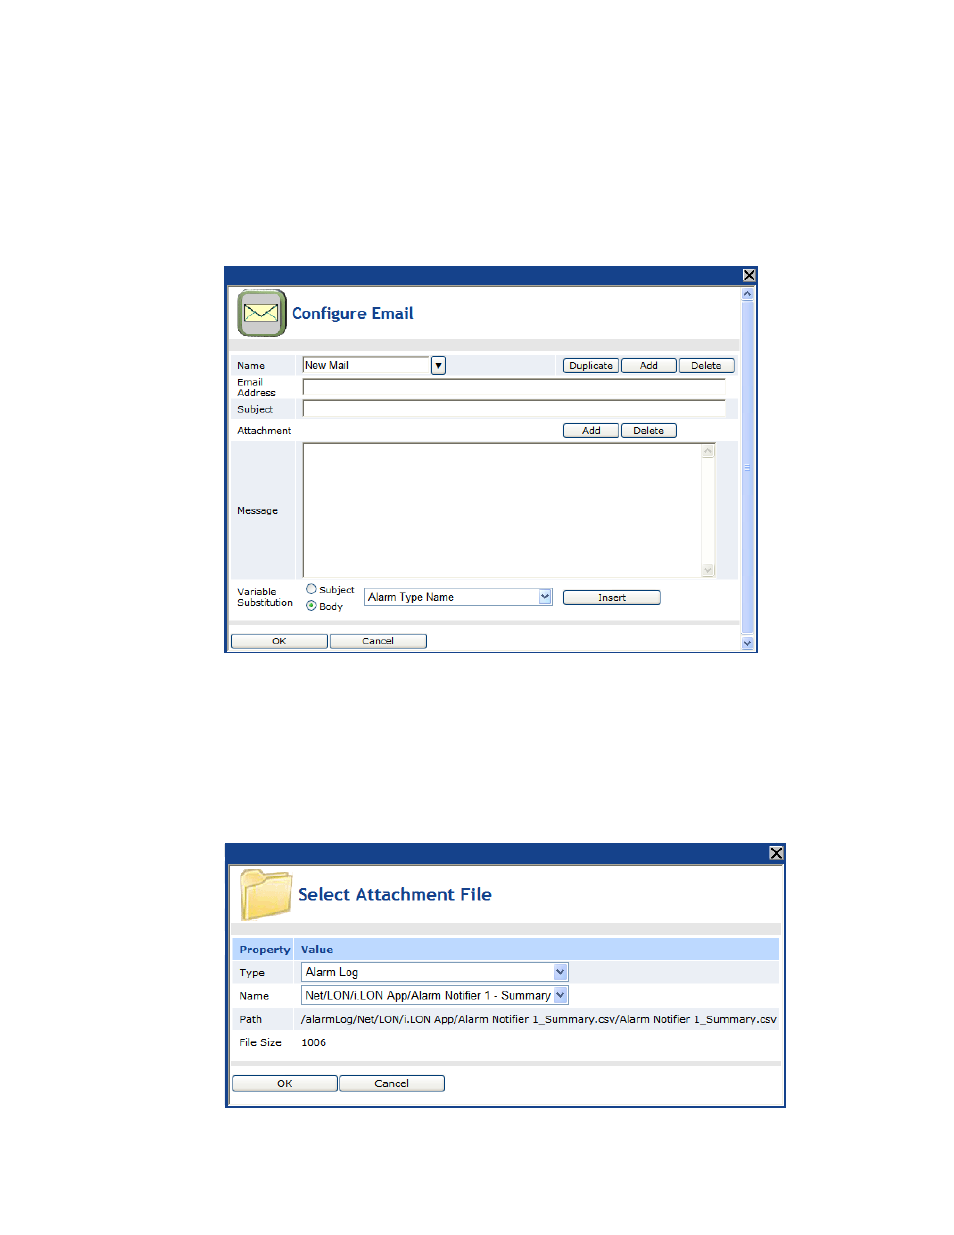
a. Click anywhere in the Mail To column. The Configure E-mail dialog opens.
b. Enter the e-mail profile Name, E-mail address, Subject, and the Message. You can select a
user profile from Name list to use the same e-mail for multiple alarm destinations. The Name
list includes all the e-mail profiles that have previously been added to the Alarm Notifier.
You can click Duplicate to copy an existing profile and then add or remove e-mail addresses
from the E-mail address property. Click Add to create a new e-mail profile; click Delete to
remove the selected e-mail profile.
c. Click Add to open the Select Attachment dialog in which you select an alarm log, data log,
event log or other user-defined file to be inserted in the e-mail. After selecting a file, click
OK.