Echelon SmartServer 2.2 User Manual
Page 379
380
Scheduling
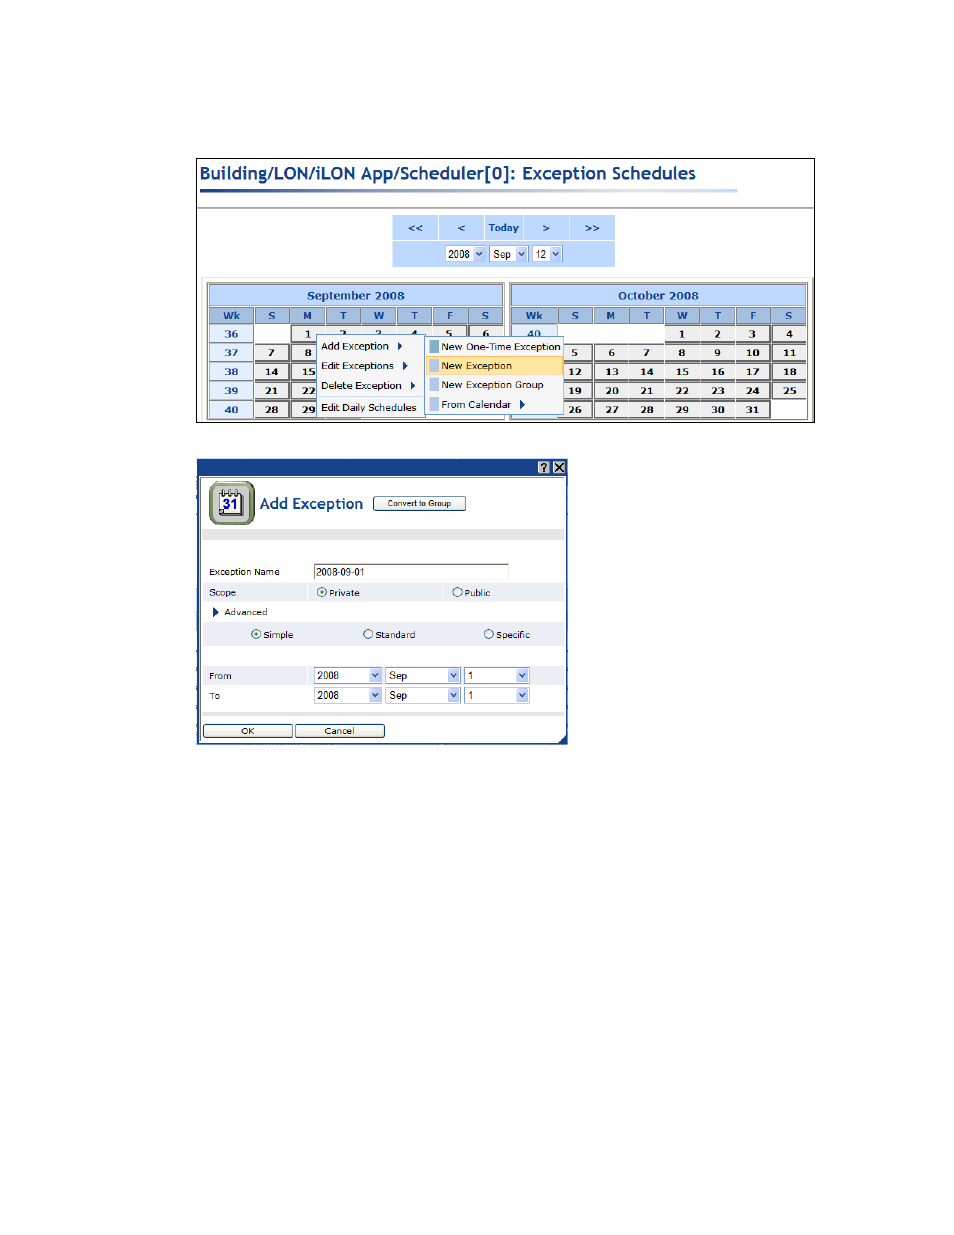
2. Right-click the start date on which the exception schedule is to begin, point to Add Exception,
and then click New Exception on the shortcut menu.
3. The Add Exception dialog opens.
4. In the Exception Name property, enter a descriptive name for the exception. The default name is
the selected start date in the following format: <year>-<month>-<date>.
5. In the Scope property, select whether the exception is Private (can only be applied to the current
Scheduler) or Public (can be applied to all Schedulers). The default scope is Private.
6. To create an exception group (a set of exceptions that use the same schedule), click the blue arrow
in the Advanced property (located directly below the Scope property) to show options for adding,
deleting, and editing additional exceptions included under the current exception.
a. Click Add to create an exception group and add new exceptions to the group. All new
exceptions you add to the group will use the same Exception Schedule, but you can specify a
different range of dates and recursions for the new exception. For example, you could create
a new exception for Thanksgiving that uses the same range of dates as the current exception,
but uses a different set of recursions. With an exception group, all the changes you make to
the schedule of one exception are globally applied to the schedules of all the exceptions
within the group. For example, if you create an ON event in the schedule for the
Thanksgiving exception, that ON event is automatically added to the schedule of all other
exceptions in the exception group.
b. Once you click Add, specify the range of dates for the exception in the From and To boxes
and click Standard or Specific if you want the exception to be a recurring exception.