Setting alarm limits, Set the alarm limit – Echelon SmartServer 2.2 User Manual
Page 419
420
Scheduling
value changes. You can set this property to On Change so that the data point is logged
only when its value or state changes.
Select Advanced to use a combination of the polling rate and event-driven update values to
filter the data point updates. Select the Set as Default check box to use the configured
properties as the default values for new data points added to the current Data Logger.
7. Click Close.
8. Click Submit. The Data Logger begins recording data point updates. You can view the log file at
any time with the SmartServer Web pages or with a spreadsheet, as described in the Viewing Data
Logs section later in this chapter.
Note: You can remove one or more data points from a Data Logger. To remove one data point,
right-click the data point and click Remove Marked Data Point(s) on the shortcut menu and then
click Submit. To remove multiple data points, click one data point and then either hold down CTRL
and click all other data points to be deleted or hold down SHIFT and select another data point to delete
the entire range of data points, right-click one data point, click Remove Marked Data Point(s) on the
shortcut menu, and then click Submit.
Setting Alarm Limits
You can enable the data logger to trigger an alarm when the log file is becoming full and have an
Alarm Notifier send a notification. This is particularly useful if you are using a historical log file
because it becomes disabled once it is full.
To specify an alarm limit and configure an Alarm Notifier to send a notification when the limit is
reached, follow these steps:
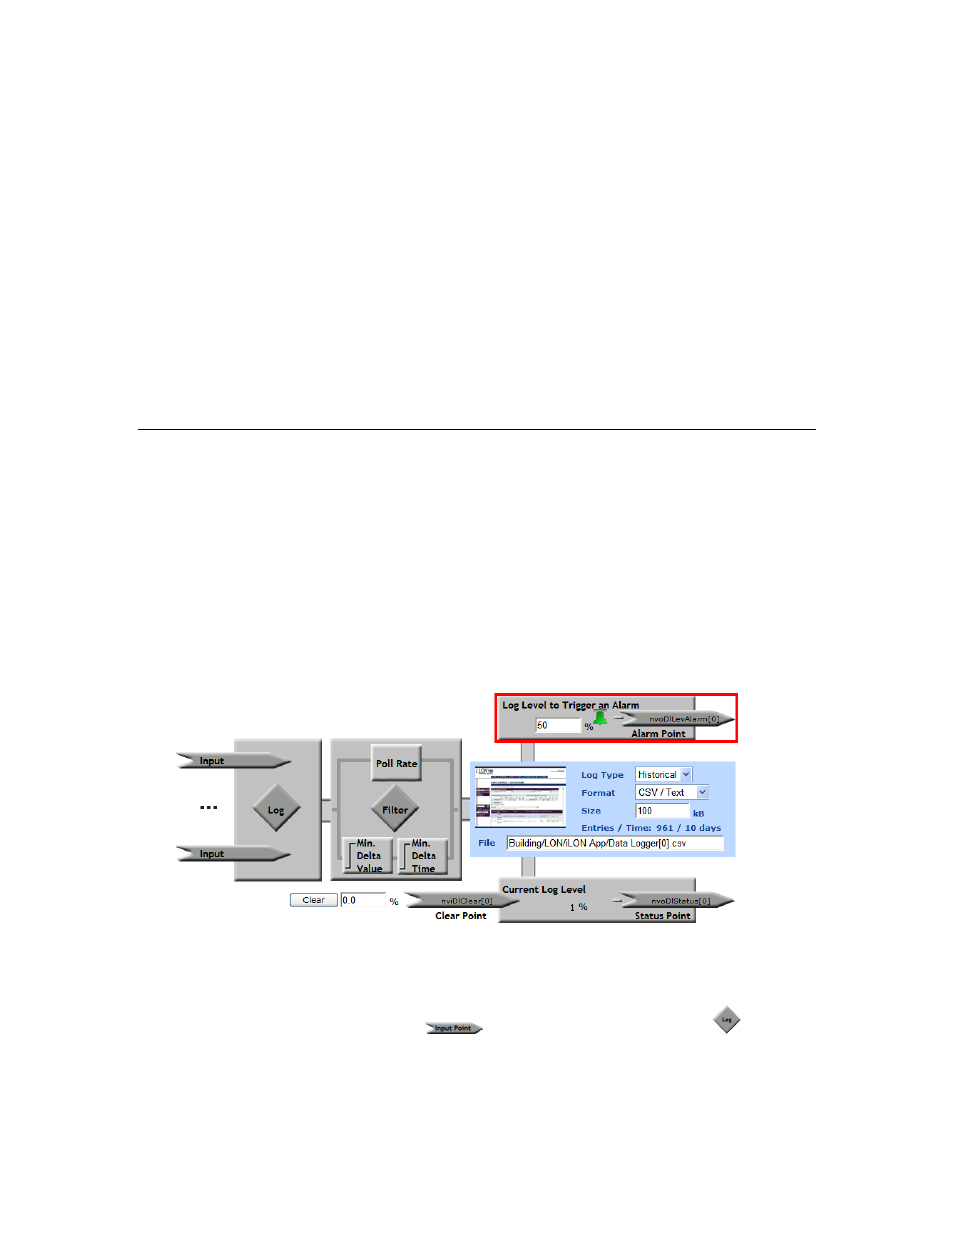
1. In the Log Level to Trigger an Alarm box on the Configure - Data Points Web page, enter the
percentage of the log file that when reached, triggers an alarm. The default log level is 50%,
which means that once the log is half full, the Data Logger updates the status of its alarm point
(nvoDlLevAlarm [x], where x is the index number of the data logger) to
AL_ALM_CONDITION.
2. Click Submit. When the alarm limit is reached, the alarm bell icon becomes red.
3. Open an Alarm Notifier application, following the steps described in the Opening an Alarm
Notifier Application section in Chapter 6, Alarming.
4. Click one of the Input Point icons (
), or click anywhere in the Log box (
). The
Alarm Notifier: Data Points Web page opens.
5. Click the nvoDlLevAlarm data point under the Data Logger functional block tree as a data point
to be monitored by the Alarm Notifier. The nvoDlLevAlarm data point is added to the Web page.