Configuring 802.1q-in-q tagging – Brocade Multi-Service IronWare Switching Configuration Guide (Supporting R05.6.00) User Manual
Page 215
Multi-Service IronWare Switching Configuration Guide
185
53-1003036-02
Configuring 802.1q-in-q tagging
7
Brocade-F(config)# vlan 103
Brocade-F(config-vlan-103)# tagged ethernet 2/1
Brocade-F(config-vlan-103)# untagged ethernet 1/3
Brocade-F(config-vlan-103)# exit
Brocade-F(config)# vlan 104
Brocade-F(config-vlan-104)# tagged ethernet 2/1
Brocade-F(config-vlan-104)# untagged ethernet 1/4
Brocade-F(config-vlan-104)# exit
Brocade-F(config)# vlan 105
Brocade-F(config-vlan-105)# tagged ethernet 2/1
Brocade-F(config-vlan-105)# untagged ethernet 1/5
Brocade-F(config-vlan-105)# exit
Brocade-F(config)# write memory
Configuring 802.1q-in-q tagging
802.1Q-in-Q tagging enables you to configure 802.1Q tag-types on a group of ports, such as LAG
ports, thereby enabling the creation of two identical 802.1Q tags (802.1Q-in-Q tagging) on a single
device. This feature improves SAV interoperability between Brocade devices and other vendors’
devices that support the 802.1Q tag-types, but are not very flexible with the tag-types they accept.
shows an 802.1Q configuration example.
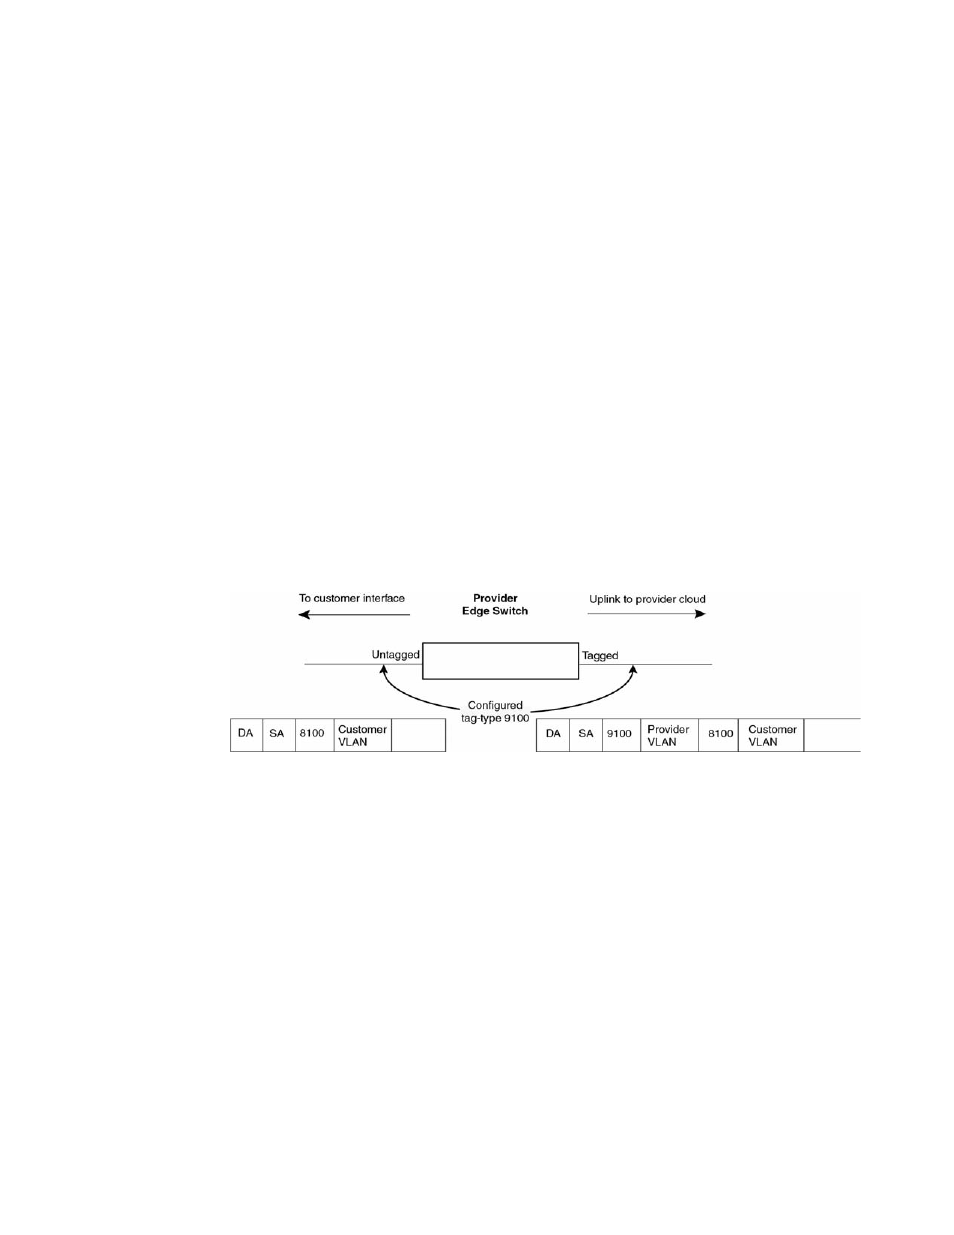
FIGURE 13
SAV configuration example
, the ports to customer interfaces are untagged, whereas the uplink ports to
the provider cloud are tagged, because multiple client VLANs share the uplink to the provider cloud.
In this example, the Brocade device treats the customer’s private VLAN ID and 8100 tag type as
normal payload, and adds the 9100 tag type to the packet when the packet is sent to the uplink
and forwarded along the provider cloud.
As long as the switches in the provider’s network support the 9100 tag type, the data gets switched
along the network. However, devices that do not support the 9100 tag type may not properly handle
the packets.
show an example application of 802.1Q-in-Q.
FIGURE 14
802.1Q-in-Q configuration example