Rolling trim – Grass Valley EDIUS Neo 3 User Manual
Page 432
430
EDIUS NEO — User Reference Guide
Section 5 — Timeline Operations
The cursor changes shape as shown in
3.
Drag the cursor to the left or right to change the section of the clip that
is used.
Note
You can fine tune trimming by 1-frame or 10-frame units by using the trim
buttons in the trim window or the corresponding keyboard shortcuts. See
Trim Mode Operation Buttons
for more details.
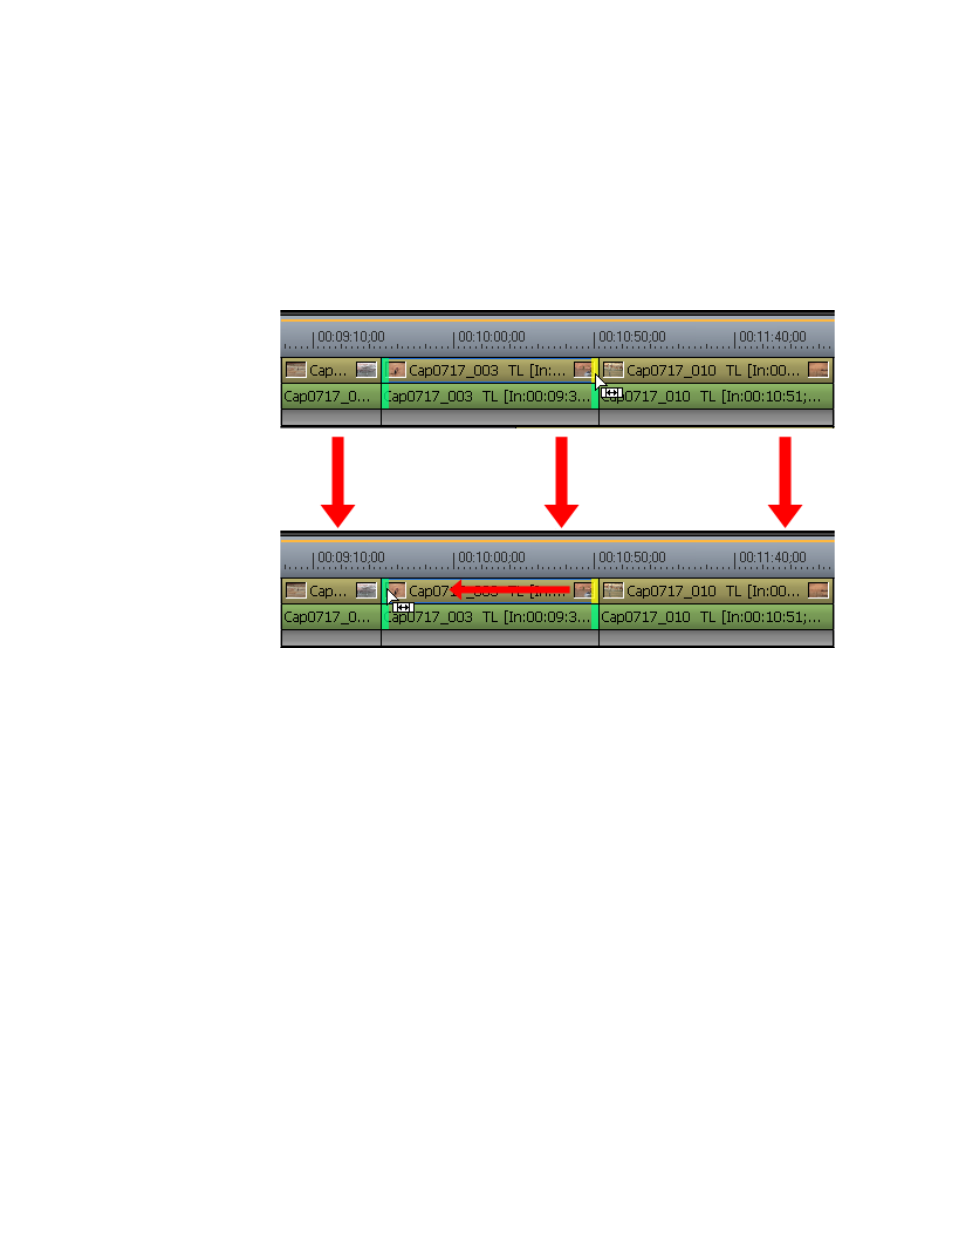
Figure 488. Slip Trim
Rolling Trim
Rolling trim shifts the start and end points of clips before and after the
selected clip. The length of the selected clip is not changed nor is the overall
length of all the clips.
Note
When Ripple Mode is On, rolling trim is not allowed if there is no margin
between the clip to be trimmed and adjacent clips. When trimming clips with
a margin, trimming can only be done up to the length of the margin.
1.
While holding down the [
CTRL
] key, click the end (Out point) of the clip
before the clip to be trimmed and the beginning (In point) of the clip
after the clip to be trimmed.
The color of the trim handle ar the edit point changes to green or yellow
and trimming is enabled. See
Note
You may also select the edit points at the ends of the clip nearest to the Time-
line cursor on the selected track by clicking the Trim Mode (Roll) button in
the Trim window.