Add e3 plus devices to your logix designer project – Rockwell Automation 193 Drives and Motion Accelerator Toolkit Quick Start User Manual
Page 322
322
Rockwell Automation Publication IASIMP-QS019E-EN-P - August 2013
Appendix G
Controller, Network, and Device Configuration Without the DMAT Wizard
Add E3 Plus Devices to Your Logix Designer Project
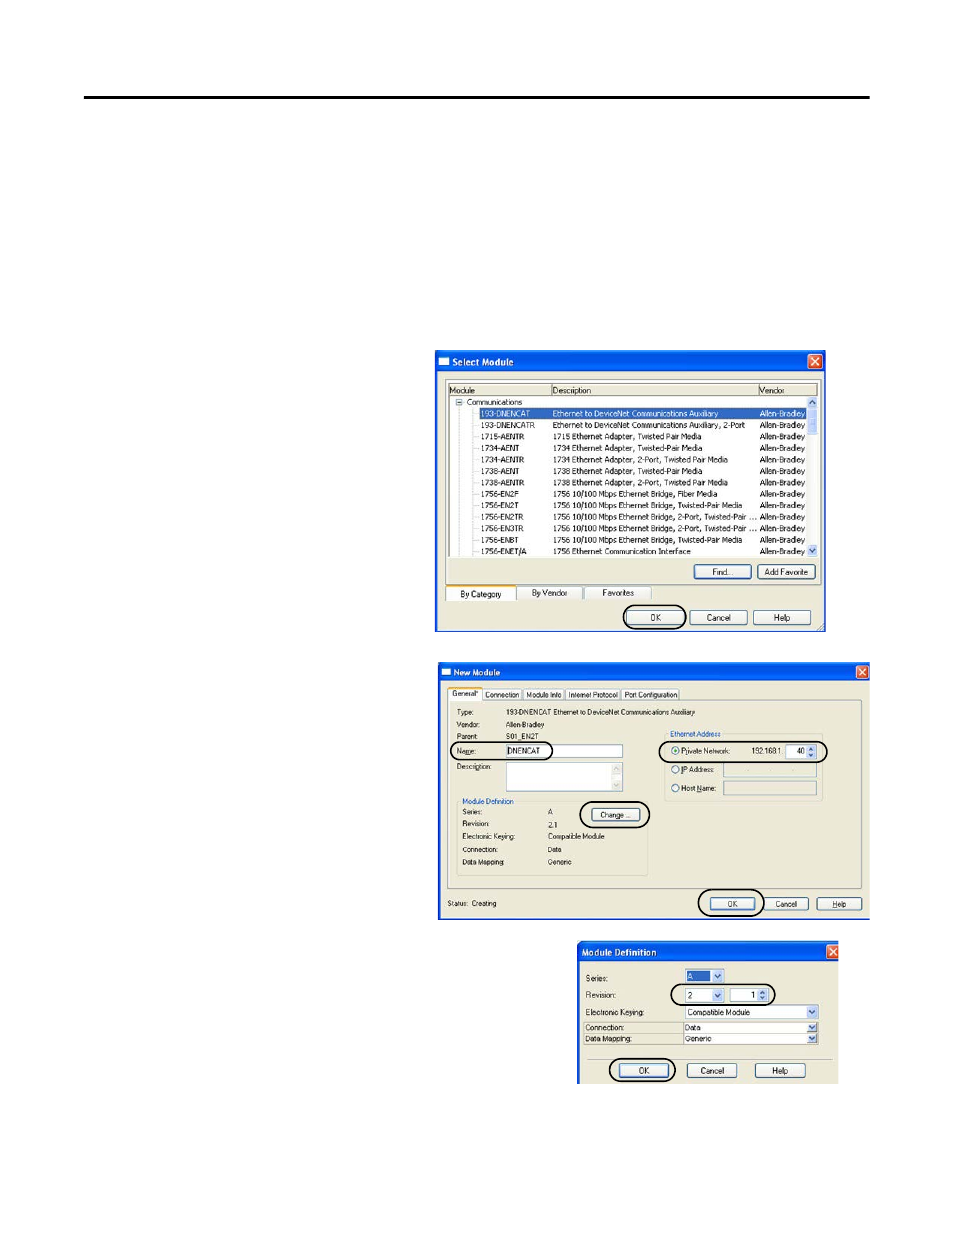
Follow these steps to add each 193-DNENCAT device in your system to the Logix Designer project file.
1.
Open your Logix Designer project file created in the previous section (for the Widgomatic example the
project file was named Widgomatic.acd).
2.
Expand the I/O Configuration folder in the Controller Organizer and browse to the controller backplane.
3.
Right-click the network communication module for your E3 Plus Device and choose New Module.
The Select Module dialog box opens.
4.
Expand the Communications folder and
select the Ethernet to DeviceNet
Communications Auxiliary module.
5.
Click OK.
The New Module dialog box opens.
6.
Name the module.
7.
Enter the IP Address.
8.
In the Module Definition field, click
Change.
The Module Definition dialog box opens.
9.
Enter the series and revision appropriate for your hardware.
10.
Click OK to save and close the Module Definition dialog box.
11.
Click OK to save and close the New Module dialog box.
- 150 Drives and Motion Accelerator Toolkit Quick Start 21G Drives and Motion Accelerator Toolkit Quick Start 20G Drives and Motion Accelerator Toolkit Quick Start 20F Drives and Motion Accelerator Toolkit Quick Start 2097 Drives and Motion Accelerator Toolkit Quick Start 2094 Drives and Motion Accelerator Toolkit Quick Start