Configure the sercos module – Rockwell Automation 193 Drives and Motion Accelerator Toolkit Quick Start User Manual
Page 274
274
Rockwell Automation Publication IASIMP-QS019E-EN-P - August 2013
Appendix G
Controller, Network, and Device Configuration Without the DMAT Wizard
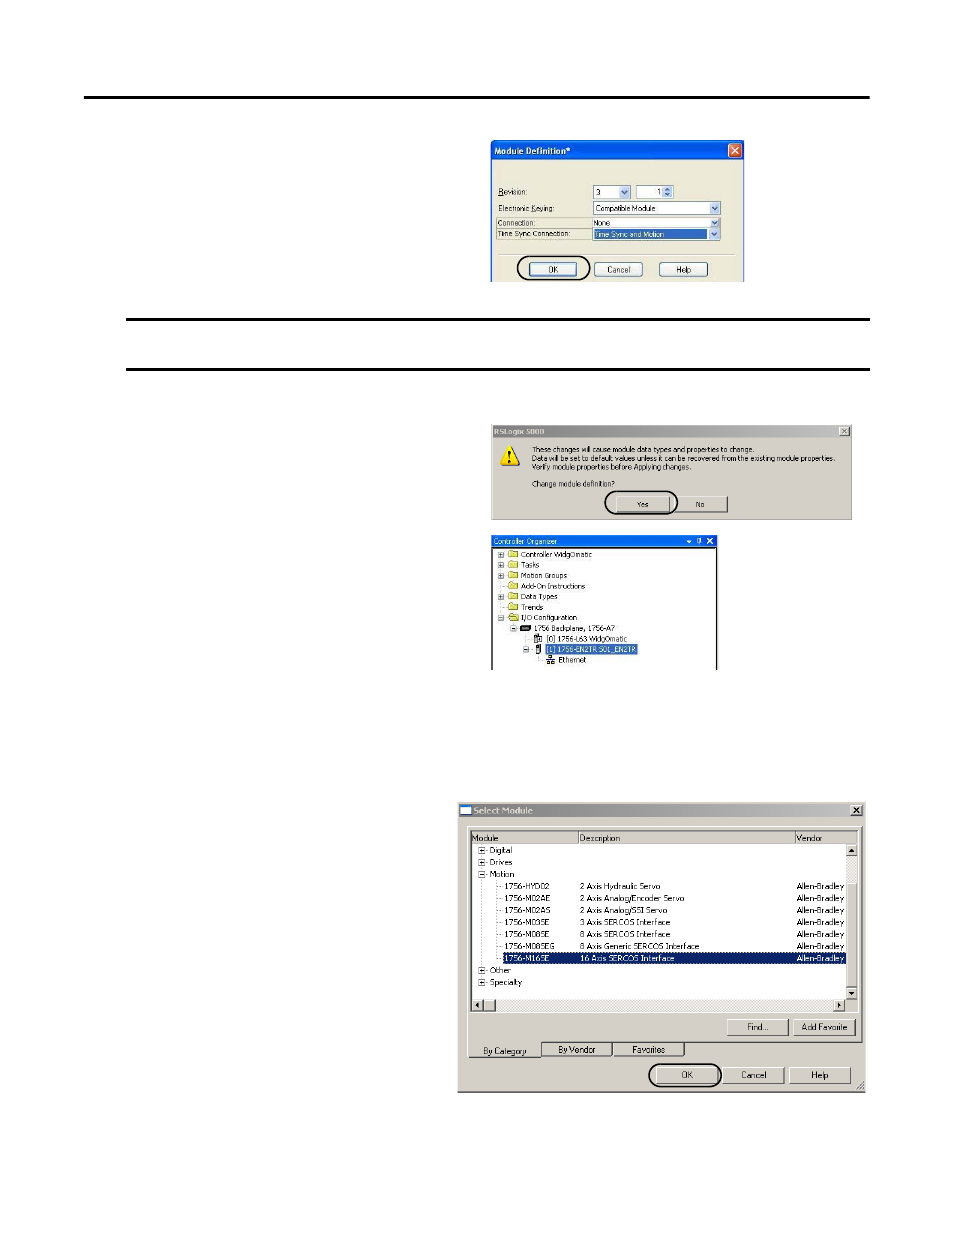
The Module Definition dialog box opens.
7.
From the Time Sync Connection pull-down
menu, choose Time Sync and Motion.
8.
Click OK to close the Module Definition dialog box.
9.
Click Yes when prompted to confirm your module
definition changes.
10.
Click OK to close the New Module dialog box.
Your new module appears under the I/O
Configuration folder in the Controller Organizer.
Configure the Sercos Module
Follow these steps to configure sercos communication,
for Kinetix 6200, Kinetix 6000, Kinetix 6000M, Kinetix 2000, Kinetix 7000, or Ultra3000 sercos drives used in
your application.
1.
Right-click I/O Configuration in the Controller Organizer and choose New Module.
The Select Module dialog box opens.
2.
Expand the Motion category and select
1756-M
xxSE or 1768-M04SE as appropriate
for your actual hardware configuration.
In this example, the 1756-M16SE module is
selected.
3.
Click OK.
IMPORTANT
Time Sync functionality is what enables motion control on an Ethernet network. Without this setting, you won’t be able to
run your motion application.
- 150 Drives and Motion Accelerator Toolkit Quick Start 21G Drives and Motion Accelerator Toolkit Quick Start 20G Drives and Motion Accelerator Toolkit Quick Start 20F Drives and Motion Accelerator Toolkit Quick Start 2097 Drives and Motion Accelerator Toolkit Quick Start 2094 Drives and Motion Accelerator Toolkit Quick Start