Configure the ethernet module – Rockwell Automation 193 Drives and Motion Accelerator Toolkit Quick Start User Manual
Page 273
Rockwell Automation Publication IASIMP-QS019E-EN-P - August 2013
273
Controller, Network, and Device Configuration Without the DMAT Wizard
Appendix G
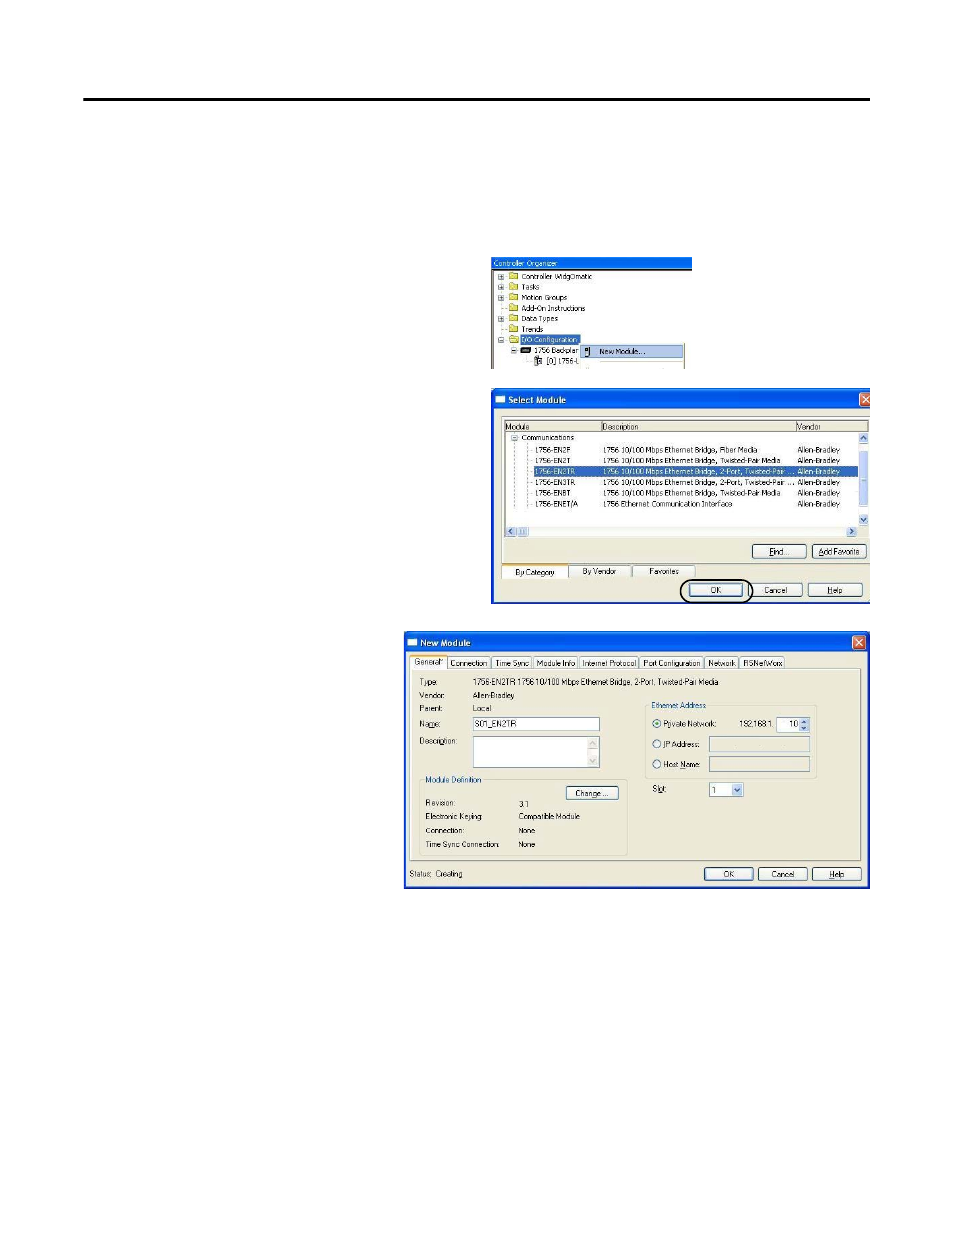
Configure the Ethernet Module
Follow these steps to configure Ethernet communication for your HMI terminal, PowerFlex drive, Kinetix 300,
Kinetix 5500, and Kinetix 6500 servo drives.
1.
Expand I/O Configuration in the Controller
Organizer.
2.
Right-click I/O Configuration and choose New
Module.
The Select Module dialog box opens.
3.
Expand the Communications category and select
your 1756 Ethernet module.
For systems using Integrated Motion on the
EtherNet/IP network, 1756-EN2
x or 1756-EN3x
module are required.
In this example, the 1756-EN2TR module is
selected.
4.
Click OK.
The New Module dialog box opens.
5.
Configure the new module.
a. Type the module Name.
b. Enter the Logix5000 EtherNet/IP
module slot (leftmost slot = 0).
c. Select an Ethernet Address option.
In this example, the Private
Network address is selected.
d. Enter the address of your
EtherNet/IP module.
In this example, the last octet of the address is 10.
6.
Click Change in the Module Definition area.
- 150 Drives and Motion Accelerator Toolkit Quick Start 21G Drives and Motion Accelerator Toolkit Quick Start 20G Drives and Motion Accelerator Toolkit Quick Start 20F Drives and Motion Accelerator Toolkit Quick Start 2097 Drives and Motion Accelerator Toolkit Quick Start 2094 Drives and Motion Accelerator Toolkit Quick Start