Save the project file – Rockwell Automation 193 Drives and Motion Accelerator Toolkit Quick Start User Manual
Page 276
276
Rockwell Automation Publication IASIMP-QS019E-EN-P - August 2013
Appendix G
Controller, Network, and Device Configuration Without the DMAT Wizard
8.
From the Cycle Time pull-down menu, choose the Cycle Time according to this table.
Sercos Cycle Time
9.
From the Transmit Power pull-down menu, match the DIP switch setting on the drive module.
10.
Enter the Transition to Phase setting.
The Transition to Phase default setting is 4 (phase 4). The Transition to Phase setting stops the ring in the
phase specified.
11.
Click OK to close the Modules Properties dialog box.
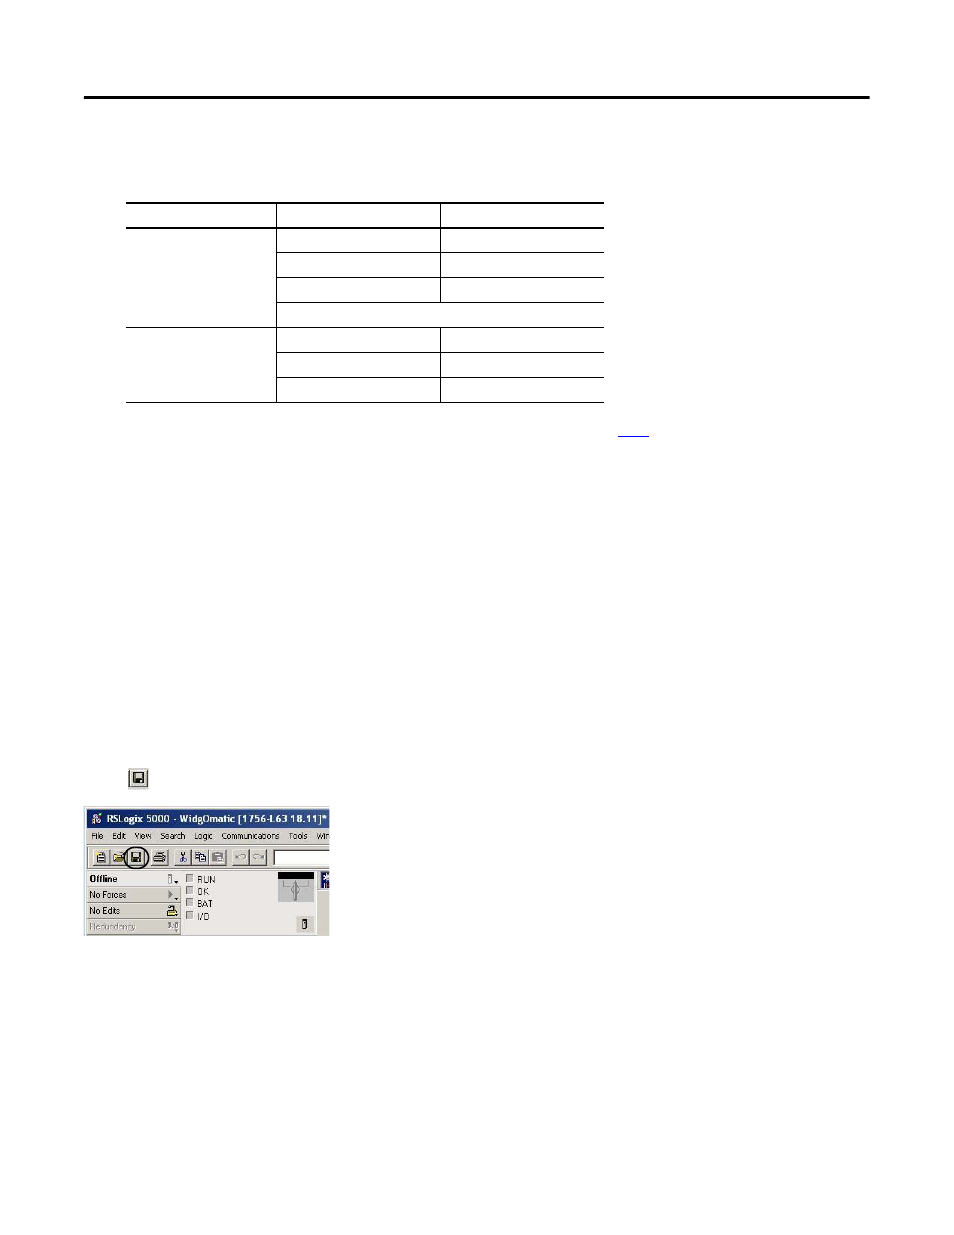
Save the Project File
When you configured the ControlLogix controller you named your (.acd) application file. In this example, the
file name is WidgOmatic. Before closing the Logix Designer application, save your file.
Click
to save your Logix Designer application file.
Data Rate
Number of Axes
Cycle Time
4 Mbps
Up to 2
0.5 ms
Up to 4
1 ms
Up to 8
2 ms
No support for axes 9…16
8 Mbps
Up to 4
0.5 ms
Up to 8
1 ms
Up to 16
2 ms
TIP
The number of axes/module is limited to the number of axes as shown in
.
- 150 Drives and Motion Accelerator Toolkit Quick Start 21G Drives and Motion Accelerator Toolkit Quick Start 20G Drives and Motion Accelerator Toolkit Quick Start 20F Drives and Motion Accelerator Toolkit Quick Start 2097 Drives and Motion Accelerator Toolkit Quick Start 2094 Drives and Motion Accelerator Toolkit Quick Start