Configuring alarm messages – Maple Systems MAPware-7000 User Manual
Page 221
MAPware-7000 Programming Manual
221
1010-1040, Rev. 02
2. Create the alarm tags using the Tag Database
Before you can start creating your alarm messages, you must open the tag database
(Tags folder in the Project Information window) and assign word registers for the alarm
messages. The word registers can be internal HMC memory or registers located in a
connected PLC. Calculate how many alarm tags you need based upon the number of
alarm messages that you wish to display. Use register memory, not bit/coil memory
since alarms tag to bits in word registers (16 messages/bits per register). Also,
determine how many Acknowledge bit/coils you require and create these as well.
Note: if you selected ’16 consecutive words’ option above, then you must create 16
consecutive data registers for alarms before you continue to the next step.
3. Generate the alarm messages
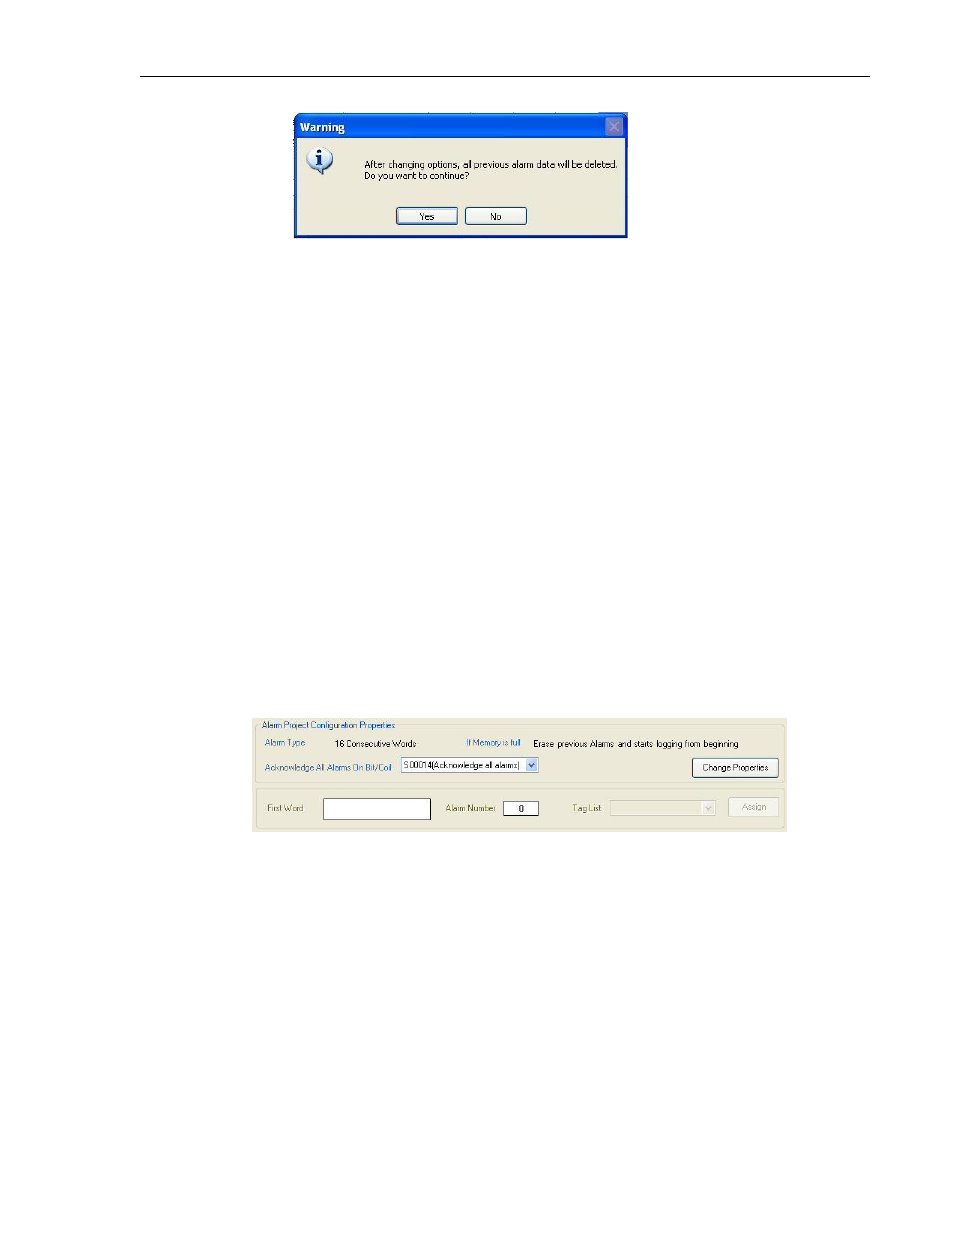
Click on the Alarms folder in the Project Information window. If you have selected the
Auto Acknowledge- Acknowledge All alarms option (see Step 1. Parameter 2 above),
then you must select a tagged coil/bit using the pull-down box next to Acknowledge All
Alarms On Bit/Coil. If you do not enter this first, the following error message displays
on the Alarm dialog box “Please select Acknowledge All Alarms field first.”
a. If 16 random words is chosen in Step 1a 16-bit word register, select the bank of
messages (i.e. 00 (000-015)) that you wish to configure under Alarm Section.
Under Tag List, click on the word register that you wish to tag to this bank, then
click Assign.
b. If 16 consecutive words are selected, go directly to the Tag List and click on a
group of 16 consecutive registers, then click Assign. If you see this:
The Assign button is unavailable. This means that MAPware-7000 does not see
16 consecutive registers in the tag database. Go back into the tag database and
verify that 16 consecutive data registers are available for the 256 alarms.
Configuring Alarm Messages
Now that you have determined the global settings for your alarms and created the tags to use
(see above section), you are now ready to configure each alarm message, along with the
particular attributes assigned to each message.
To do this, you must go back to the Alarm Project Configuration Properties dialog box (click the
Alarms folder in the Project Information window):