Go to next screen object – Maple Systems MAPware-7000 User Manual
Page 137
MAPware-7000 Programming Manual
137
1010-1040, Rev. 02
Place a Go to Screen button on screen
1. Use one of the following:
a. Click Draw…Buttons…Navigation Buttons…Go to Screen from the standard menu
b. Click Quick Buttons…Go to Screen from the Draw toolbar
2. Move
cursor to a start point for the button object. Click and hold mouse cursor.
3. Drag mouse cursor to an end point for the button object and release. The button
appears on screen and the Go to Screen Properties box displays.
Go to Screen Properties Options
Language (List J) - configure a text label for up to nine languages per object.
Appearance Feedback Tag On/Off (List L) – select the On and/or Off labels.
Button Style (List M) – selects a style or ‘look’ to the button.
Feedback Tag (List N): Enable this feature and select the same tag for both the target
address and the feedback tag address, if you wish to see the button change state (i.e. go
from an ‘off’ or untouched look to an ‘on’ or touched look).
Screen Name: select from the pull-down list box, the screen that you wish to display
when the button is pressed.
o Screen Number: this is the number assigned to the selected screen.
Simulation (List Nc) – select ‘On/Off’ to see how button looks in that state (only
available if Feedback Tag is set to ‘Yes’).
Task (List O) - Go to Screen (cannot be modified)
Design (List S) - identifies object.
Layout (List T) – coordinates (i.e. size and position) for the object.
Resize a Go to Screen button
Move the mouse pointer over one of the resize handles. When the pointer changes to a double-
headed arrow, simply click and drag to a new location.
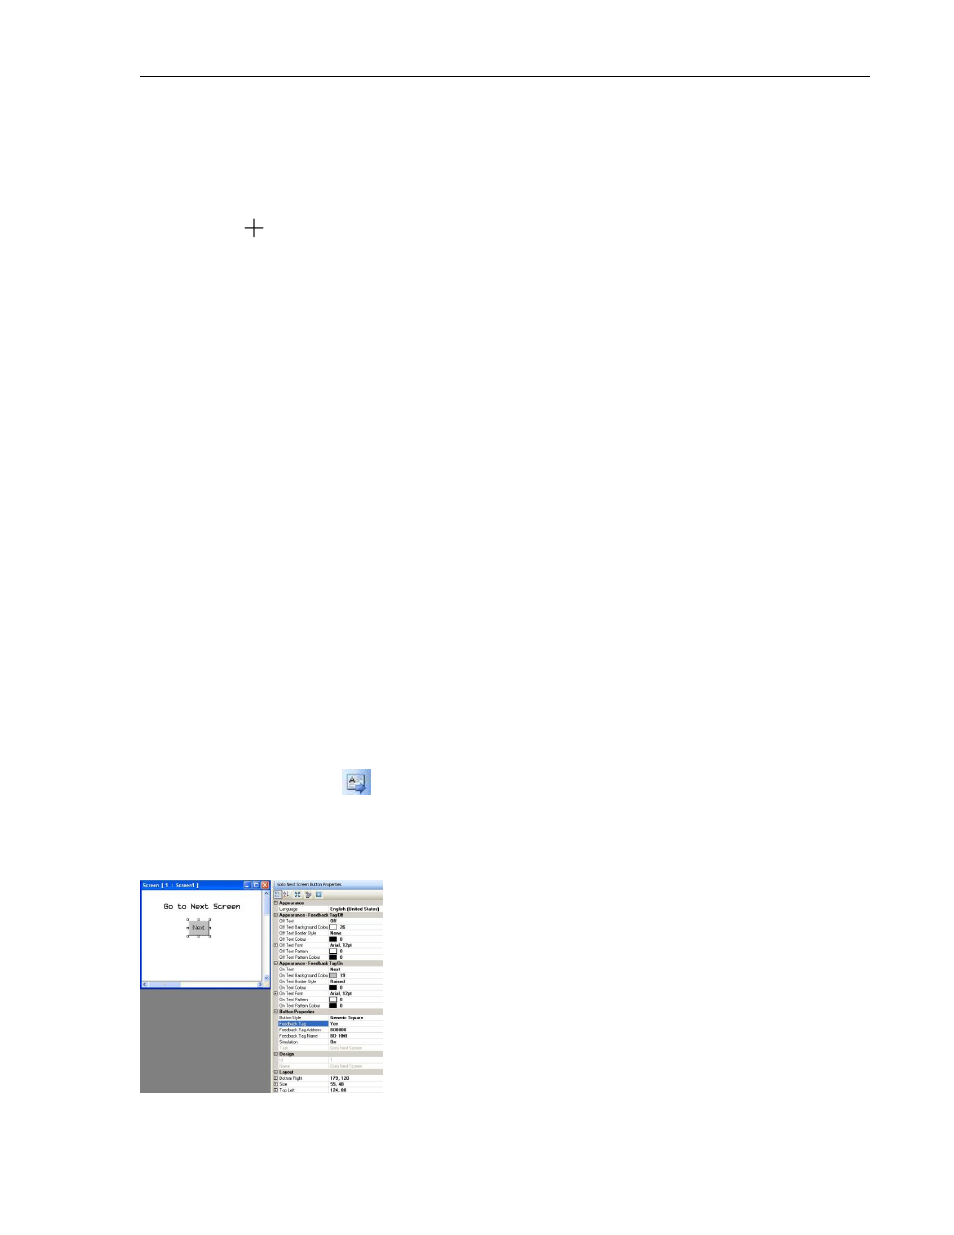
Go to Next Screen Object
Use to display a button on screen that, when pressed, displays the next screen in numerical
sequence. If there are no higher screens, then pressing this button has no effect.