Adobe InDesign User Manual
Page 606
Custom stroke styles can be saved and loaded into other InDesign documents.
1. Choose Window > Stroke to display the Stroke panel.
2. In the panel menu, choose Stroke Styles.
3. Click New.
4. Enter a name for the stroke style.
5. For Type, select one of the following:
Dash to define a style with dashes spaced at regular or varying intervals.
Striped to define a style with one or more parallel lines.
Dotted to define a style with dots spaced at regular or varying intervals.
The options in the dialog box change to match your selection.
6. For Pattern Length, specify the length of the repeating pattern (dashed or dotted styles only). The ruler updates to match the length you
specify.
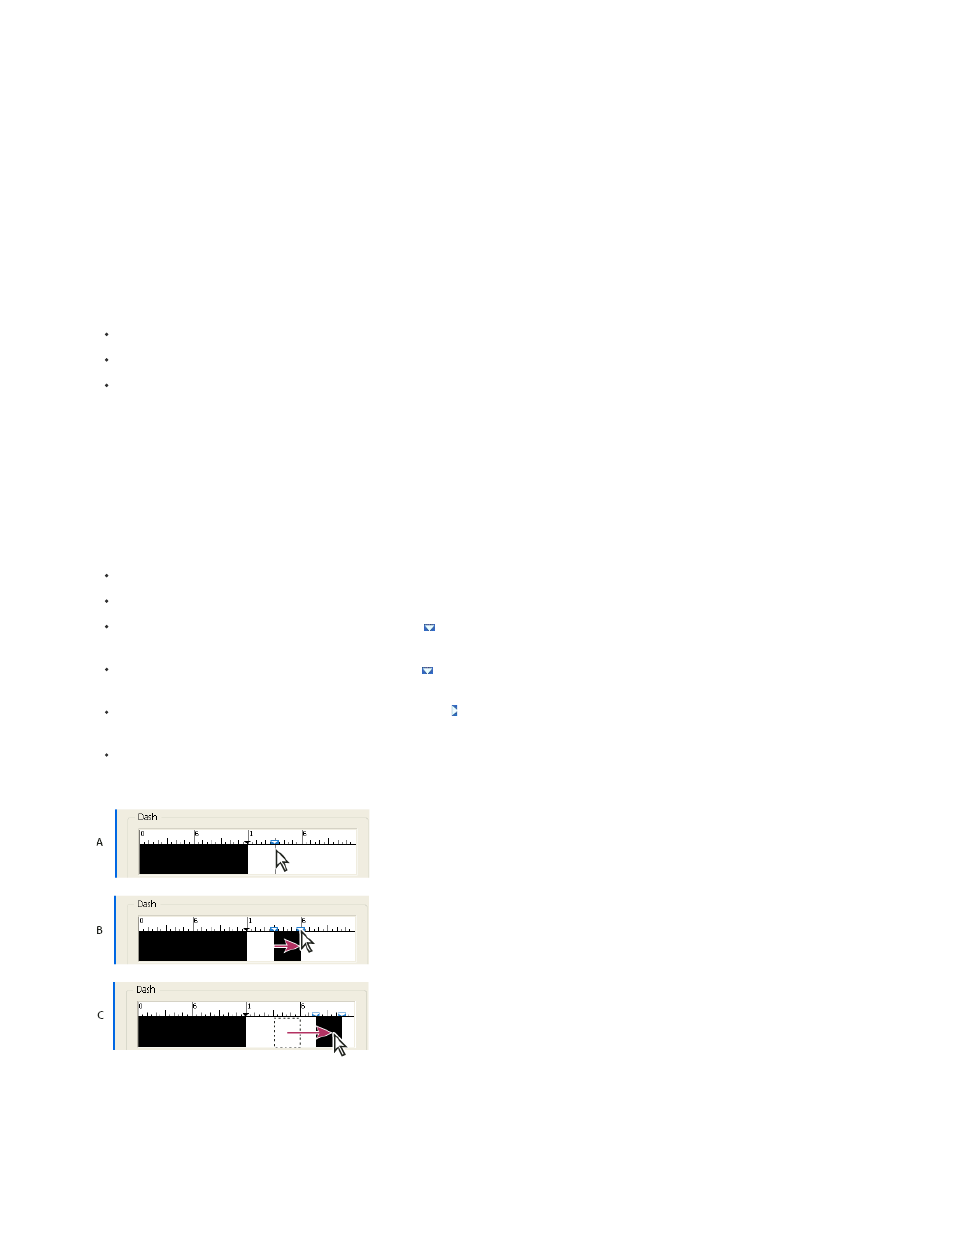
7. To define the stroke pattern, do any of the following:
Click the ruler to add a new dash, dot, or stripe.
Drag a dash, dot, or stripe to move it.
To adjust the width of a dash, move its ruler markers . You can also select the dash and then enter values for Start (where the dash
starts on the ruler) and Length.
To adjust the position of a dot, move its ruler marker . You can also select the dot and then enter a value for Center (where the center
of the dot is positioned).
To adjust the thickness of a stripe, move its ruler markers . You can also select the stripe and enter values for Start and Width, both of
which are expressed as a percentage of the stroke’s weight.
To delete a dash, dot, or stripe, drag it out of the ruler window. (However, a custom stroke style must contain at least one dash, dot, or
stripe.)
Creating a dashed line in New Stroke Style dialog box
A. Clicking to add a dash to the pattern B. Dragging a marker to make the dash wider C. Dragging the dash to adjust the white space
between dashes
601