Enter user identification workflow icons, Enter user identification, Workflow icons – Adobe InDesign User Manual
Page 105
Note:
Note:
Note:
The managed workflow makes it possible to know who has checked out files. After assignment packages are returned, stories in assignment
packages are checked in. InDesign users can check out the files to finalize the layout as necessary.
Enter user identification
All users in the workflow must have a user name. This identification reveals who has checked out a particular file and makes this information
available to other users. It’s also required in order to check out a file for editing.
If you’ve already specified a user name and want to change it, you must check in any content you have checked out. Otherwise, changing user
identification during an editing session would forfeit your ability to edit content that you have checked out—it would be checked out to you under a
different name.
User identification is application-specific; no single user can have multiple user identifications per application.
The InCopy Notes and Track Changes features also use the specified name to identify the author of a note or a tracked change.
1. Do either of the following:
Choose File > User.
Choose User from the Assignments panel menu.
2. Type a unique name and click OK.
If you forget to specify a user name using this method, you’re prompted to enter one when you attempt your first workflow action.
The Color pop-up menu in this dialog box is for identifying editorial notes and tracked changes. You can choose the color now if you want,
but it doesn’t affect anything you do in a managed workflow.
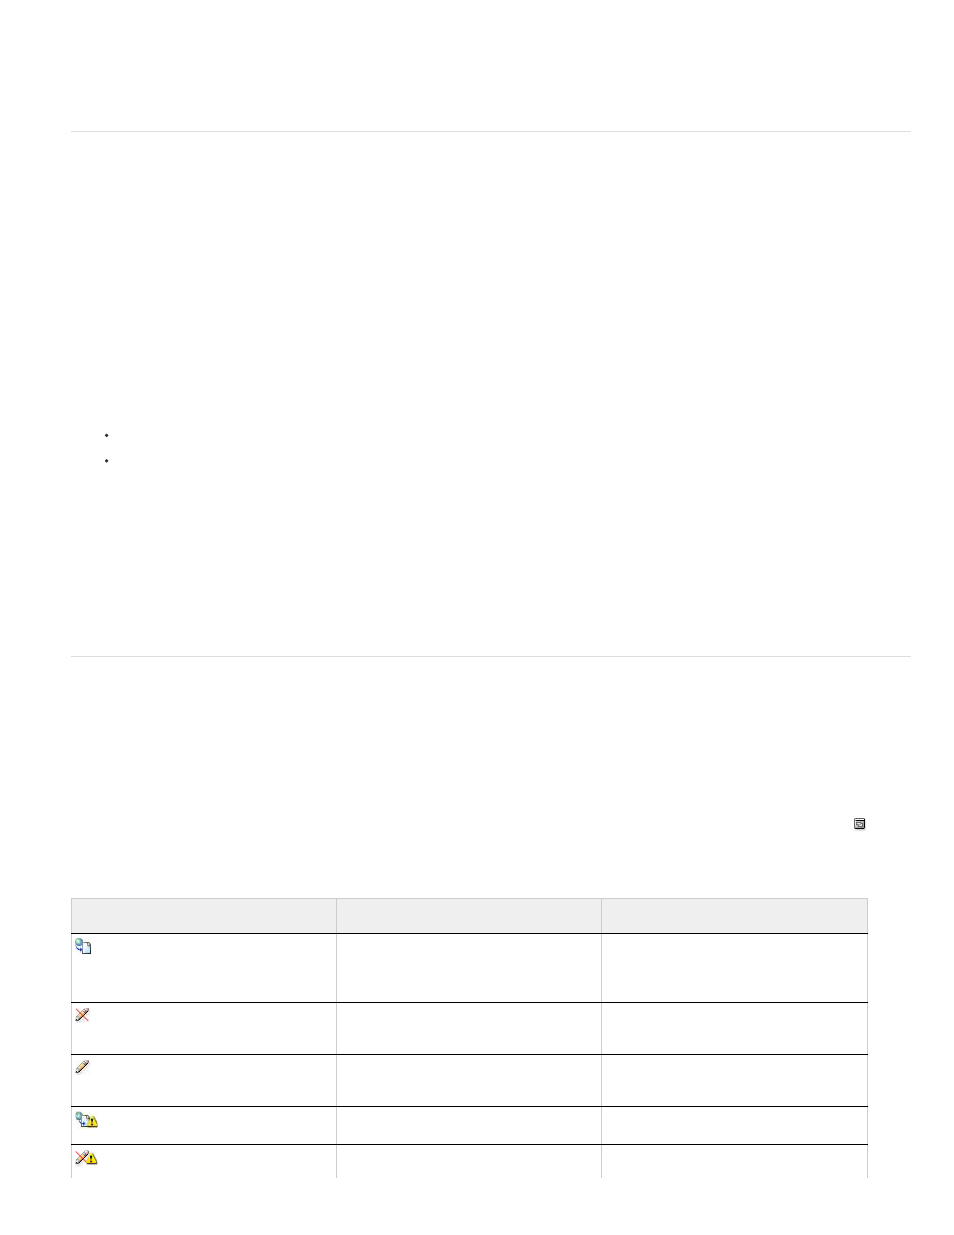
Workflow icons
Icons can appear on text and graphics frames, the Assignments panel, and in the story bar (InCopy only). Edit status icons appear next to the
managed file in the Links panel and Assignments panel, and communicate content status. Icons appear on frames that contain a linked InCopy
story (in the Layout view in both InDesign and InCopy). These icons also communicate content status and can be used to differentiate between
managed and unmanaged content. The associated tool tip indicates editing status and ownership. To view the frame icons, make sure that frame
edges are showing in InDesign and InCopy (View > Extras > Show Frame Edges).
(InDesign) The InDesign document window must be in Normal Mode for the frame edges to show. (Click the Normal Mode button at the
lower left of the toolbox.)
Icon
Name
Location
Available
Assignments panel (InDesign and
InCopy), text frames, and graphics
frames
In Use By [name]
Assignments panel, text frames, and
graphics frames
Editing
Assignments panel, text frames, and
graphics frames
Available And Out Of Date
Text and graphics frames
In Use By [name] And Out Of Date
Text and graphics frames
100