Draw straight lines followed by curves, Draw curves followed by straight lines – Adobe InDesign User Manual
Page 576
Draw straight lines followed by curves
1. Using the Pen tool, click corner points in two locations to create a straight segment.
2. Position the Pen tool over the selected endpoint. In Illustrator and InDesign, a convert-point icon appears next to the Pen tool when it is
positioned correctly (In Photoshop, a small diagonal line, or slash, appears next to the Pen tool). To set the slope of the curved segment
you’ll create next, click the anchor point, and drag the direction line that appears.
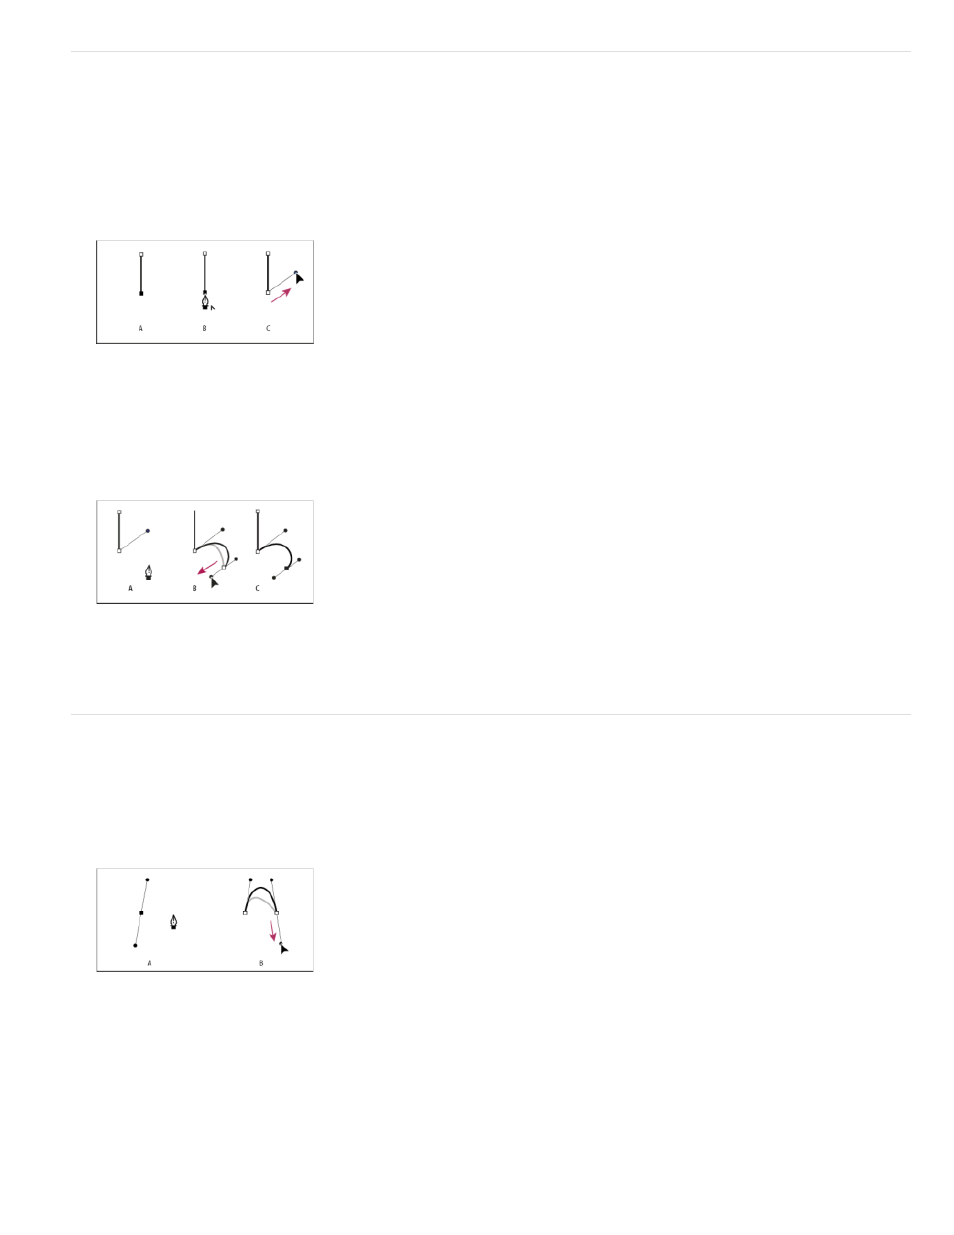
Drawing a straight segment followed by a curved segment (part 1)
A. Straight segment completed B. Positioning Pen tool over endpoint (the Convert Point icon appears only in Illustrator and InDesign) C.
Dragging direction point
3. Position the pen where you want the next anchor point; then click (and drag, if desired) the new anchor point to complete the curve.
Drawing a straight segment followed by a curved segment (part 2)
A. Positioning Pen tool B. Dragging direction line C. New curve segment completed
Draw curves followed by straight lines
1. Using the Pen tool, drag to create the first smooth point of the curved segment, and release the mouse button.
2. Reposition the Pen tool where you want the curved segment to end, drag to complete the curve, and release the mouse button.
Drawing a curved segment followed by a straight segment (part 1)
A. First smooth point of curved segment completed and Pen tool positioned over endpoint B. Dragging to complete the curve
3. Position the Pen tool over the selected endpoint. A convert-point icon appears next to the Pen tool when it is positioned correctly. Click the
anchor point to convert the smooth point to a corner point.
4. Reposition the Pen tool where you want the straight segment to end, and click to complete the straight segment.
571