Add anchored objects to type on a path – Adobe InDesign User Manual
Page 222
Facebook posts are not covered under the terms of Creative Commons.
Note:
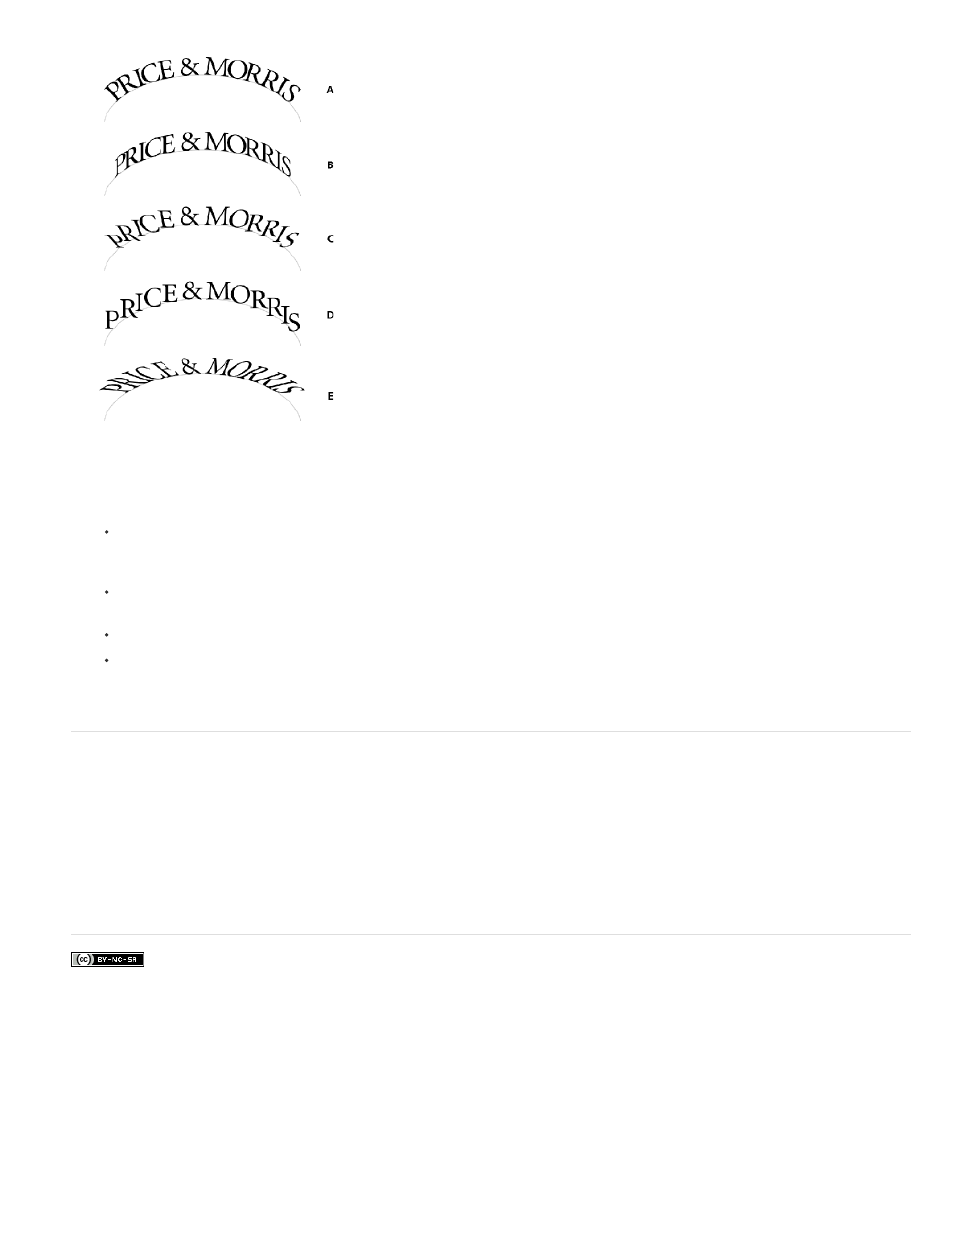
Type on a path effects
A. Rainbow effect B. Skew effect C. 3D Ribbon effect D. Stair Step effect E. Gravity effect
To keep characters’ vertical edges perfectly vertical regardless of the path shape, while letting characters’ horizontal edges follow the
path, choose Skew. The resulting horizontal distortion is useful for text that appears to follow waves or go around a cylinder, as on a
beverage can label.
To keep characters’ horizontal edges perfectly horizontal regardless of the path shape, while keeping each character’s vertical edge
perpendicular to the path, choose 3D Ribbon.
To keep the left edge of each character’s baseline on the path without rotating any characters, choose Stair Step.
To keep the center of each character’s baseline on the path while keeping each vertical edge in line with the path’s center point, choose
Gravity. You can control this option’s perspective effect by adjusting the arc of the text’s path.
Add anchored objects to type on a path
1. Using the Type tool or the Type On A Path tool, click an insertion point in the text where you want the anchor for the object to appear.
2. Add the anchored object. You can add inline or above line anchored objects or frames to the path. (See Anchored objects.)
The options available for above line anchored objects in a text path differ slightly from options for anchored objects in a regular text frame:
the Alignment option is relative to the anchored object marker and the Space Before option is not available.
217