Rockwell Automation 8520 9/Series CNC Integration Maintenance Manual Documentation Set User Manual
Page 815
Section 15B
Replacement Procedures
15B-59
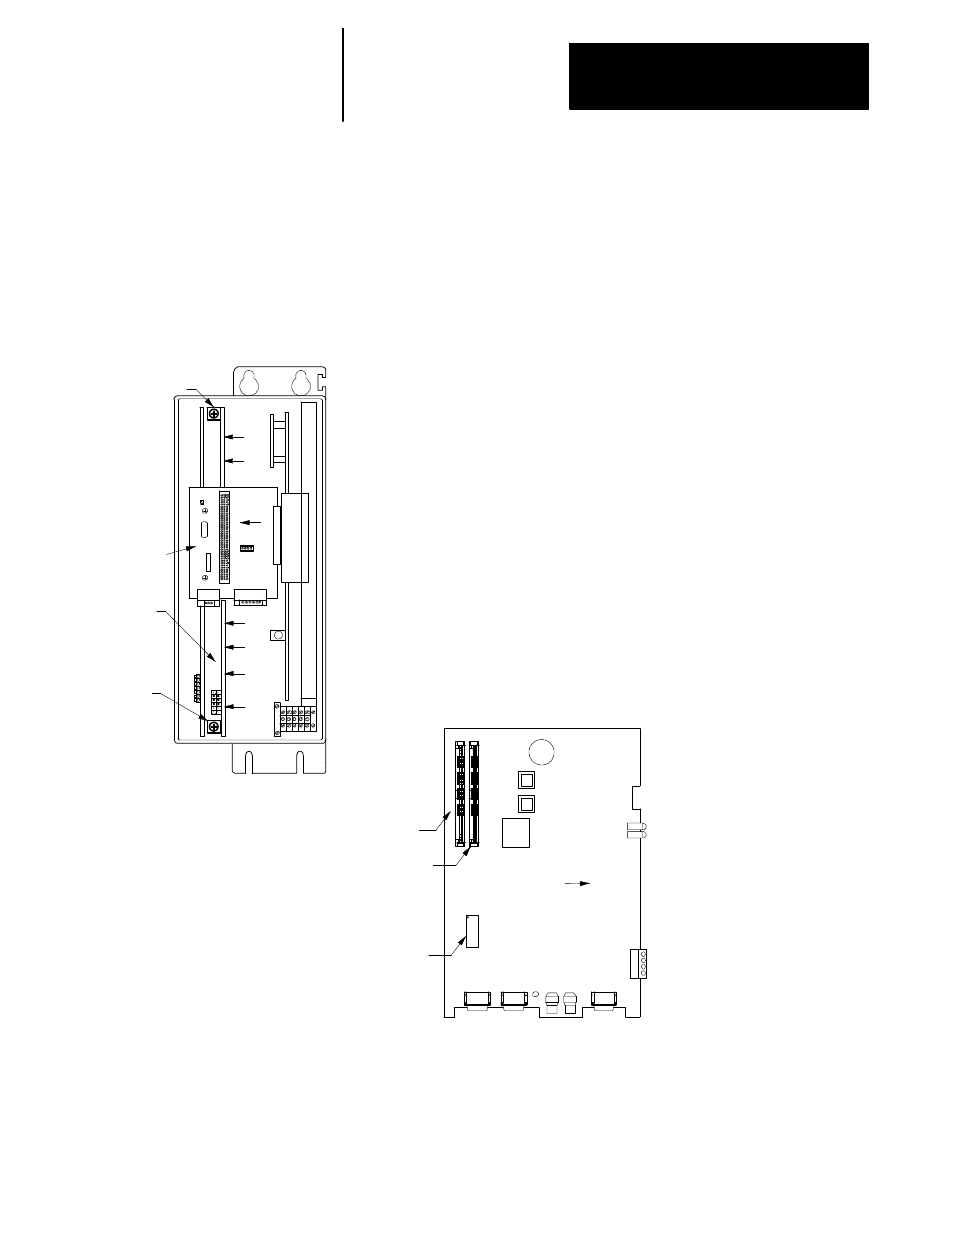
6.
Loosen or remove the bolts that mount the axis modules to the
cabinet. Disconnect axis modules from the system module by
pressing down on axis module tab and sliding to the right (away from
the system module).
7.
Unbolt system module and remove from drive cabinet.
8.
Remove the two screws holding the 9/440 CNC assembly bracket in
the system module.
9.
Push the 9/440 CNC assembly to the left (away from the axis module
mounting) to unplug the wiring board from the power portion of the
system module. Make sure the wiring board fully disengages from
the power portion of the system module.
10. Remove the two screws holding the wiring board to the 9/440 CNC
assembly and unplug the wiring board (by pulling straight out of the
system module) from the 9/440 CNC assembly.
11. Carefully slide the 9/440 CNC assembly out of the system module.
Be careful to not damage the flash and RAM SIMMS which are
mounted on the left side of the 9/440 CNC assembly.
12. If you are sending the 9/440 CNC assembly in for repair make sure
you label and remove the flash and RAM SIMMS as well as your
option chip before sending in the assembly. Repaired or replacement
units will not be shipped with these chips.
CNC Processor Board
Front of
System Module
RAM
SIMMS
Flash
SIMMS
Option
Chip
Important: Never attempt to separate the boards of the CNC assembly
(processor board/feedback board). These boards must be serviced as an
assembly.
CNC
Wiring
Board
CNC Assembly
9/440 CNC Assembly
Mounting Screw
9/440 CNC Assembly
Mounting Screw
Push 9/440 CNC assembly to the left to
unplug the wiring board after the remov-
ing assembly mounting screws.