15b.35 replacing the high density i/o – Rockwell Automation 8520 9/Series CNC Integration Maintenance Manual Documentation Set User Manual
Page 809
Section 15B
Replacement Procedures
15B-53
To replace the high density I/O:
1.
Disconnect the cable running from the external power source to the
high density I/O.
ATTENTION: To guard against electrical shock hazards, never
make connections or disconnections at the AC distribution
network unless the main AC disconnect switch is open and
locked.
2.
Disconnect the cables running from the external I/O devices to the
high density I/O.
3.
Disconnect the fiber optic cables.
4.
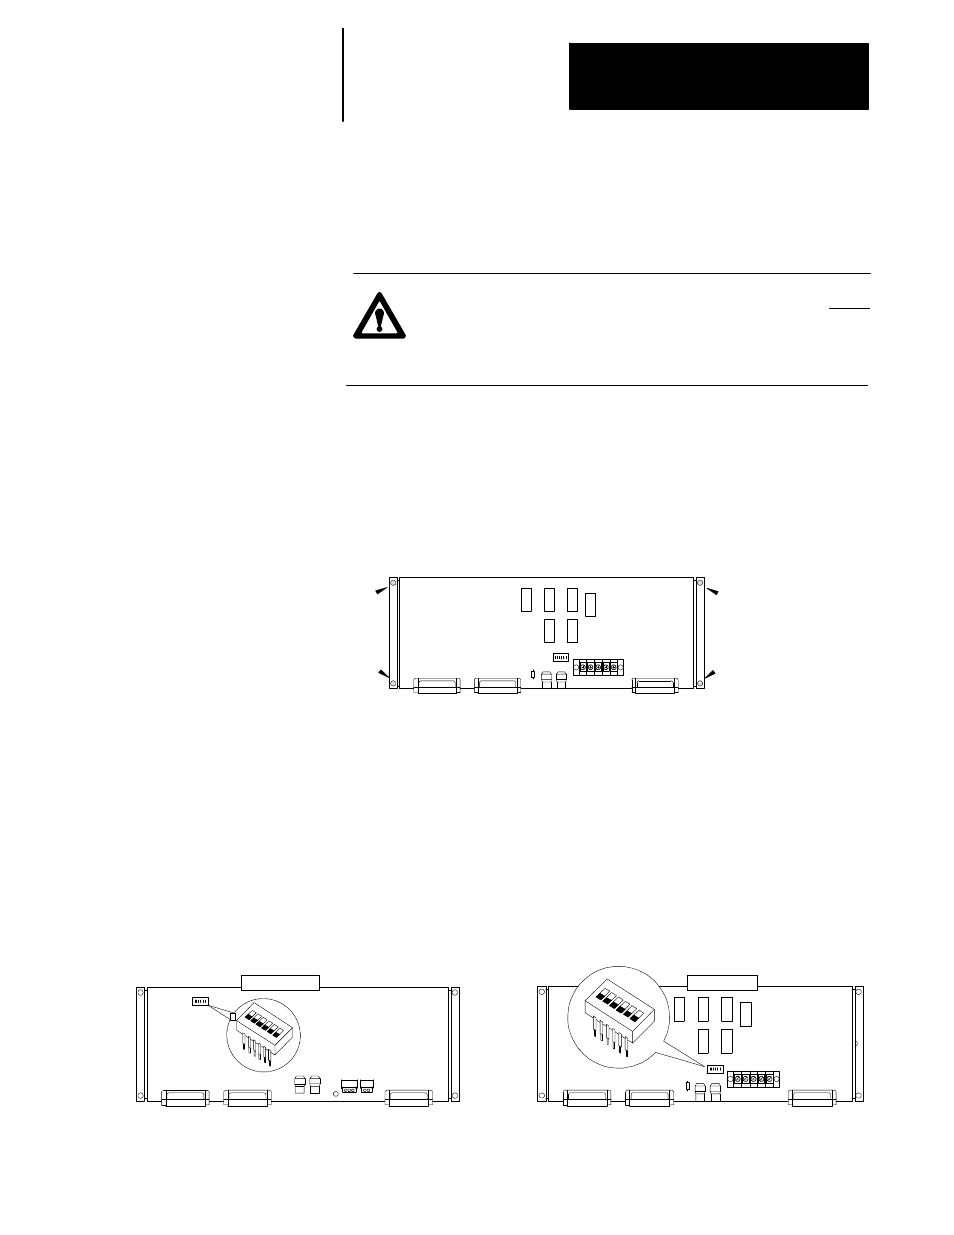
Remove the 4 mounting screws shown in the figure below that secure
the high density I/O back plate to the cabinet.
5.
Replace the old high density I/O with a new high density I/O. There
are two versions of the high density I/O module. If you are replacing
an existing module with a different version of the high density I/O
module, you will have to drill new mounting holes to secure the new
module. Refer to page 2B-21 for mounting dimensions for both of
these modules.
6.
Replace and tighten the 4 mounting screws then reconnect all cables.
7.
Set the node address to match that of the old high density I/O using
the switch assembly shown in the figure below. The location of this
switch is slightly different between the two available modules.
1 2
3 4
5 6
1 23
456
8500-HDM1
8500-HDM
15B.35
Replacing the High Density
I/O