Loudness meter] dialog box, P409 – Grass Valley EDIUS Pro v.6.5 User Manual
Page 431
409
Volume/Pan Adjustment
EDIUS - Reference Manual
3
•
During measurement, volume in the part where exceeding the target level can be adjusted with the audio mixer.
Adjusting Volume/Pan with the Audio Mixer
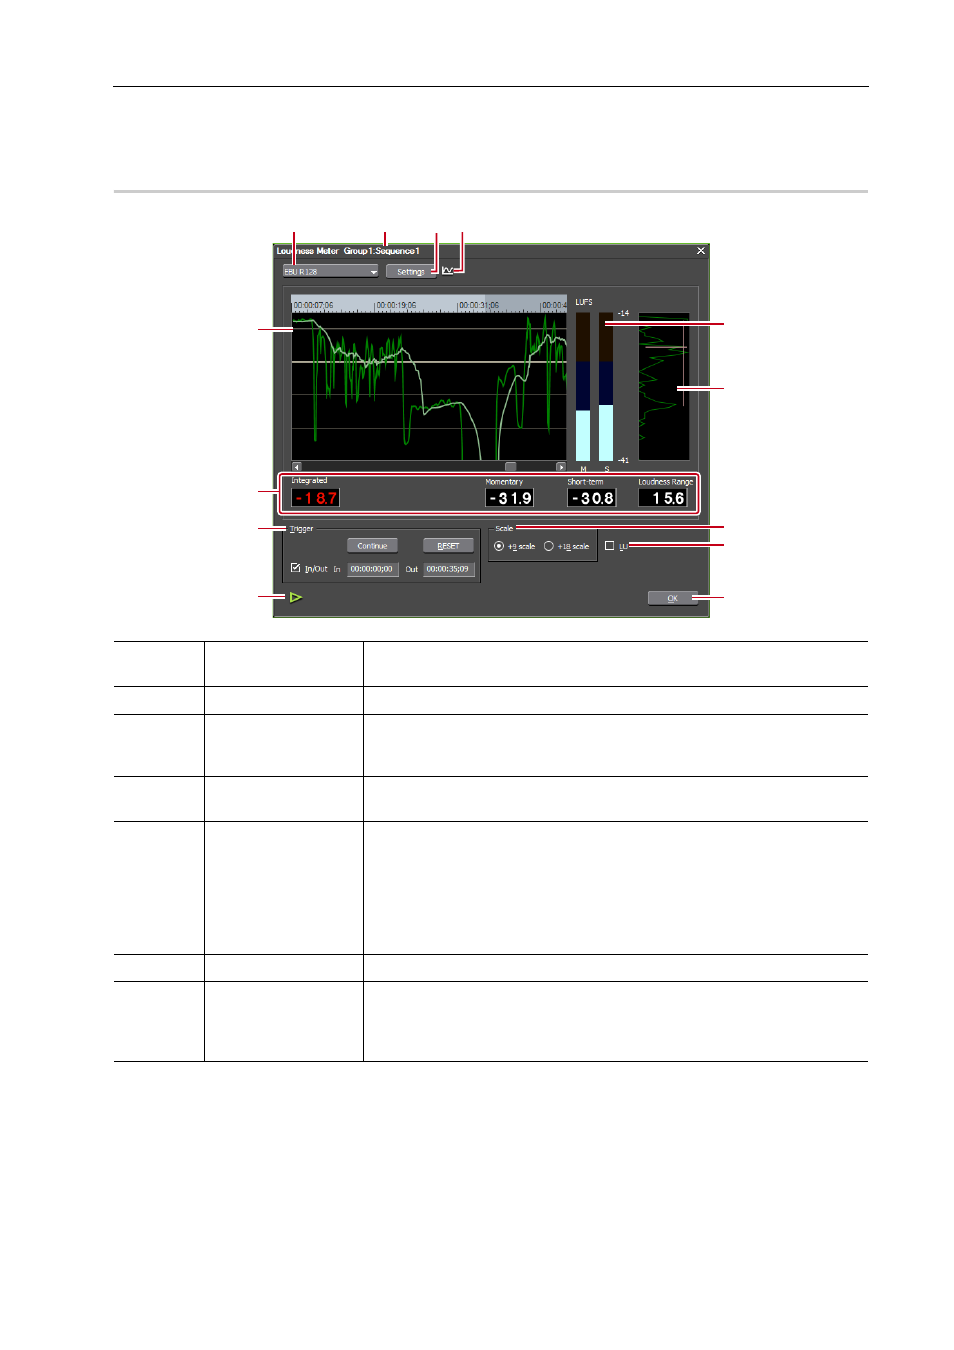
[Loudness Meter] Dialog Box
0
(1)
Loudness standard
Select the preset or the standard to be used for loudness measurement from
the list.
(2)
Measurement target
Displays the sequence name and measurement group to be measured.
(3)
[Settings]
View the settings of loudness standards and set the output channels for L/R/
C/LS/RS channels.
[Loudness Meter Settings] dialog box
(4)
Switch
measurement group
The icon is displayed when two measurement groups have been set. Click
this to switch the measurement group.
(5)
History display
Display the measurement result as a chart.
The momentary value is displayed in green, and the short term value is
displayed in light blue.
Click anywhere on the time scale and you can move to the clicked timecode
position.
Press [I] or [O] on the keyboard anywhere on the time scale to set the In or
Out point.
(6)
Level meter
Display the momentary (M) and short time (S) level.
(7)
Loudness range
Displayed when measurement is being performed by EBU R128.
A distribution based on the loudness measurement values of the history
display is displayed. When measurement ends, the loudness range and
average level are displayed on the distribution.
(1)
(5)
(6)
(2)
(4)
(8)
(7)
(10)
(11)
(13)
(9)
(12)
(3)