Fade in]/[fade out, P347 – Grass Valley EDIUS Pro v.6.5 User Manual
Page 369
347
Setting Effects
EDIUS - Reference Manual
• The operation procedure to adjust or delete the key frame with value entry is the same as in the audio rubber
band.
Initializing/Deleting Rubber Band Points
[Fade In]/[Fade Out]
You can set [Fade In] to make the video appear gradually, or [Fade Out] to make the video disappear gradually.
1 Select a clip to set fade in/fade out.
You can select multiple clips on separate tracks.
2 Move the timeline cursor to the end position of the fade in effect (or the start position of the fade out effect).
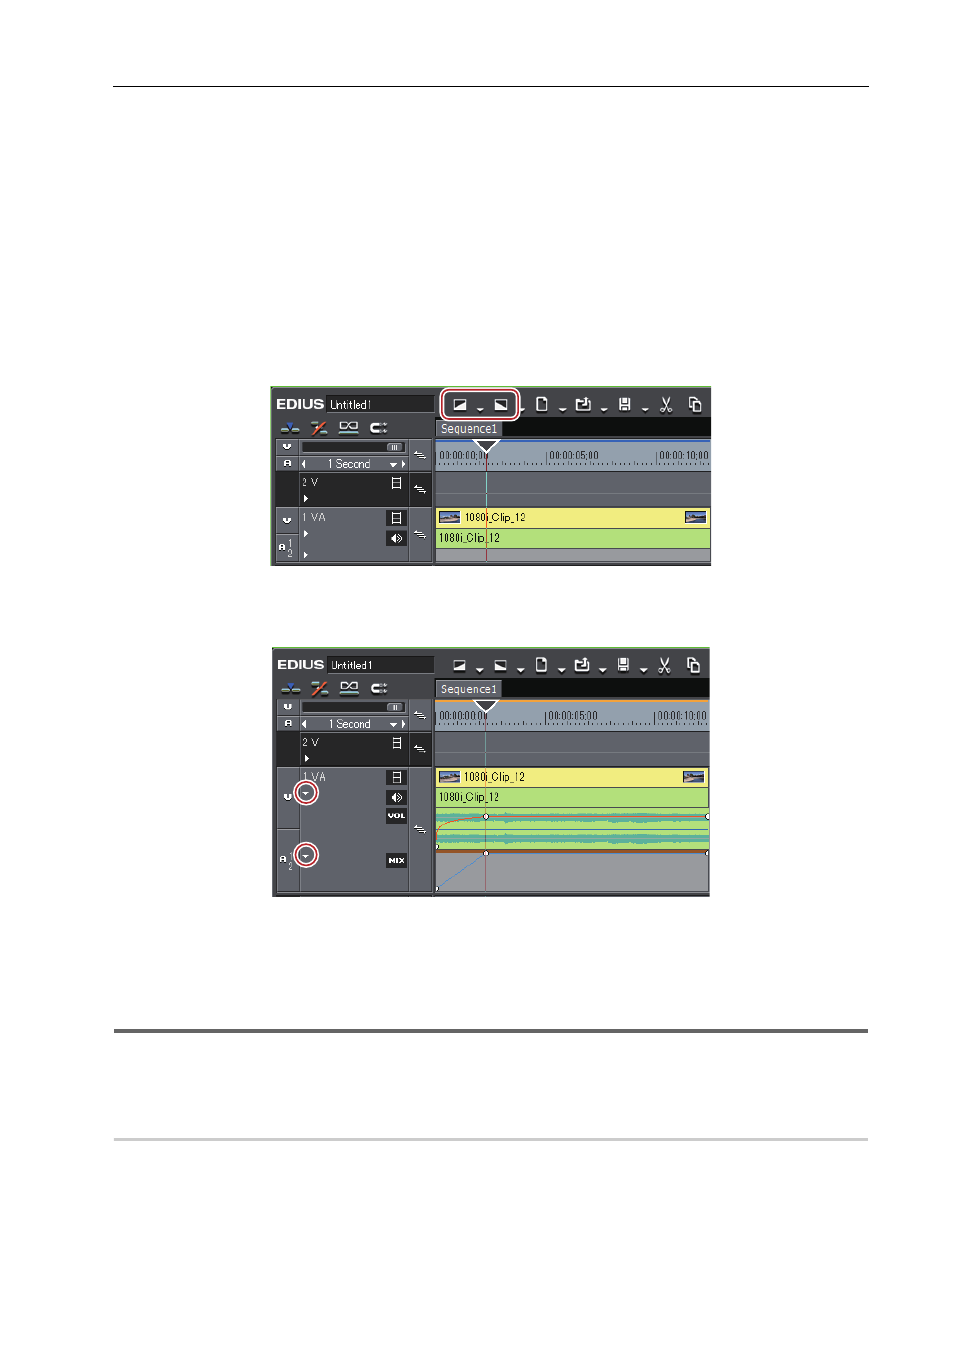
3 Click [Fade In] or [Fade Out] on the timeline.
The mixer area with [Fade In] or [Fade Out] applied is displayed with an orange line.
You can check the settings of the audio and video parts by clicking [Audio] and [Mixer] on the track panel. A key frame
is added to the position to which [Fade In] or [Fade Out] is set.
3
•
To delete the [Fade In] or [Fade Out] effect, delete both the audio part and the video parts.
- To delete the video part, select and right-click a clip, and click [Delete Parts]
→ [Mixer] → [Transparency].
- To delete the audio part, select and right-click a clip, then click [Delete Parts]
→ [Audio Rubber Band] →
[Volume].
1
Note
• [Fade In] or [Fade Out] is not shown in the default setting. Define the setting to display the button on the timeline in
advance.
Setting Fade-in/Fade-out to Video or Audio Parts Individually
0
You can set fade in or fade out effects to the video or audio parts individually.
1 Select a clip to set fade in/fade out.
You can select multiple clips on separate tracks.
2 Move the timeline cursor to the end position of the fade in effect (or the start position of the fade out effect).