Luminancekey] dialog box, P345 – Grass Valley EDIUS Pro v.6.5 User Manual
Page 367
345
Setting Effects
EDIUS - Reference Manual
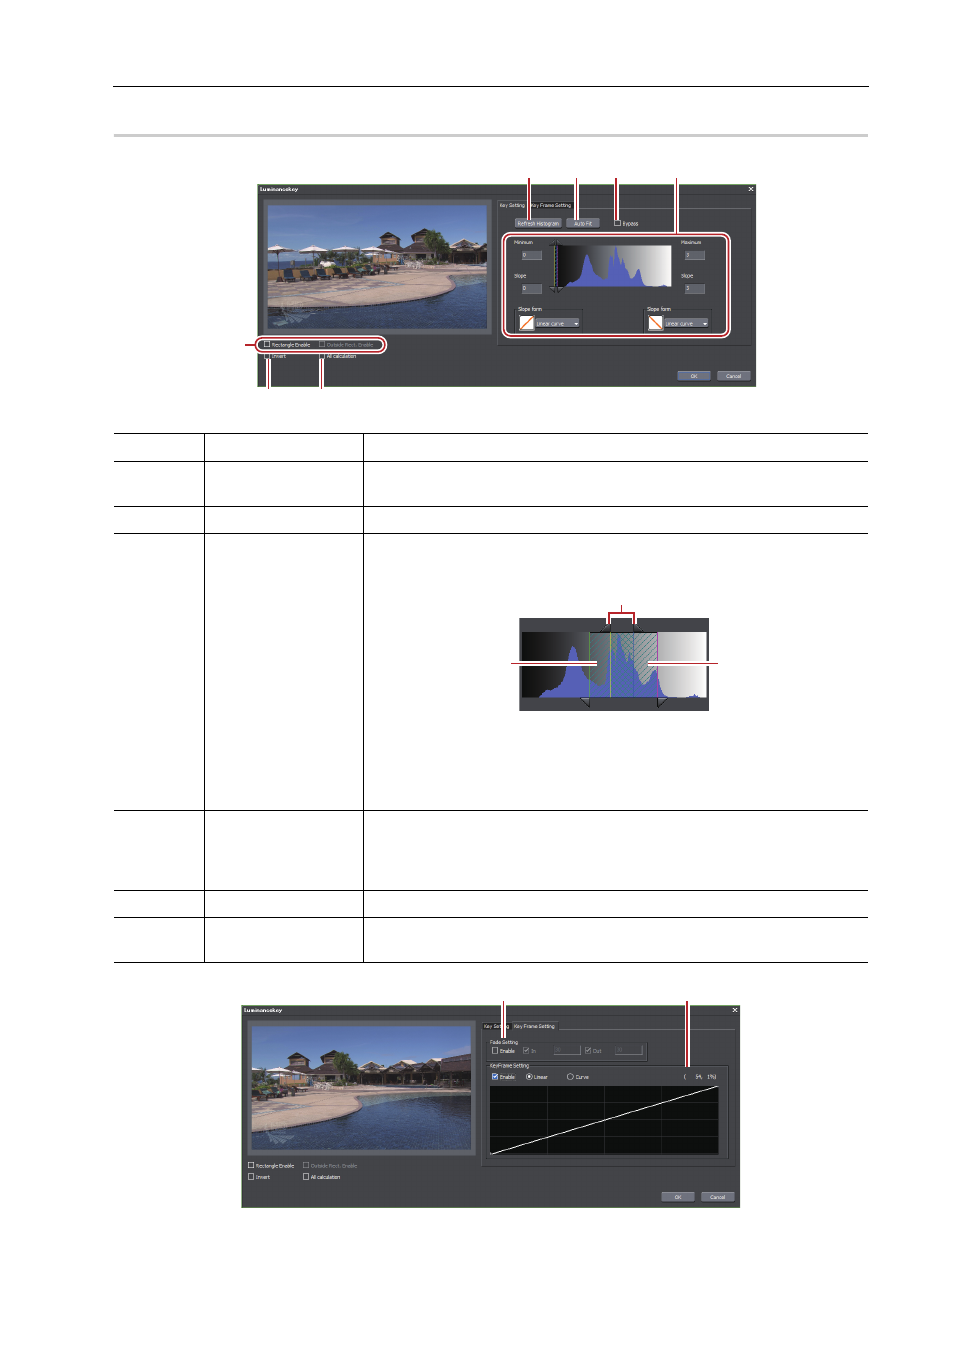
[Luminancekey] Dialog Box
0
(1)
[Refresh Histogram]
Click this button to refresh the histogram.
(2)
[Auto Fit]
Click this button to automatically define keyer settings appropriate for the
selected key color.
(3)
[Bypass]
Switch the image applied with the luminancekey and the original image.
(4)
Setting range to
apply
Set the range to apply by entering a value directly in each field or dragging
the triangle slider, or grating/slant parts.
A: Range to apply 100%
B: Range to increase the effect of luminancekey gradually
C: Range to decrease the effect of luminancekey gradually
Select the form to show increase or decrease of the effect in range B and C
(slope).
(5)
[Rectangle Enable]
Set the range to set the luminancekey. The area outside the range becomes
all transparent and the track image below is displayed through.
Select [Outside Rect. Enable] to apply the luminancekey only within the
range.
(6)
[Invert]
Invert the range with the luminancekey applied.
(7)
[All calculation]
Check this item to calculate all the area including the range specified with the
[Rectangle Enable] settings.
(1)
(2) (3)
(4)
(5)
(6)
(7)
A
B
C
(1)
(2)