About the trim window – Grass Valley EDIUS Pro v.6.5 User Manual
Page 287
265
Trimming Clips
EDIUS - Reference Manual
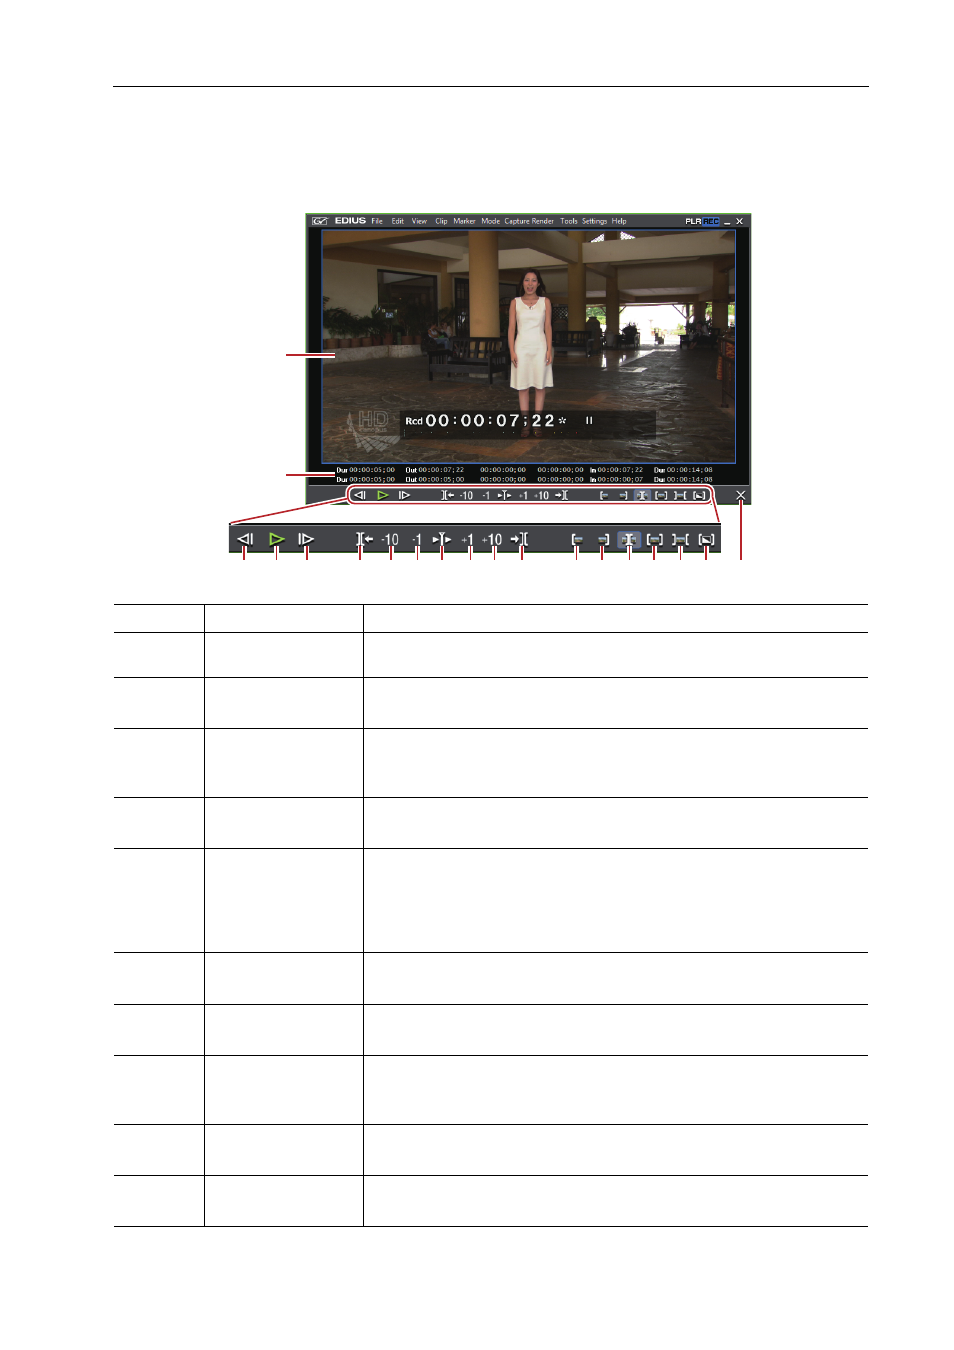
About the Trim Window
Buttons exclusively for trimming and the preview are displayed in this window. When the trim mode button is clicked,
the cut point corresponding to the trim mode is automatically selected. Trimming can also be performed more
accurately by entering numerical values to the timecode for trimming.
(1)
Preview window
Switch the display to 1/2/4 screens depending on the trimming operation.
(2)
Timecode
Display the timecode of the In or Out point of the clip to edit. You can also
change the trimming position by directly entering a numerical value.
(3)
[1 Frame Back]
Move to the previous frame.
[
←]
(4)
[Play]
Play the timeline in the forward direction. When this button is clicked during
playback, playback pauses.
[Enter]
(5)
[Next Frame]
Move to the next frame.
[
→]
(6)
[Move to Previous
Edit Point (Trim)]
Move the focus and timeline cursor to the edit point (cut point) on the left of
the current cut point position. When a cut point has not been selected, the
focus and timeline cursor move to the edit point of the selected tracks on the
left of the timeline cursor position.
[Page up]
(7)
[Trim (-10 frames)]
Adjust the trimming position in
−10-frame units.
[Shift] + [,]
(8)
[Trim (-1 frame)]
Adjust the trimming position in
−1-frame units.
[,]
(9)
[Play the Event Area] Repeatedly play back the area around the focused cut point. Click it again to
stop.
[/]
(10)
[Trim (1 frame)]
Adjust the trimming position in
+1-frame units.
[.]
(11)
[Trim (10 frames)]
Adjust the trimming position in
+10-frame units.
[Shift] + [.]
(1)
(2)
(3) (4) (5)
(6) (7) (8) (9) (10)(11) (12)
(13) (14)(15)(16) (17)(18) (19)