Bayer HealthCare Rapidlab 800 User Manual
Page 265
3Ć93
Maintaining the System
CAUTION:ĄĂ
Do not turn the needle valve too hard or damage can occur.
h. Carefully turn the needle valve adjustment knob counterclockwise until
until it stops.
i. Listen carefully for any gas leaks.
j. Check the gas line for good gas flow.
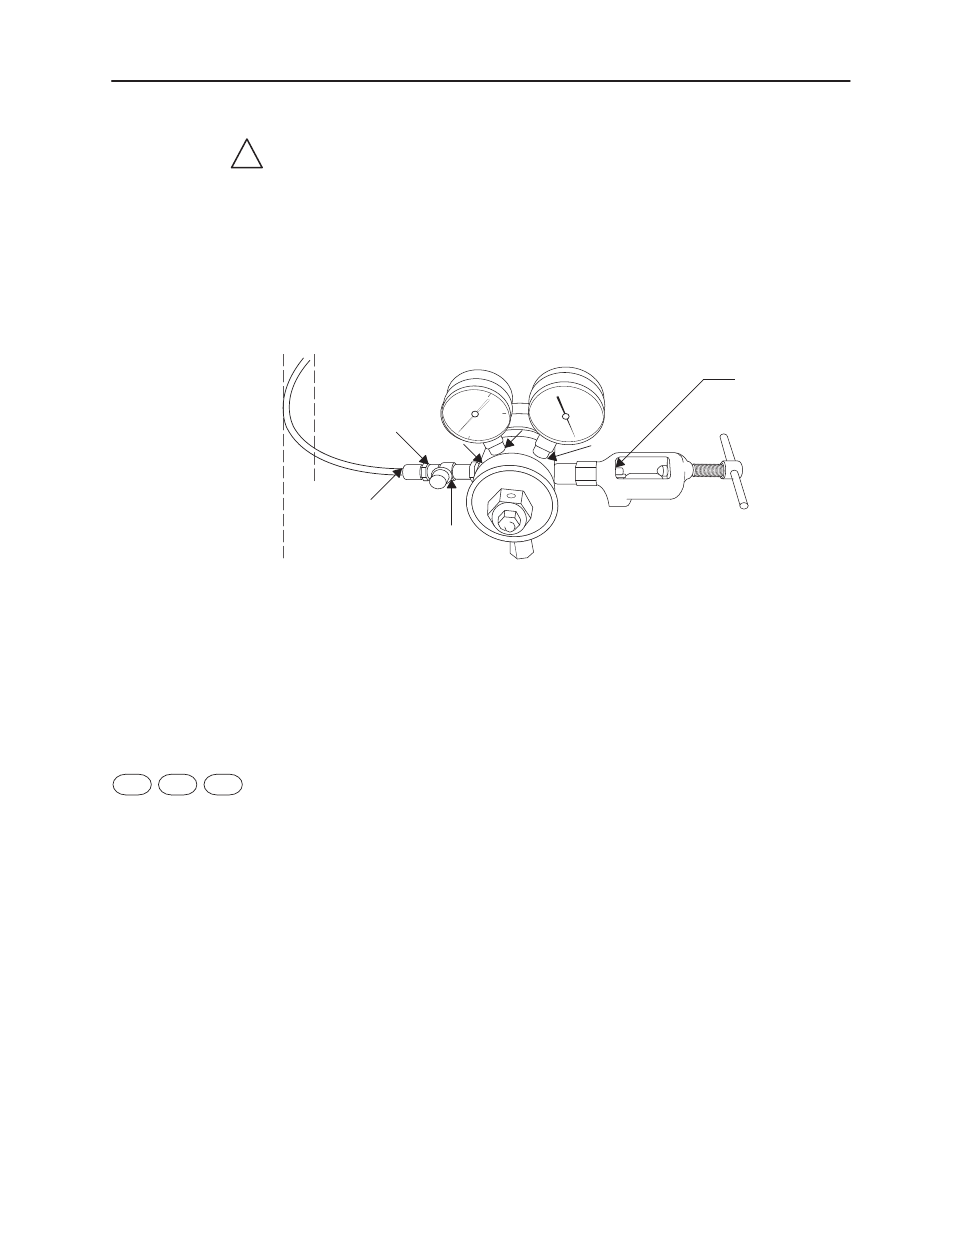
k. Visually check for leaks by applying soapy water around all connections, as
shown in Figure 3-63, and watching for bubbles.
Figure 3Ć63.āăChecking Connections for Leaks
Apply soapy water
to all connections
indicated by arrows
5.
If the 800 system will not be used for an extended period of time, close the gas
tank by turning the valve stem clockwise.
6.
Connect the gas line to the appropriate 800 system port.
7.
Press
Continue
.
A wash sequence starts. When the wash sequence finishes, a message box
appears prompting you to perform a two-point calibration.
8.
Check the gas flow rate from the Menu screen:
a. Select
3 Troubleshooting
and press
Enter
.
b. Select
1 Fluidics System
and press
Enter
.
c. Select
4 Valves
and press
Enter
.
d. Select the gas type that you replaced and press
Enter
.
e. Insert an aspiration adapter into the sample port and immerse the open end
of the adapter into a small container of reagent water.
f. Press
Start Test
.
g. Verify that a steady stream of bubbles flows into the water.
h. Press
Stop Test
.
i. Verify that the bubbles stop flowing into the water.
j. Remove the adapter.
k. Press
Exit Test
.
!
4
1
Menu Code
3
(from the Main Menu)