Virtual panels – Grass Valley NV9000-SE v.5.0 User Manual
Page 204
186
Control Panels
Installation and Connections
Virtual Panels
Virtual panels reside on users’ PCs and communicate with the NV9000 system through the PC’s
IP address. Except for the NV9647V, the various virtual panels emulate nearly completely the
hardware panels after which they are named. (There is no physical NV9647.)
Because they are software, virtual panels do not provide the GPIO functions that some physical
panels provide.
To obtain the virtual panel software (the installers actually) you must purchase a 5-seat license
and the accompanying SB0217 Virtual Panels CD. Virtual panels are available for both Macintosh
OS/X and Windows.
To install a virtual panel, locate and double click its installer on the CD. The installation takes
only a few seconds.
Virtual panels require panel IDs as do physical panels.
The instructions for assigning a panel ID to the virtual panel can be found in the virtual panel
installer’s guide that comes with the virtual panels. These are the general steps:
1 Launch the virtual panel. Usually you would double click the panel icon on your PC desktop.
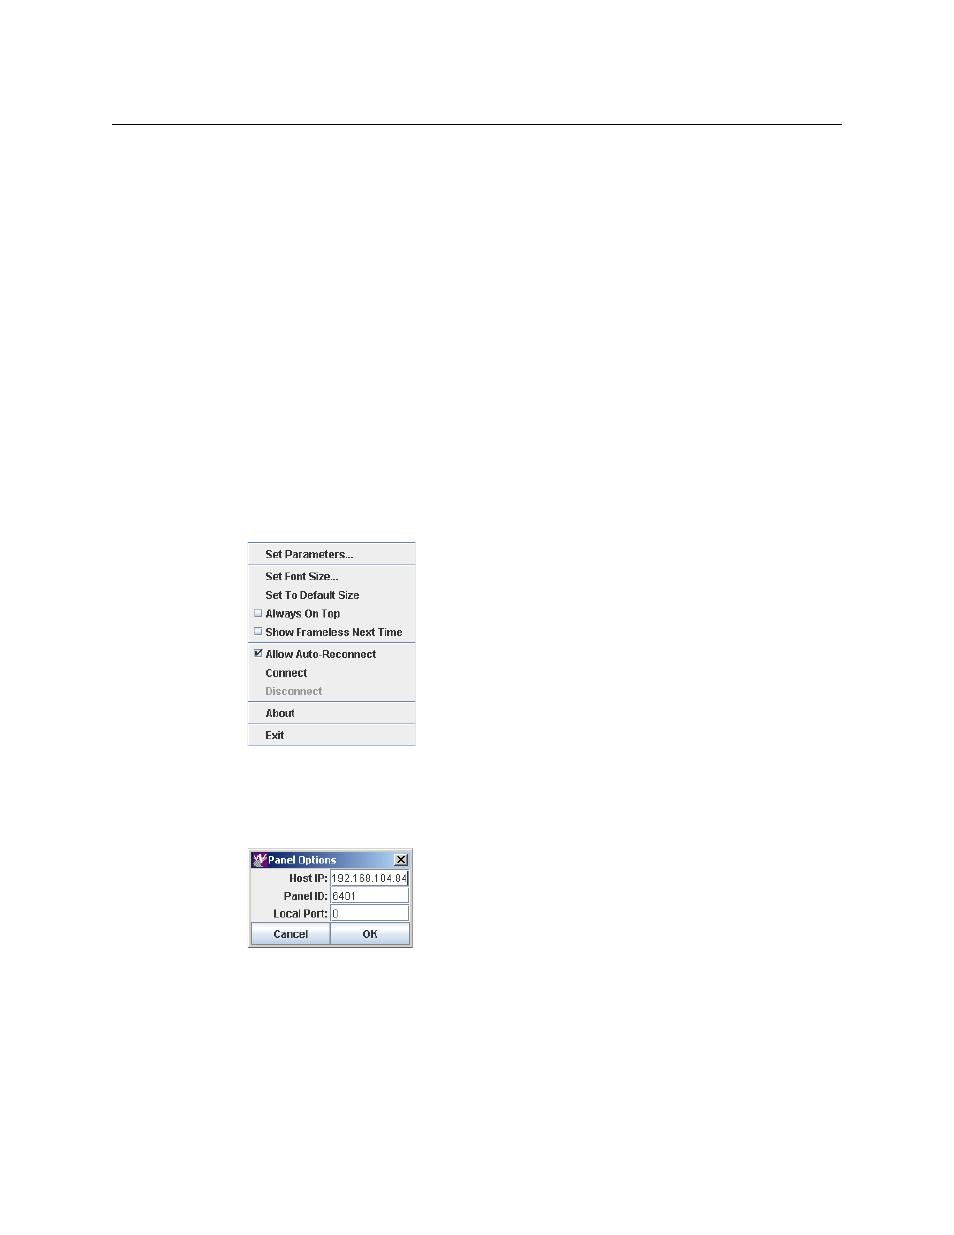
2 Right-click anywhere in the black region of the the virtual panel window. A context menu
appears:
If the panel is connected to the NV9000, the ‘Disconnect’ button will be enabled and you
should click ‘Disconnect’.
3 Again right-click anywhere in the black region of the the virtual panel window. The context
menu appears. Click ‘Set Parameters’. The ‘Panel Options’ dialog appears:
4 (If you have not done so) enter the IP address of the system controller with which your panel
is to communicate.
5 Then enter the panel’s ID in the ‘Panel ID’ field. Click ‘OK’.
6 Once more, right-click anywhere in the black region of the the virtual panel window. The
context menu appears.
The ‘Connect’ button will be enabled and you should click ‘Connect’.