Buttons, Device detail - i/o ports, Buttons device detail — i/o ports – Grass Valley NV9000-SE v.5.0 User Manual
Page 161: Device detail — i/o ports
143
NV9000-SE Utilities
User’s Guide
Buttons
At the bottom of the page are 3 simple buttons:
•
Save
Click ‘Save’ to commit (make permanent) the changes you have made in the page.
•
Revert to Saved
Click ‘Revert to Saved’ to restore the saved version of the device definition, discarding any
changes you have made (since the last save).
•
‘Save & Close’
Click ‘Save & Close’ to commit the changes you have made in the page and then close the
page.
Device Detail — I/O Ports
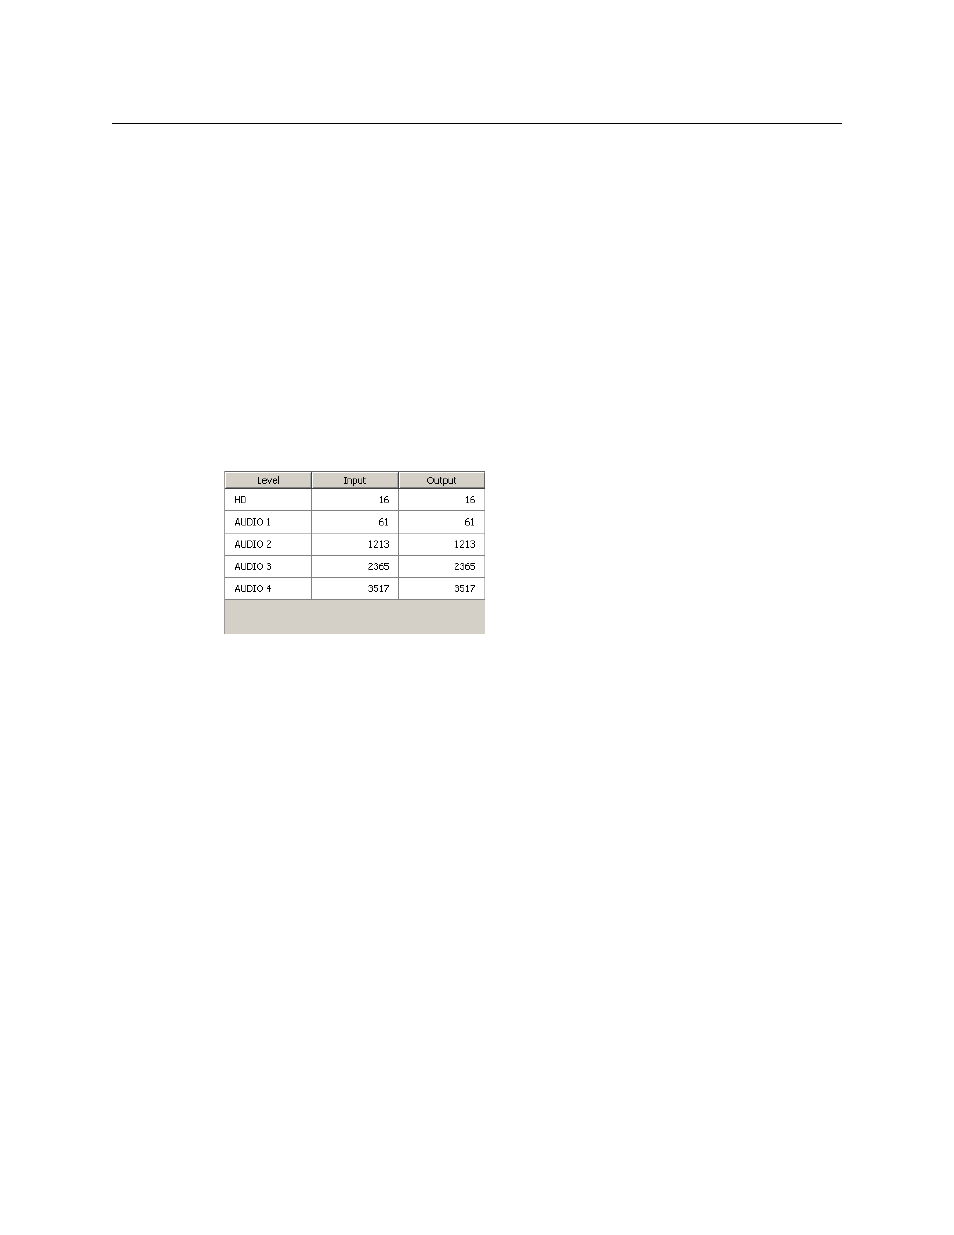
The ‘Device Details’ section is the principal part of the page. This is a sample:
It is in this table that you assign router ports to the device. (You can assign router ports to
devices in other configuration pages too.)
The rows of this table have 3 fields:
•
Level
The entries in this column of the table are the virtual levels available to the device as defined
in the level set to which the device was assigned when it was created.)
•
Input
This table column lists router input ports. Note that the router’s input ports connect to the
device’s output ports.
For each level on which your device is an input to a router, enter that router’s input port to
which the device connects. In the illustration above, the device has input connections on all
of its levels.
If the device sends no signal on that level, leave the input field blank.
•
Output
This table column lists router output ports. Note that the router’s output ports connect to the
device’s input ports.
For each level on which your device receives a signal from a router, enter that router’s output
port to which the device connects. In the illustration above, the device has output connec-
tions on all of its levels.
If the device receives no signal on that level, leave the output field blank.