Enabling a plug-in – Echelon LonMaker User Manual
Page 316
300
Using LNS Plug-ins
2. Click
Disable. The plug-in or plug-ins are added to the Pending list (they also remain under their
existing lists), and their status, “[Disable]”, is indicated.
3. Click
Apply to disable the selected plug-in or plug-ins.
4. After the plug-ins are disabled, click OK to return to the LonMaker drawing.
When a registered plug-in is disabled, it will not open when you select a default command that would
otherwise invoke it. For example, if the LonPoint Configuration plug-in is disabled and you right-click
a LonPoint functional block and click Configure, the next available plug-in, which is typically the
LonMaker Browser, opens instead of the LonPoint Configuration plug-in. You can still use a disabled
plug-in by manually invoking it. To do this, right-click the object on which you want to use the plug-
in or an empty space in the drawing page, point to Plug-ins, and then select the desired plug-in from
the shortcut menu.
If you disable an unregistered plug-in, it will not be registered in new or existing networks, even if the
Register New Plug-ins check box is selected in the New Network Options tab of the LonMaker
Design Manager or the Register All New Plug-ins check box is selected in the Plug-in Registration
dialog. You can still manually register a disabled plug-in in the network properties: Plug-In
Registration dialog in the LonMaker drawing.
Enabling a Plug-in
To enable a plug-in, follow these steps:
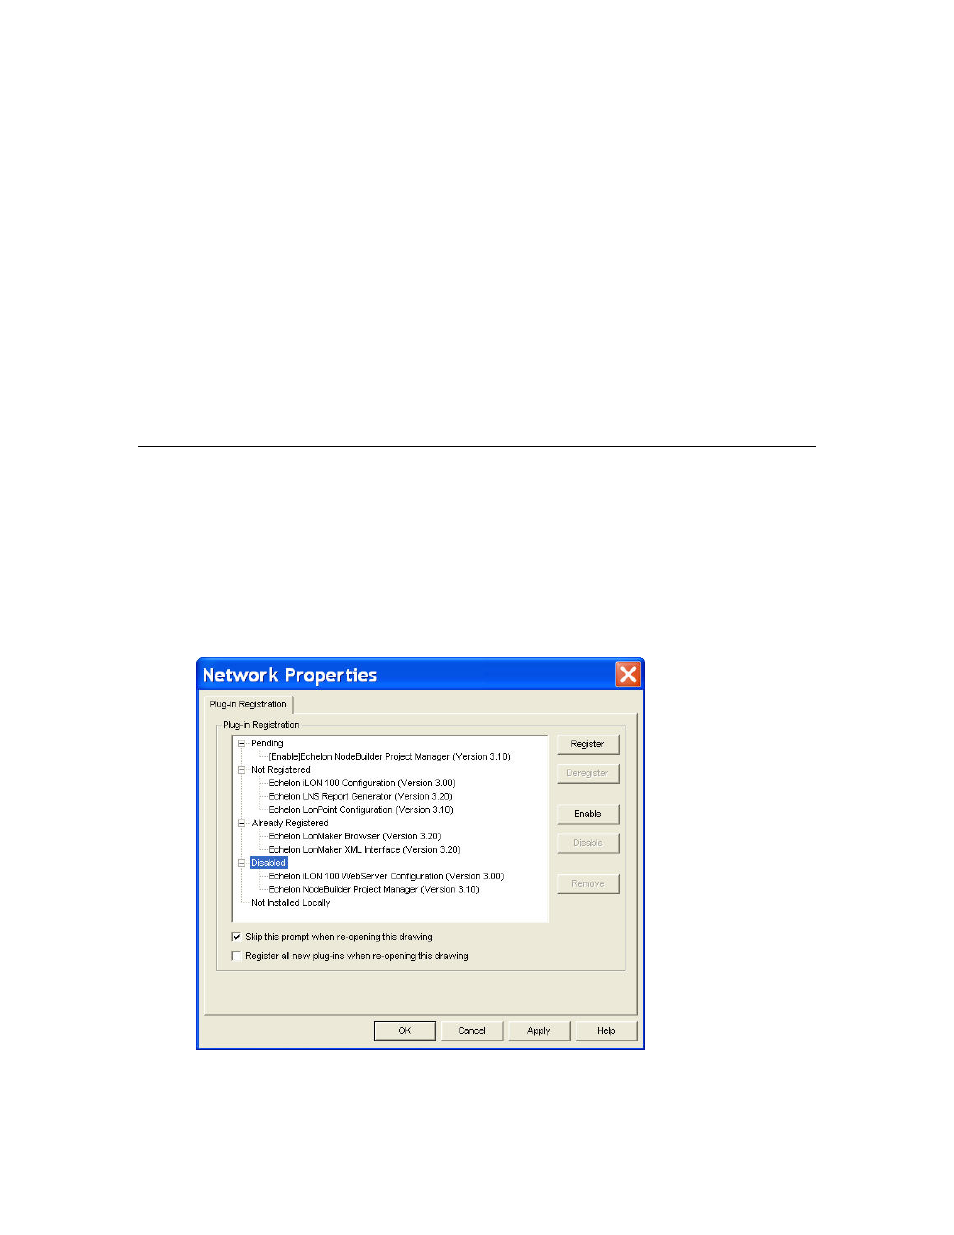
1. Select the plug-in under the Disabled list. You can enable all of the disabled plug-ins by clicking
the category label.
2. Click
Enable. The selected plug-in or plug-ins are added to the Pending list (they also remain
under their existing categories), and their pending status, “[Enable]”, is indicated.
3. Click
Apply to enable the selected plug-in or plug-ins.
4. After the plug-ins are enabled, click OK to return to the LonMaker drawing.