Establishing teka key vault credentials on the, Switch – Brocade Network Advisor SAN User Manual v12.3.0 User Manual
Page 789
Brocade Network Advisor SAN User Manual
737
53-1003154-01
Steps for connecting to a TEKA appliance
20
6. Click Add Client.
7. Enter the user name from
in the Name field.
8. Enter a password in the Password and Verify Password fields.
9. Select the group brocade from the group pull-down menu, then click Add Client.
A TEKA client user is created and is listed in the table.
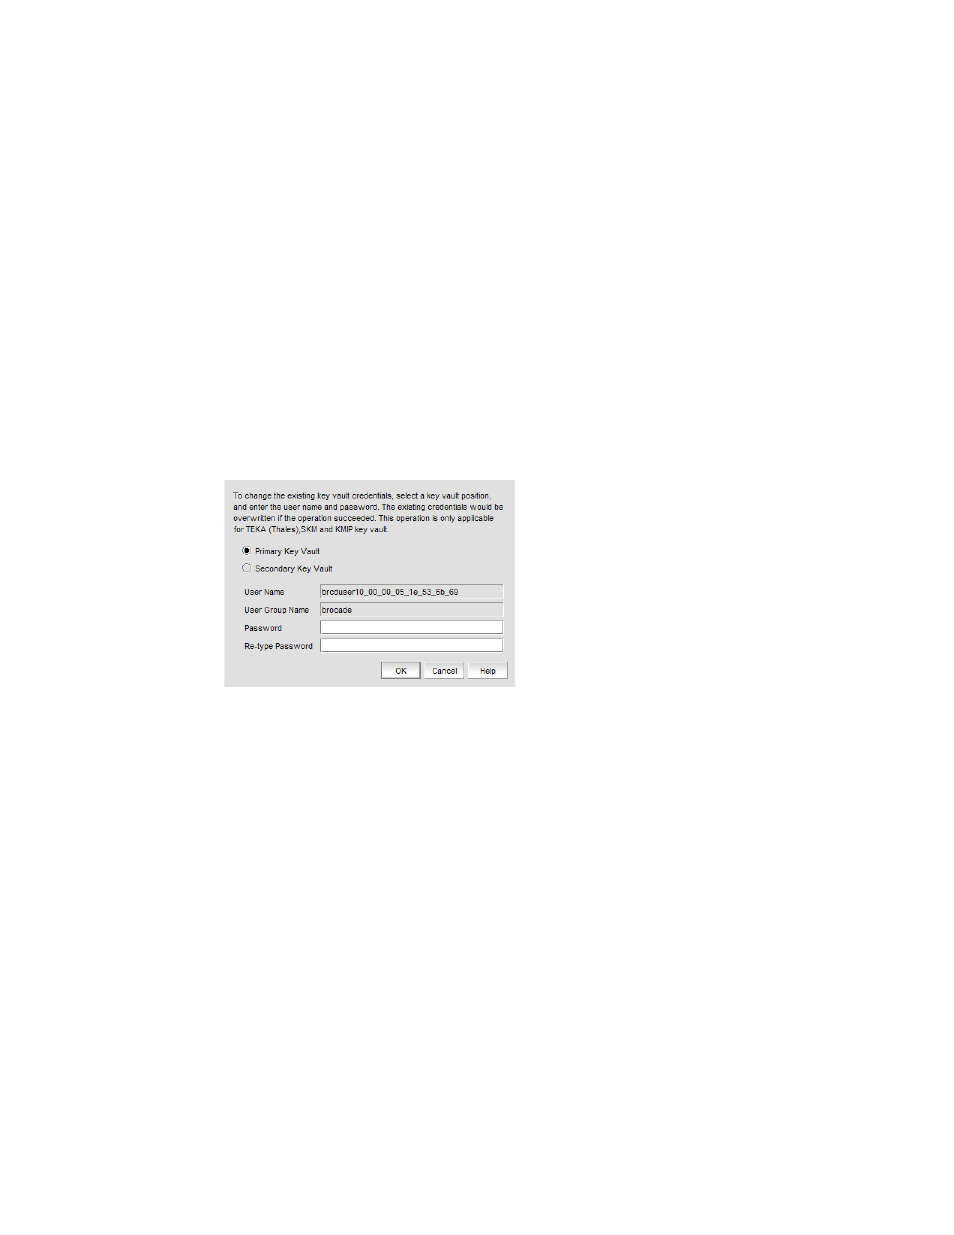
Establishing TEKA key vault credentials on the switch
The credentials established for the TEKA client must be presented to TEKA by the switch. The
primary and secondary TEKA key vaults must be installed and registered with the switch before you
can configure CryptoTarget containers or LUNs.
1. From the Encryption Center Devices table, select a switch, then select Switch > Key Vault
Credentials from the menu task bar.
The Key Vault Credentials dialog box displays. (Refer to
FIGURE 284
Key Vault Credentials dialog box
The dialog box contains the following information:
•
Primary Key Vault selector: Preselected.
•
Secondary Key Vault selector: Active only if you are using a TEKA key vault.
•
User Name: Used for creating the client account on the key vault.
•
User Group Name: Used for creating the client account on the key vault.
•
Password: Enter a password for the Group Leader.
•
Re-type Password: Re-enter the password for verification.
2. Repeat the procedure for each node.
3. Copy the user name and password used when creating the TEKA client.
You may create different credentials, but if you do, you must change the TEKA client
credentials to match the new credentials.
4. Click OK.