Adding a new static route – Brocade Mobility RFS7000-GR Controller System Reference Guide (Supporting software release 4.1.0.0-040GR and later) User Manual
Page 95
Brocade Mobility RFS7000-GR Controller System Reference Guide
81
53-1001944-01
Viewing network IP information
4
4. Select an entry and click the Delete button to remove the selected entry from the IP forwarding
table.
5. Click the Add button to create a new static route. For more information, see
6. Click Enable (to allow) or Disable (to deny) routing between VLANs.
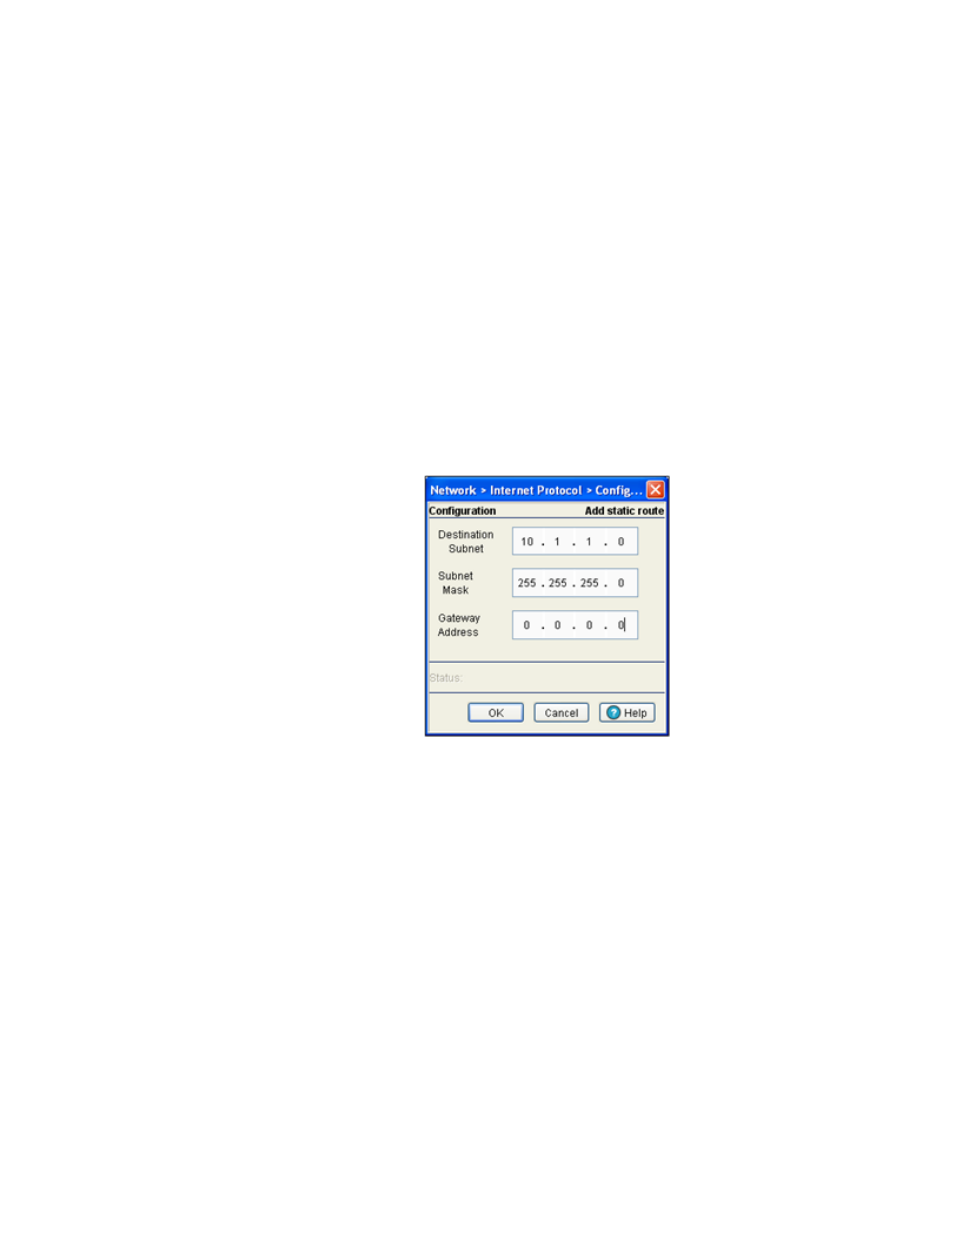
Adding a new static route
Use the Add screen to add a new destination subnet, subnet mask and gateway for routing packets
to a defined destination. Use the screen when an existing destination subnet does not meet the
needs of the network.
To add a new static route:
1. Click the Add button.
A new Configuration screen displays enabling you to add a new destination subnet, subnet
mask and gateway for routing packets to a defined destination.
2. In the Destination Subnet field, enter an IP address to route packets to a specific destination
address.
3. Enter a subnet mask for the destination subnet in the Subnet Mask field.
The Subnet Mask is the IP mask used to divide internet addresses into blocks known as
subnets. A value of 255.255.255.0 support 256 IP addresses.
4. In the Gateway Address field, enter the IP address of the gateway used to route the packets to
the specified destination subnet. Do not set the gateway address to any VLAN interface used
by the switch.
5. Refer to the Status field for the current state of the requests made from applet. This field
displays error messages if something goes wrong in the transaction between the applet and
the switch.
6. Click OK to use the changes to the running configuration and close the dialog.
7. Click Cancel to close the dialog without committing updates to the running configuration.