Adding a virtual interface – Brocade Mobility RFS7000-GR Controller System Reference Guide (Supporting software release 4.1.0.0-040GR and later) User Manual
Page 103
Brocade Mobility RFS7000-GR Controller System Reference Guide
89
53-1001944-01
Configuring switch virtual interfaces
4
4. Select a record from the table and click the Delete button to remove the configuration from the
list of switch virtual interfaces.
5. Click the Add button to add a new configuration to the switch virtual interface. For more
information, see
6. Select an interface as click the Startup button to invoke the selected interface the next time
the switch is booted.
7. Select an interface as click the Shutdown button to disable the selected interface.
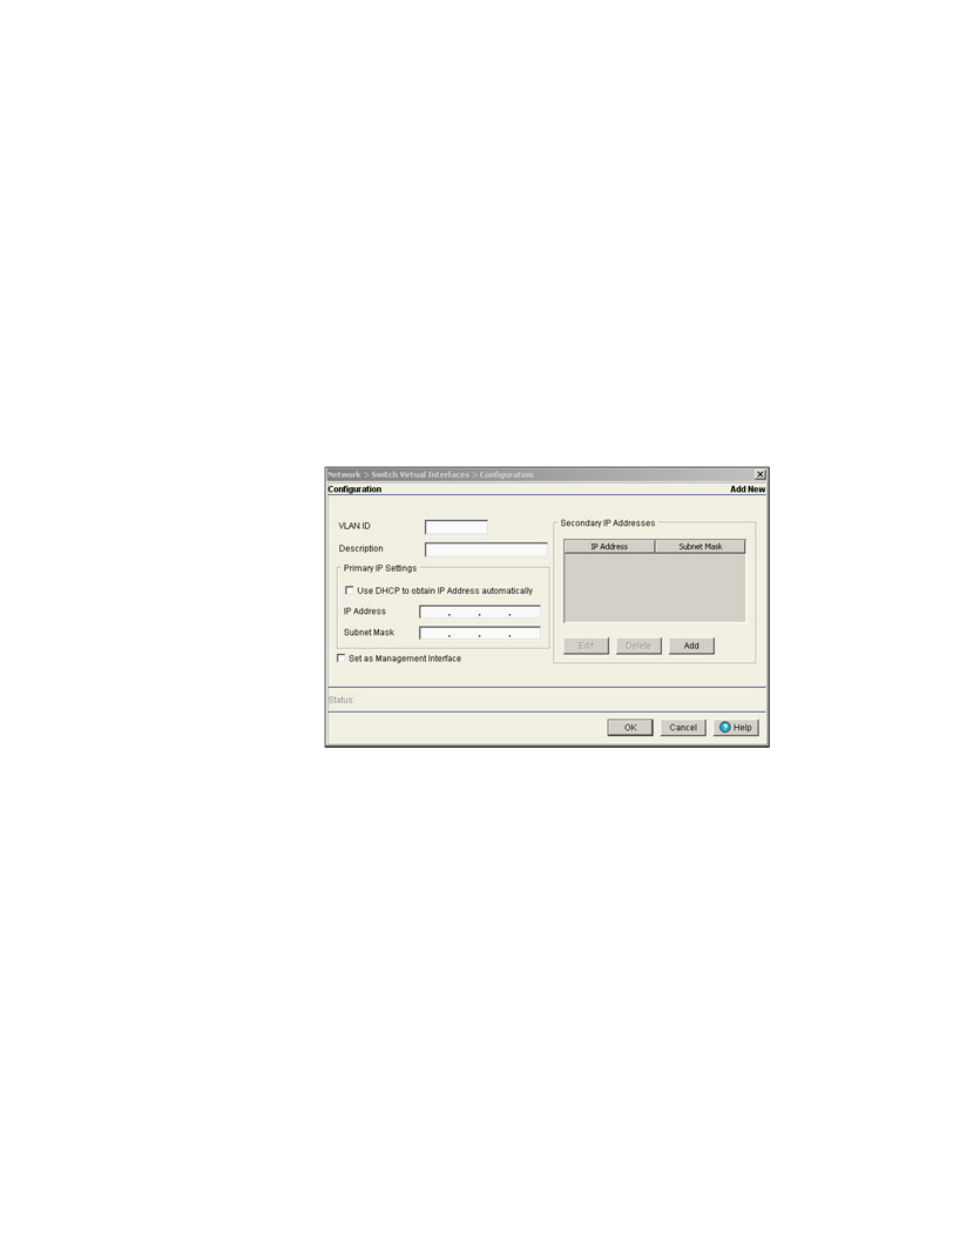
Adding a virtual interface
To add a new switch virtual interface:
1. Select Network > Switch Virtual Interface from the main tree menu.
2. Select the Configuration tab.
3. Click on the Add button.
4. Enter the VLAN ID for the switch virtual interface.
5. Provide a Description for the VLAN, representative of the VLAN’s intended operation within the
switch managed network.
6. The Primary IP Settings field consists of the following:
a. Select Use DHCP to obtain IP Address automatically to allow DHCP to provide the IP
address for the virtual interface. Selecting this option disables the IP address field.
b. Enter the IP Address for the VLAN associated virtual interface.
c. Enter the Subnet Mask for the IP address.
7. Select the Set as Management Interface checkbox to enable any host displayed in this VLAN to
configure the switch.
8. Use the Secondary IP Addresses field to define additional IP addresses to associate with VLAN
IDs. The address provided in this field is used if the primary IP address is unreachable.