Creating a server / ca root certificate – Brocade Mobility RFS7000-GR Controller System Reference Guide (Supporting software release 4.1.0.0-040GR and later) User Manual
Page 434
420
Brocade Mobility RFS7000-GR Controller System Reference Guide
53-1001944-01
Creating server certificates
6
3. Click the Certificate Wizard button to create a self signed certificate, upload an external server
certificate (and/or a root certificate) or delete a server certificate (and/or a root certificate) of a
trustpoint. For more information, see
“Using the wizard to create a new certificate”
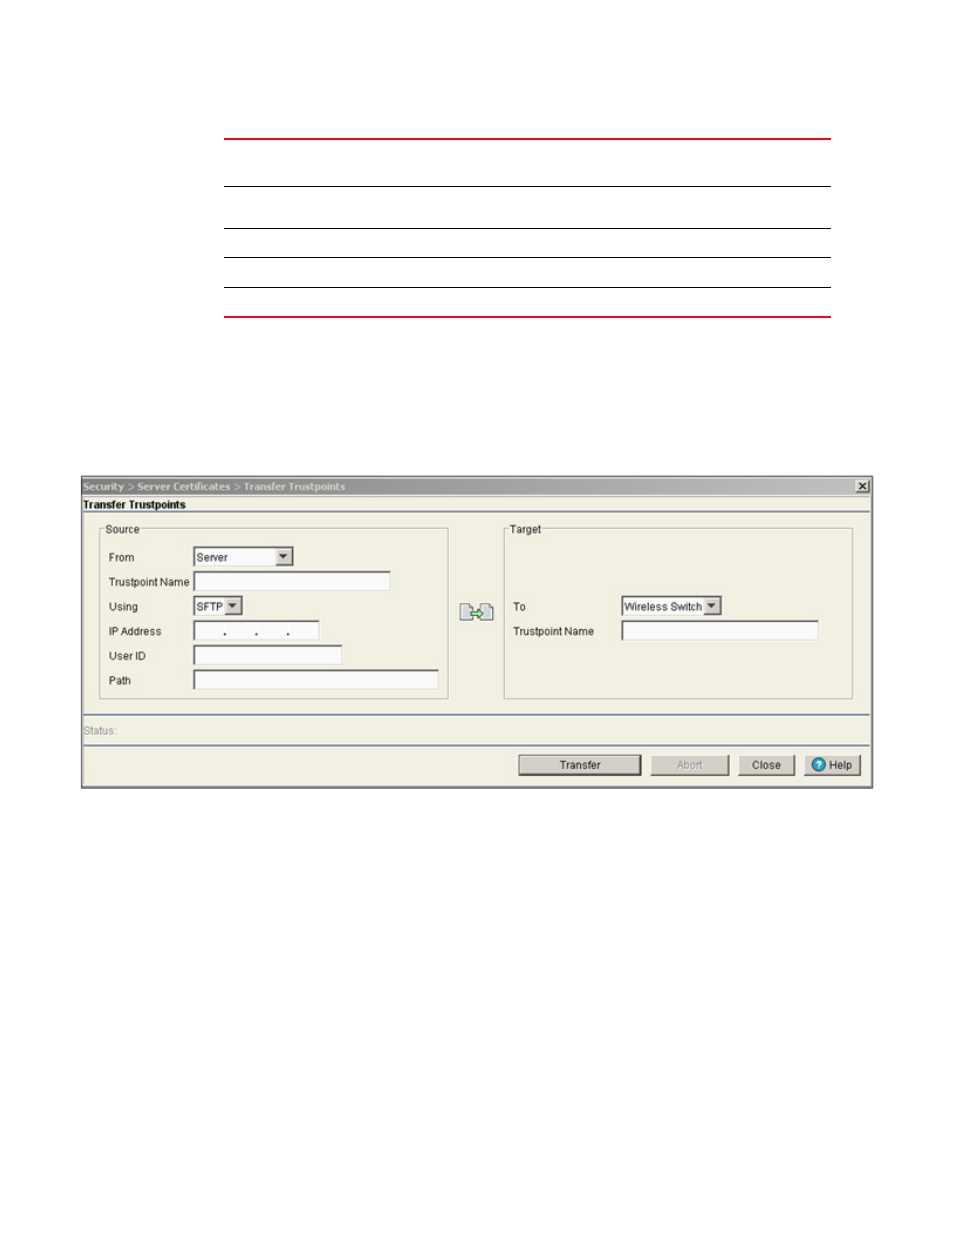
4. Click the Transfer Trustpoints button to display a dialogue wherein the trustpoint files can be
sent to an external location through a user defined file transfer medium.
5. Click the Transfer button when ready to move the target file to the specified location. Repeat
the process as necessary to move each desired log file to the specified location.
6. Click the Abort button to cancel an active transfer before it is complete.
7. Click the Close button to exit the Transfer screen and return to the Trustpoint screen. Once the
file is transferred, there is nothing else to be saved within the Transfer screen.
Creating a Server / CA Root Certificate
To create a Server Certificate or import a CA Root Certificate:
Organizational Unit
(OU)
If a unit exists within the organization that is representative of the certificate
issuer, that name should be displayed here.
Common Name (CN)
If there is a common name (IP address) for the organizational unit issuing the
certificate, it displays here.
Validity
Issued On
Displays the date the certificate was originally issued.
Expires On
Displays the expiration date for the certificate.