Viewing the attributes of existing host pools – Brocade Mobility RFS7000-GR Controller System Reference Guide (Supporting software release 4.1.0.0-040GR and later) User Manual
Page 258
244
Brocade Mobility RFS7000-GR Controller System Reference Guide
53-1001944-01
DHCP server settings
5
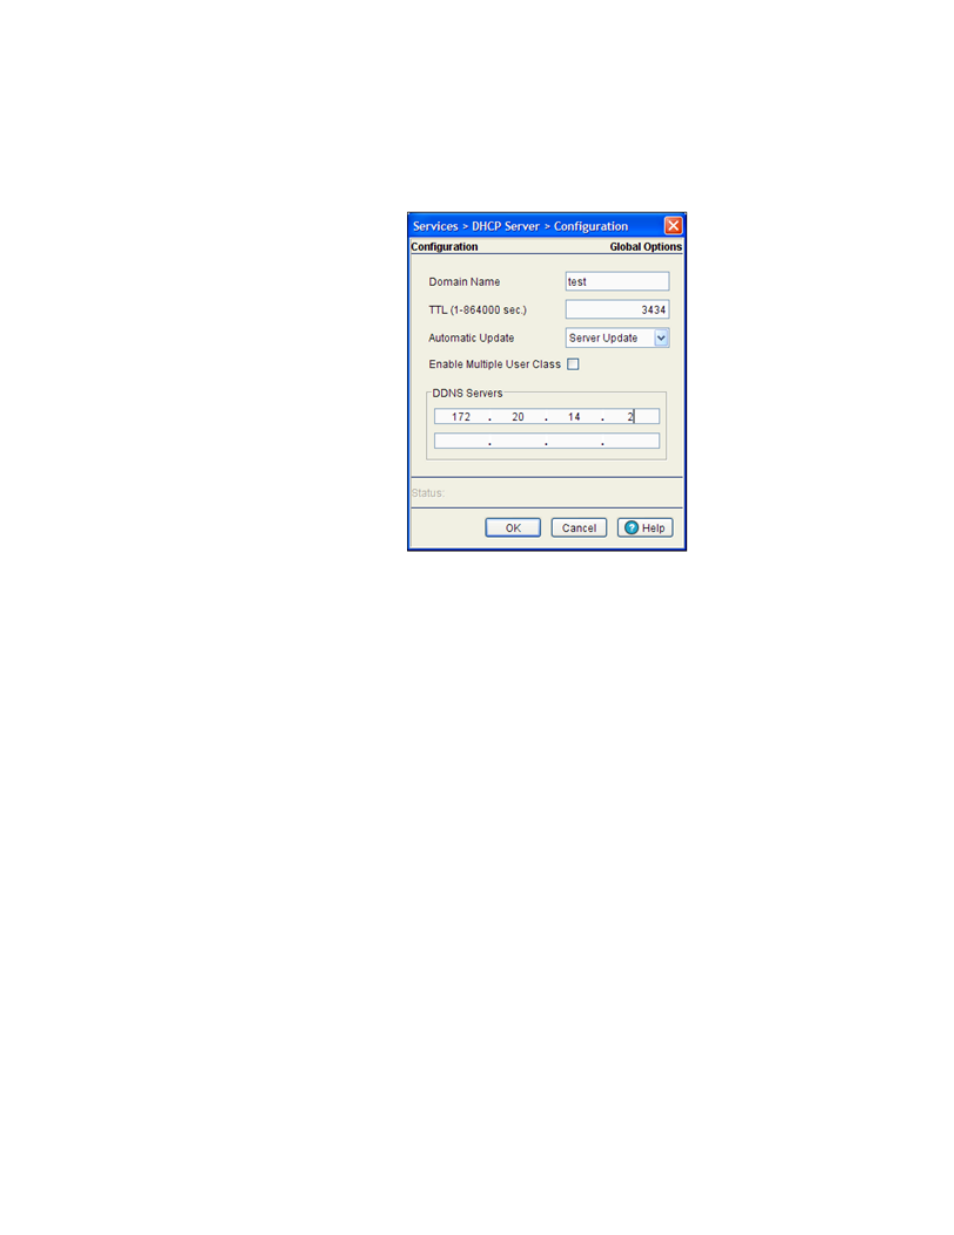
1. Select Services > DHCP Server from the main menu tree.
2. Highlight an existing pool name from within either the Configuration or Host Pool tabs and click
the DDNS button at the bottom of the screen.
3. Enter a Domain Name which represents the forward zone in the DNS server. For example
test.net.
4. Define the TTL (Time to Live) to specify the validity of DDNS records. The maximum value is
864000 seconds.
5. Use the Automatic Update drop-down menu to specify whether the automatic update feature is
on or off. Select Server update to enable a DDNS update from the DHCP server. Select Client
update
to get the DDNS updates from DHCP clients
.
6. Select the Enable Multiple User Class checkbox if multiple user class support is needed.
7. Use the DDNS Servers field to define the IP addresses of the DNS servers.
8. Click OK to save and add the changes to the running configuration and close the dialog.
9. Refer to the Status field.
The Status is the current state of the requests made from the applet. Requests are any
“SET/GET” operation from the applet. The Status field displays error messages if something
goes wrong in the transaction between the applet and the switch.
10. Click Cancel to close the dialog without committing updates to the running configuration
Viewing the attributes of existing host pools
Refer to the Host Pool tab within the DHCP Server screen to view how the host pools reserve IP
addresses for specific MAC addresses. This information can be an asset in determining if a new
pool needs to be created or an existing pool requires modification.
To view the attributes of existing host pools: